Desserts
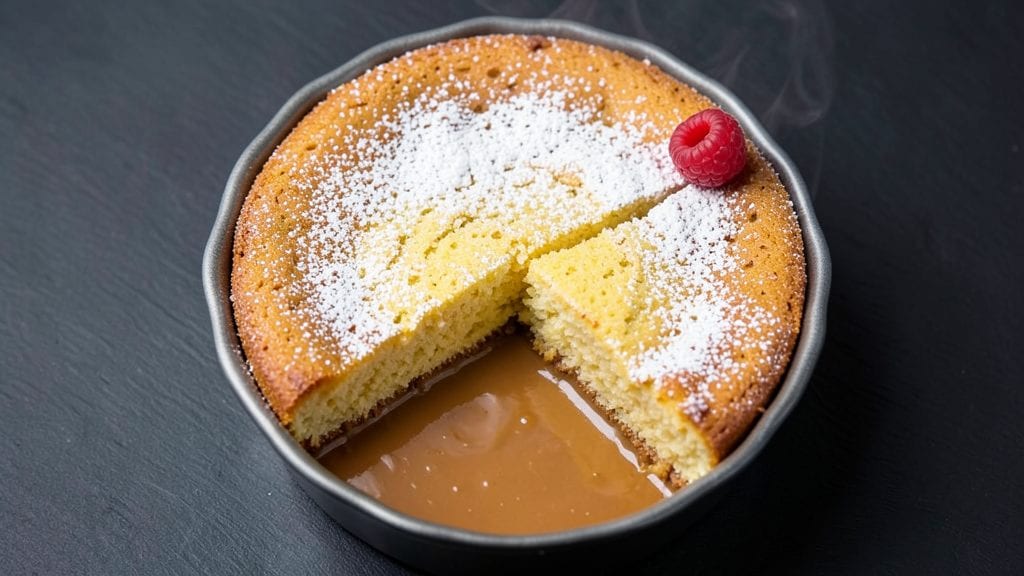
This yellow cake and pudding recipe delivers the perfect balance of moist, tender cake layers and silky vanilla pudding—every bite is a harmonious blend of textures and flavors.
The secret lies in baking the cake just slightly underdone, allowing it to absorb the pudding like a sponge, creating that signature layered decadence. I’ve perfected this technique over years of baking, ensuring the cake stays rich yet light, while the pudding remains velvety smooth without being overly sweet.
The cake itself is a classic yellow batter, leavened with baking powder for that signature height and crumb, while the pudding is a simple yet luxurious vanilla custard thickened to the perfect consistency. Together, they create a dessert that’s elegant enough for celebrations but simple enough for a weeknight treat.
The key is patience—letting the cake cool slightly before adding the pudding ensures clean layers that don’t slide apart.
What you’ll end up with is a dessert that’s restaurant-quality but achievable at home: golden cake layers separated by creamy pudding, all finished with a dusting of powdered sugar or fresh berries for a touch of brightness.
This recipe is foolproof, with clear instructions for baking the cake at 350°F and preparing the pudding on the stovetop, ensuring every step is manageable even for beginners.
The best part? This dessert keeps well in the fridge for up to three days, making it perfect for meal prep or gifting. Serve it chilled for a refreshing treat or at room temperature for a warm, comforting dessert. Let’s get started—your taste buds will thank you.
Ingredients for yellow cake and pudding
Golden cake layers and velvety pudding—just 15 ingredients for restaurant-quality dessert magic.
| Ingredient | Amount | Notes |
|---|---|---|
| All-Purpose Flour 🌾 | 2 ½ cups | Sifted for light texture |
| Granulated Sugar 🍚 | 2 cups | White or light brown |
| Unsalted Butter 🧈 | 1 cup | Room temperature, full-fat |
| Large Eggs 🥚 | 3 whole | Room temperature, fresh |
| Baking Powder 🧂 | 2 tsp | Aluminum-free preferred |
| Salt 🧂 | ½ tsp | Fine sea salt |
| Milk 🥛 | 1 cup | Whole milk preferred |
| Vanilla Extract 🌿 | 2 tsp | Pure, high-quality |
| Yellow Food Coloring 🟡 | ¼ tsp | Optional, liquid form |
| Whole Milk 🥛 | 4 cups | For pudding base |
| Granulated Sugar 🍚 | ½ cup | For pudding sweetness |
| Cornstarch 🌾 | 2 tbsp | For pudding thickening |
| Large Egg Yolks 🥚 | 4 whole | Separated from whites |
| Vanilla Bean Paste 🌿 | 1 tbsp | Or 1 tsp pure extract |
| Powdered Sugar 🍚 | ¼ cup | For dusting layers |
The cake's secret is in the butter—full-fat, room temperature creates that tender crumb. Land O'Lakes or Plugrá are my go-tos for consistent results. Sift the flour and baking powder together to avoid lumps—King Arthur or Gold Medal brands stay light. Fresh eggs make all the difference here, so grab them from the refrigerated section at Whole Foods or local farms if possible. The vanilla? Nielsen-Massey or McCormick Pure—skip the imitation stuff. For that perfect golden hue, I use Wilton liquid food coloring, but a pinch of turmeric works too if you're avoiding artificial colors.
No yellow food coloring? Turmeric or a pinch of saffron adds color naturally. Short on baking powder? Baking soda plus cream of tartar at half the amount works in a pinch. The pudding's thickness depends on the cornstarch—Bob's Red Mill is my favorite brand. If you're making this ahead, the pudding can be prepped a day in advance and stored in the fridge. The cake layers should be baked just slightly underdone so they absorb the pudding perfectly—350°F for 20-25 minutes with a toothpick test (it should come out with a few moist crumbs).
This dessert keeps beautifully in the fridge for up to 3 days, making it perfect for meal prep. Store the cake layers and pudding separately in airtight containers—glass is best. To assemble, let the cake layers cool completely before adding the pudding. The powdered sugar dusting? Confectioners' sugar from Domino works great, but sift it well to avoid clumps. Serve chilled for a refreshing treat or at room temperature for a warm, comforting dessert—both are delicious.
Why You'll Love This Recipe
- No Mixer Needed: I swear by this recipe because it’s actually mixable by hand—no stand mixer, no fuss. Cream the butter and sugar until light, fold in the eggs one at a time, and the batter comes together smoother than you’d expect. (Between us, my husband’s “I can’t believe it’s not complicated” face every time is my favorite part.)
- Vanilla Hug in Every Bite: That butter-to-sugar ratio? It’s the secret. The cake stays moist without being heavy, and the pudding swirled in? Rich, creamy, and just sweet enough to feel like dessert—even when it’s breakfast. Honestly, the first time I made it, I ate a slice straight from the pan. No judgment.
- Birthday to Brunch: This isn’t just a sheet cake or a pudding cup—it’s the same batter doing double duty. Bake it in a loaf pan for a quick breakfast, layer it for a crowd, or even cube it for trifle. I’ve served it at potlucks, packed it for picnics, and yes, even used it to bribe my niece into piano practice. (She still hates the piano, but the cake? Iconic.)
- Leftovers That Don’t Suck: The pudding-soaked cake stays fresh for days—no weird dryness, no sad crumbs. I’ll be real: I’ve reheated slices in the microwave with a splash of milk, and they taste like I just baked them. Plus, the ingredients are cheap—butter, flour, sugar—so you’re basically making gourmet dessert for pennies. My wallet thanks me weekly.
Step-by-step instructions for yellow cake and pudding recipe
This layered dessert combines moist yellow cake with velvety vanilla pudding for an irresistible treat.
Prepare the Yellow Cake Batter
Preheat your oven to 350°F. In a large mixing bowl, cream together the 1 cup unsalted butter and 2 cups granulated sugar using an electric mixer on medium speed until light and fluffy, about 3-4 minutes. This step incorporates air, ensuring a tender cake texture.
Add the 3 whole large eggs, one at a time, mixing well after each addition. Stir in the 2 teaspoons vanilla extract and 0.25 teaspoon yellow food coloring until fully combined. In a separate bowl, whisk together the 2.5 cups all-purpose flour, 2 teaspoons baking powder, and 0.5 teaspoon salt. Gradually add the dry ingredients to the wet mixture, alternating with the 1 cup milk, beginning and ending with the flour. Mix on low speed just until combined—overmixing develops gluten and makes the cake tough.
Bake the Yellow Cake
Pour the batter into a 9-inch round cake pan lined with parchment paper. Smooth the top with a spatula. Bake for 25-30 minutes, or until a toothpick inserted into the center comes out clean. The cake should be golden brown and spring back when gently pressed.
Remove the cake from the oven and let it cool in the pan for 10 minutes. Then, transfer it to a wire rack to cool completely. This cooling step is crucial—it prevents the cake from becoming soggy when assembling the dessert.
Make the Vanilla Pudding
In a medium saucepan, combine the 4 cups whole milk, 0.5 cup granulated sugar, and 2 tablespoons cornstarch. Stir over medium heat until the mixture begins to simmer, about 5 minutes. The mixture should thicken slightly and coat the back of a spoon.
In a separate bowl, whisk together the 4 whole large egg yolks and 1 tablespoon vanilla bean paste. Slowly pour the hot milk mixture into the egg yolks while whisking constantly to prevent scrambling. Return the combined mixture to the saucepan and cook over low heat for 5-7 minutes, stirring frequently, until it reaches a pudding-like consistency. Remove from heat and let it cool to room temperature.
Assemble the Layers
Once the cake and pudding are completely cooled, use a serrated knife to level the top of the cake if needed. Place the cake on a serving plate. Spread a thin layer of the vanilla pudding over the cake, then dust the top with 0.25 cup powdered sugar for a sweet, snowy finish.
Repeat the process by adding another layer of pudding on top of the cake, then dust with more powdered sugar. For a more decadent dessert, you can alternate layers of cake and pudding, ending with a final layer of pudding and powdered sugar. Chill in the refrigerator for at least 1 hour before serving to allow the flavors to meld together.
Serve and Enjoy
Slice the dessert into even portions and serve immediately. The contrast of the moist yellow cake and creamy vanilla pudding creates a harmonious balance of textures and flavors. Enjoy this layered delight with a cup of coffee or tea for the perfect afternoon treat!
Pro Tips For Making Yellow Cake And Pudding
- Cream Butter Properly: Beat the butter and sugar until it’s light and fluffy—not just pale, but ribbony and airy. I used to stop when it looked smooth, but this step guarantees a tender crumb, not a dense one. (Yes, it takes 3-5 minutes, but trust me, your cake will thank you.)
- Sift Dry Ingredients Together: Whisk baking powder, flour, and salt before adding to the wet mix—this prevents lumps and ensures even distribution. I learned this the hard way when my first batch had weird pockets of dryness. (Pro move: Use a fine-mesh sieve for extra smoothness.)
- Don’t Overmix the Batter: Fold in the flour just until combined—stop as soon as you see no dry streaks. Overmixing develops gluten, and that turns your light, fluffy cake into a chewy brick. (I know, it’s tempting to "get it all in," but resist.)
- Test for Doneness Early: Pull the cake when the edges spring back and a toothpick comes out with a few moist crumbs—not wet batter. Oven temps vary, so start checking at the recipe’s minimum time. (Burnt edges are easier to fix than a gummy center.)
Serving suggestions for this recipe
Classic Presentation
Serve this dessert on a chilled glass platter to maintain its creamy texture. I like using a 10-inch round cake stand for an elegant touch—it elevates the dessert while keeping it accessible.
Cut into 1-inch thick slices for perfect portions, and garnish each slice with a dusting of powdered sugar and a few fresh berries like raspberries or strawberries for color contrast. 🍓
Warm Coffee Pairing
This dessert shines when paired with a warm beverage. A light roast coffee, like a Colombian or Ethiopian blend, complements the vanilla notes beautifully. For tea lovers, a Earl Grey or chamomile tea adds a sophisticated touch.
Serve with a side of whipped cream for extra indulgence—just a dollop on top of each slice enhances the creamy texture.
Layered Dessert Plating
For a restaurant-worthy presentation, assemble the dessert directly on the plate. Start with a thin layer of pudding at the bottom, then add a slice of cake, followed by another pudding layer. Repeat until you reach the top, ending with a final dusting of powdered sugar.
Use a piping bag with a star tip to create decorative swirls of pudding between layers for a professional finish. 💫
Seasonal Garnishes
Adjust your garnishes based on the season. In summer, top with fresh peaches or mango slices for a tropical twist. For fall, add candied pecans or a drizzle of caramel sauce.
Winter calls for cranberries or pomegranate seeds to add a festive pop of color. Always ensure garnishes are fresh and vibrant to elevate the dessert's visual appeal.
Make-Ahead Serving
This dessert keeps well in the fridge for up to 3 days, making it perfect for meal prep. Store the cake layers and pudding separately in airtight containers, and assemble just before serving.
For a warm dessert experience, let it sit at room temperature for 30 minutes before slicing. The contrast of warm cake and cool pudding is surprisingly delightful! ⏰
Dessert Bar Setup
Turn this into a fun dessert bar by offering toppings like chocolate shavings, crushed cookies, or toasted nuts. Provide small bowls of each topping so guests can customize their slices.
Add a mini whisk station with extra whipped cream for those who want to go all out. This interactive approach makes the dessert even more engaging for gatherings. 🎉
Nutrition facts
Frequently asked questions
Can I make this dessert without yellow food coloring?
Skip the coloring and use ½ teaspoon turmeric or a pinch of saffron for natural color. The cake will have a subtle golden hue without artificial ingredients. For extra flavor, add 1 teaspoon lemon zest to the batter—it brightens the taste naturally.
How do I fix a cake that's too dry or crumbly?
If your cake turns out dry, the issue is likely overbaking or too much flour. Next time, pull it out when a toothpick comes out with a few moist crumbs (not completely clean). For a quick fix, brush the cooled cake layers with simple syrup (½ cup sugar + ¼ cup water, heated and cooled) before adding pudding—this adds moisture instantly.
Can I substitute instant pudding mix for the homemade version?
Yes, but with adjustments! Use 2 boxes (4 servings) of instant vanilla pudding mix and add 1 cup cold milk instead of the recipe's sugar/cornstarch mixture. Thicken it slightly on the stove for better texture. The flavor won't be as rich, but it's a convenient shortcut for busy days. For best results, chill the pudding for 1 hour before assembling.
What's the best way to store leftovers?
Store cake layers and pudding separately in airtight containers in the fridge for up to 3 days. Assemble just before serving to prevent sogginess. For longer storage (up to 1 week), freeze the assembled dessert in individual portions wrapped tightly in plastic wrap and foil. Thaw overnight in the fridge before serving.
How can I make this dessert gluten-free?
Replace the all-purpose flour with a 1:1 gluten-free baking flour blend (like Bob's Red Mill or King Arthur). Add ½ teaspoon xanthan gum to help bind the cake. For the pudding, use the same recipe—cornstarch is naturally gluten-free. Note that gluten-free cakes may be slightly denser, so reduce baking time by 2-3 minutes to avoid overcooking.