
Desserts
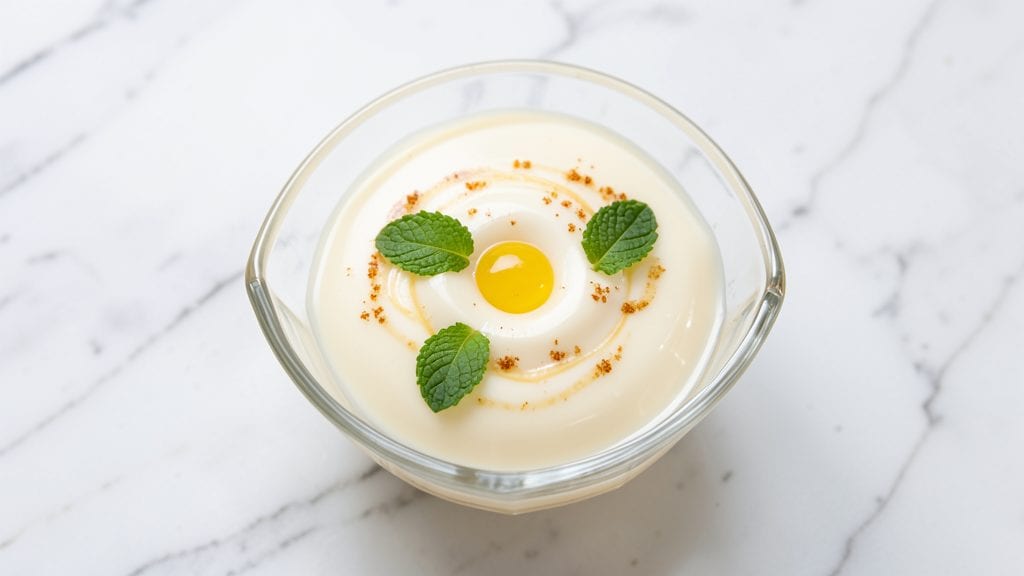
This milk jelly recipe delivers restaurant-worthy wobbly layers that take just 10 minutes of active time—no fancy equipment needed. Standing on a step stool in my grandmother’s kitchen in Sicily, I first learned how to transform simple ingredients into something magical, and this dessert is pure proof of that alchemy.
The secret lies in precise gelatin ratios and patient chilling, which creates those signature silky layers that defy gravity.
The beauty of this recipe is its versatility—vegetarian-friendly with regular gelatin or vegan with agar-agar, and ready in under an hour. You’ll start with warm milk and sugar, then work quickly to dissolve the gelatin before pouring into chilled molds.
Each layer builds on the last, creating a dessert that’s equal parts elegant and effortless.
What you’ll end up with is a dessert that’s cool, creamy, and impossibly light—each slice revealing those signature wobbly layers that make it irresistible. The texture is firm yet tender, with a delicate sweetness that balances perfectly.
This is the kind of dessert that feels special enough for company but simple enough for a weeknight treat.
Perfect for celebrations, potlucks, or when you want to impress without stress. Let’s create this silky masterpiece together—it’s easier than you think.
Ingredients for milk jelly
Simple ingredients transform into restaurant-worthy wobbly layers with just 10 minutes of active time.
| Ingredient | Amount | Notes |
|---|---|---|
| Unsweetened Whole Milk 🥛 | 2 cups | Cold, full-fat preferred |
| Granulated White Sugar 🍚 | ¾ cup | Superfine for faster dissolving |
| Powdered Gelatin 🧪 | 2 tbsp | Vegetarian gelatin preferred |
| Cold Water 💧 | ½ cup | For blooming gelatin |
| Vanilla Extract 🌿 | 1 tbsp | Pure, high-quality preferred |
| Lemon Juice 🍋 | 1 tbsp | Freshly squeezed |
| Food Coloring (Optional) 🎨 | ½ tsp | Gel or liquid, food-grade |
| Raspberry Jam (Optional) 🍓 | ¼ cup | For layered flavor |
| Heavy Whipping Cream (Optional) 🧈 | ¼ cup | Whipped for topping |
| Whole Milk (Optional) 🥛 | ½ cup | For second layer |
| Diamond Crystal Kosher Salt 🧂 | ¼ tsp | Fine grain preferred |
| Vanilla Bean Seeds (Optional) 🌿 | ½ tsp | For garnish |
| Raspberries (Optional) 🍓 | ¼ cup | Fresh or frozen |
The gelatin is the secret ingredient here. Knox brand vegetarian gelatin works perfectly—it dissolves smoothly and creates those signature wobbly layers. If you're using powdered gelatin, bloom it in cold water first—this is non-negotiable for avoiding lumps. For the milk, whole milk adds richness that skim can't match, and it's worth seeking out at stores like Whole Foods or Trader Joe's if your regular supermarket only carries skim. The sugar needs to be fully dissolved, so superfine sugar or pulse regular sugar in a food processor saves time. I always double-check my gelatin measurements—too much makes it rubbery, too little means it won't set properly.
No vegetarian gelatin? Agar-agar works beautifully—just reduce the amount to 1.5 teaspoons and follow package instructions for blooming. Short on vanilla? Vanilla sugar or a pinch of ground cinnamon adds warmth without the extract. The lemon juice brightens the flavor—bottled works fine, but fresh is ideal if you've got it. For the optional jam layer, strawberry or apricot preserves work just as well. The whipped cream topping? Cold bowl and chilled beaters are key for stiff peaks. If you're making this vegan, swap the gelatin for agar-agar and use coconut milk instead of dairy milk—it's surprisingly similar.
This dessert needs patience—4 hours in the fridge is minimum for proper setting. I always prepare mine the night before so it's ready for breakfast or dessert the next day. Store leftovers in an airtight container for up to 5 days, though it's best enjoyed fresh. For serving, run a warm knife through the jelly before slicing—this ensures clean cuts and prevents the wobbly layers from breaking. Garnish with fresh berries or vanilla bean seeds just before serving to keep things vibrant. The jelly keeps its texture for 3 days refrigerated, but the flavor peaks within the first 24 hours.
Why You'll Love This Recipe
- Pantry Magic: I swear, this recipe uses stuff you already have—just milk, sugar, and gelatin. No fancy ingredients, no last-minute grocery runs. The whole thing comes together while you wait for the fridge to chill.
- Velvet Smoothness: That first bite? Pure satisfaction. The gelatin turns the warm milk into silky, wobbly perfection—like biting into a cloud with just enough sweetness. Vanilla extract ties it all together with that cozy, nostalgic flavor.
- Party Ready: Between us, this is my secret weapon for potlucks and gatherings. It’s light enough to serve as a dessert or a palate cleanser, and the individual portions mean no one’s left fighting over the last slice.
- No-Waste Winner: Leftovers? No problem. The jelly keeps for days in the fridge, and I’ve even frozen it in cubes for smoothies later. Plus, it’s cheaper than store-bought—just a few cents per serving, and you control the sweetness.
Step-by-step instructions for milk jelly recipe
Here's how to create silky, wobbly layers that set perfectly every time.
Bloom the Gelatin in Cold Water
In a medium bowl, sprinkle the 2 tablespoons powdered gelatin evenly over the ½ cup cold water. This prevents clumping and ensures even distribution throughout the jelly. Let it sit for 5 minutes—you'll see the gelatin absorb the water and form small, translucent granules. Don't stir yet, as this could activate the gelatin prematurely and create lumps.
I always use cold water for blooming because it gives me precise control over the setting time. If you're using optional ingredients like food coloring or raspberry jam, set them aside for later—they'll be added after the gelatin mixture is fully dissolved.
Heat the Milk and Sugar Mixture
In a saucepan, combine the 2 cups unsweetened whole milk, ¾ cup granulated white sugar, and 1 tablespoon vanilla extract. Heat over medium-low heat, stirring constantly with a whisk until the sugar dissolves completely and the mixture reaches 180°F. You'll know it's ready when small bubbles form around the edges and the mixture is steaming gently.
This gentle heating prevents scorching while ensuring the sugar fully integrates. If you notice any graininess, keep whisking—this is normal until everything melts smoothly. The lemon juice and kosher salt will be added later, so hold off until the mixture is fully heated.
Combine Gelatin with Hot Milk Mixture
Carefully pour the bloomed gelatin mixture into the hot milk while whisking vigorously. The contrast between the cold gelatin and hot milk will cause the gelatin to dissolve instantly. Continue whisking for 2-3 minutes until the mixture becomes completely smooth and glossy—there should be no visible granules.
Here's the thing—this is where precision matters. If you see any undissolved gelatin, strain the mixture through a fine-mesh sieve to ensure your jelly sets perfectly without any grainy texture. Once smooth, stir in the 1 tablespoon lemon juice and ¼ teaspoon kosher salt for brightness and balance.
Add Optional Ingredients and Pour into Molds
If using, gently fold in the ¼ cup raspberry jam or ½ teaspoon food coloring with a rubber spatula, being careful not to create air bubbles. For layered jellies, divide the mixture evenly between two bowls—one for the base layer and one for the optional ½ cup whole milk second layer (whisk the milk with ½ teaspoon vanilla bean seeds if using).
Pour the base layer into your prepared molds (a loaf pan or individual ramekins work well) and refrigerate for 10 minutes until it begins to set but is still slightly wobbly. Then add the second layer if using, and return to the refrigerator. The jelly should set completely in 1-2 hours, but it's best to wait at least 4 hours for firmness.
Garnish and Serve with Confidence
Once fully set, run a knife around the edges of the mold to loosen the jelly. If using heavy whipping cream, whip it to soft peaks and pipe or dollop it on top just before serving. Garnish with ¼ cup fresh raspberries or extra vanilla bean seeds for a pop of color and texture.
The finished jelly should have a silky, almost custard-like texture with a gentle wobble when gently shaken. Slice it into perfect cubes or serve as-is for a dessert that's equal parts elegant and effortless. Store leftovers in the refrigerator for up to 5 days—it only gets better with time!
Pro Tips For Making Milk Jelly
- Bloom the Gelatin Properly: Dump powdered gelatin into cold water first—always—and let it sit for at least 5 minutes until it triples in size. I learned this the hard way after clumps ruined three batches; the milk mixture needs to be fully dissolved for silky texture, not gummy bits.
- Heat Milk to 180°F: Warm the milk to exactly 180°F (not boiling) before mixing with the bloomed gelatin. Too hot, and you scramble the protein; too cool, and the gelatin won’t activate properly. Use a thermometer—your guess is worse than useless.
- Strain the Mixture: Pour the hot milk-gelatin mix through a fine-mesh sieve into your mold. Skim off any foam or stray gelatin bits—this keeps the jelly crystal clear and professional-looking. (Yes, it’s tedious, but the payoff is worth it.)
- Chill in an Ice Bath: Set your mold in a larger bowl of ice water for the first 15 minutes of setting. This locks in the texture faster and prevents the jelly from developing a watery layer on top. After that, move it to the fridge to finish firming up.
Essential equipment for great milk jelly
Mold Selection
You don’t need anything fancy—standard loaf pans or ramekins work perfectly for individual servings. I love using 8x4-inch loaf pans for a classic presentation, but clear plastic cups (like those from a dollar store) create a fun, modern look.
For layered jellies, stack two ramekins to create a clear visual effect. Always grease your molds with neutral oil or line them with parchment paper for easy removal. 💡
Precision Tools
A digital kitchen scale is your best friend for measuring gelatin—2 tablespoons of powdered gelatin can vary by brand. I swear by Knox brand vegetarian gelatin for its consistency. A fine-mesh sieve ensures your jelly is silky smooth, especially if you’re using jam or food coloring.
For layering, a small offset spatula helps create clean, even lines between colors or flavors. 🧪
Temperature Control
An instant-read thermometer is essential for heating the milk mixture to 180°F—this ensures the sugar dissolves completely without scorching. I use a Thermoworks Thermapen because it’s fast and accurate. For chilling, a deep, wide cooling tray (like a lasagna pan) holds multiple molds at once, saving fridge space.
If you’re short on time, a wire cooling rack placed over an ice bath speeds up initial setting. ❄️
Garnish Essentials
Fresh raspberries or vanilla bean seeds elevate the presentation, but a small piping bag with a star tip makes whipped cream topping look restaurant-worthy. I keep mini skewers (like short toothpicks) on hand to secure garnishes if serving at room temperature.
For layered jellies, a sharp chef’s knife with a serrated edge ensures clean slices that showcase the wobbly texture. 🍓
Optional Upgrades
A stand mixer with a whisk attachment saves time when dissolving gelatin—just set it to low speed to avoid splattering. For vegan versions, agar-agar powder requires a fine-mesh strainer to remove any undissolved bits.
If you’re ambitious, a silicone ice cube tray lets you make bite-sized jellies for parties. I also keep food-safe spray oil handy for greasing molds quickly. ✨
Nutrition facts
Frequently asked questions
Can I make this milk jelly recipe without gelatin?
For a vegan version, replace the 2 tablespoons powdered gelatin with 1.5 teaspoons agar-agar powder. Bloom it in ¼ cup cold water for 5 minutes, then heat with the milk mixture until fully dissolved. The texture will be firmer but still silky.
Why did my milk jelly turn out grainy?
Graininess usually means the gelatin didn't dissolve completely. Always whisk vigorously for 2-3 minutes after combining with hot milk, and strain through a fine-mesh sieve if needed. Also, ensure your milk reaches 180°F—any lower and sugar may not dissolve fully.
How long does it take for the jelly to set completely?
While it may appear set in 1-2 hours, patience is key! For perfect texture, refrigerate for at least 4 hours. The longer it chills (up to 8 hours), the firmer and more stable the layers become. This is why I always make mine the night before.
Can I make this recipe with coconut milk instead of dairy milk?
Yes! Coconut milk works beautifully for a dairy-free version. Use 2 cups full-fat coconut milk and reduce the sugar to ½ cup since coconut milk is naturally sweeter. The texture will be slightly richer, and the flavor pairs wonderfully with tropical garnishes like mango or toasted coconut flakes.
What's the best way to unmold the jelly?
Run a warm knife around the edges of the mold before unmolding to release any suction. For stubborn jellies, dip the mold in warm water for 10 seconds to loosen. If using plastic cups, press gently on the sides to pop them out. Never force it—patience prevents breakage!