
Side Dishes
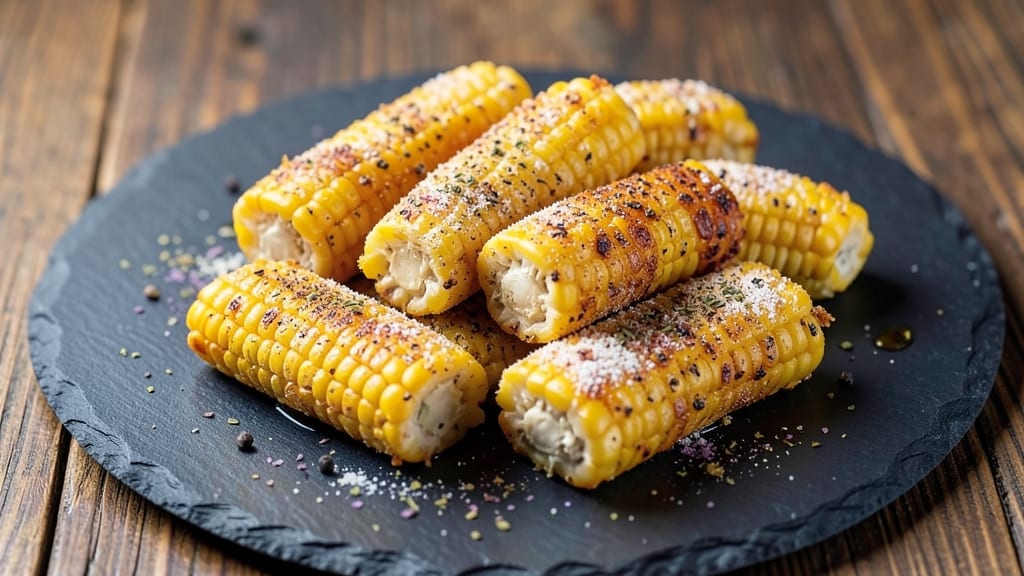
This fried corn recipe with canned corn turns humble pantry staples into crispy-golden, herby bites that taste like a restaurant-worthy dish. The secret lies in properly draining and drying the corn kernels before frying—this creates that satisfying crunch while keeping the centers tender.
I developed this method during a particularly busy week when I needed a side dish that felt special without requiring extra shopping trips.
This recipe delivers perfectly crispy corn every time, with a golden exterior and a flavor profile that's far more complex than plain canned corn.
The herby kick comes from a blend of dried oregano, garlic powder, and a pinch of smoked paprika that transforms the simple corn into something worth making from scratch. Ready in just 20 minutes with minimal prep, it's the ideal solution for weeknight dinners or potlucks.
What you'll end up with is a side dish that's crispy enough to satisfy crunch lovers but still tender enough to eat straight from the pan. The herby seasoning clings to each golden kernel, creating pockets of flavor that make this dish unforgettable.
This is the kind of recipe that proves you don't need fresh ingredients to create something impressive.
Serve alongside grilled meats, fried chicken, or as a standalone snack with a side of ranch dressing. The crispy texture holds up well even when served at room temperature, making it perfect for meal prep or parties. Let's get started on creating these crispy-golden bites!
Ingredients for fried corn recipe with canned corn
Pantry staples meet crispy perfection—just 11 ingredients for golden, herby fried corn.
| Ingredient | Amount | Notes |
|---|---|---|
| Canned Corn Kernels 🌽 | 15 oz | Drained thoroughly, patted dry |
| All-Purpose Flour 🌾 | ½ cup | For light coating |
| Dried Oregano 🍃 | 1 tbsp | Mexican oregano preferred |
| Garlic Powder 🧄 | 1 tbsp | Freshly ground preferred |
| Smoked Paprika 🌶️ | ½ tbsp | For subtle smokiness |
| Ground Black Pepper 🌶️ | ½ tsp | Freshly cracked |
| Kosher Salt 🧂 | ½ tsp | For seasoning |
| Vegetable Oil 🫒 | 2 cups | High smoke point preferred |
| Lemon Juice 🍋 | 1 tbsp | Freshly squeezed |
| Butter 🧈 | 2 tbsp | Unsalted, melted |
| Fresh Parsley 🌿 | ¼ cup | Chopped, for garnish |
The canned corn is the star, but the quality matters. Look for brands like Green Giant or Del Monte—their kernels stay plump when drained properly. Draining is critical: place the corn in a fine-mesh strainer and gently press with a paper towel to remove excess moisture. Wet kernels won’t crisp up. For the oil, vegetable or canola oil works best due to its neutral flavor and high smoke point. Avoid olive oil—it burns too easily. The herby blend of oregano, garlic powder, and smoked paprika is what elevates this from plain corn to something special. Penzeys or Spicewalla carry excellent dried herbs if you want to splurge.
No Mexican oregano? Regular dried oregano works at double the amount. Short on smoked paprika? Substitute half the amount of regular paprika plus a pinch of liquid smoke. The corn can be prepped ahead—pat dry and toss with seasonings up to 2 hours before frying. For extra crunch, add 2 tbsp cornstarch to the flour mixture. The lemon juice brightens the flavor, but if you're serving with something tangy like ranch, you can skip it. The butter at the end adds richness—don’t skip this step. It’s what makes this taste restaurant-quality.
The fried corn stays crispy for about 10 minutes after frying, so serve it immediately. For meal prep, fry in batches and keep warm in a 200°F oven until ready to serve. Store leftovers in an airtight container for 3 days, but the texture won’t be as crispy. To revive, reheat in a dry skillet over medium heat for 2-3 minutes. Garnish with fresh parsley right before serving—it adds a pop of color and freshness that makes the dish look even more impressive.
Why You'll Love This Recipe
- Pantry Magic: I swear by this recipe because it’s built on what I always have: a can of corn, some flour, and spices from the back of the cabinet. No fresh ingredients needed—just drain, toss, and fry.
- Crispy-Creamy Magic: The flour coating gives it that addictive crunch while the corn stays tender inside. Add the smoked paprika and oregano? It’s like a little flavor bomb that hits just right.
- Game for Any Meal: Serve it as a side for tacos, a snack with beer, or even a topping for baked potatoes. Honestly, I’ve eaten it cold straight from the fridge—no judgment here.
- Zero-Waste Victory: One can feeds four, and leftovers reheat perfectly in the air fryer or oven. Plus, it costs pennies to make, so my wallet and my taste buds both win.
Step-by-step instructions for crispy-golden fried canned corn
Here's how to transform simple canned corn into perfectly crispy, herby bites with a golden crust.
Prepare the Corn for Frying
Drain the 15 oz canned corn kernels thoroughly, then pat them completely dry using paper towels. This step is crucial—any moisture will prevent the corn from becoming crispy. I like to spread the corn on a clean kitchen towel and gently press with another towel to remove all excess liquid. The drier the corn, the better the final texture.
Once dry, transfer the corn to a medium bowl. Here's where the flavor magic begins: add the 0.5 cup all-purpose flour, 1 tbsp dried oregano, 1 tbsp garlic powder, 0.5 tbsp smoked paprika, 0.5 tsp ground black pepper, and 0.5 tsp kosher salt. Toss everything together until every kernel is evenly coated in the seasoned flour mixture. This coating will create that perfect crispy exterior while infusing flavor throughout.
Create the Frying Station
Heat 2 cups vegetable oil in a deep skillet or Dutch oven over medium-high heat until it reaches 350°F. Use a thermometer for accuracy—this temperature is key for achieving crispy corn without burning. If you don't have a thermometer, test the oil by dropping in a small piece of corn. It should sizzle immediately and float to the surface.
While the oil heats, melt the 2 tbsp butter in a small saucepan over low heat. Once melted, remove from heat and stir in the 1 tbsp lemon juice. This buttery lemon mixture will be our finishing touch after frying, adding richness and brightness to balance the crispy corn. Keep it warm until ready to use.
Fry the Corn in Batches
Working in batches of about 1 cup corn at a time, carefully add the seasoned corn to the hot oil. Avoid overcrowding the pan—this will lower the oil temperature and result in greasy rather than crispy corn. Fry for 2-3 minutes, stirring occasionally, until the corn turns a beautiful golden brown color and floats to the surface.
Use a slotted spoon to remove the fried corn and transfer it to a paper towel-lined plate. The corn will be hot, so work quickly but carefully. Let it drain for 1-2 minutes before adding more batches to the oil. This resting period helps set the crispy texture. Repeat with all the corn, maintaining the 350°F oil temperature between batches.
Finish and Serve
Once all the corn is fried, return it to the skillet with the melted butter-lemon mixture. Toss gently to coat each piece with the warm, fragrant butter. The residual heat will help the butter melt and cling to the crispy corn, creating a perfect balance of textures and flavors.
Transfer the finished corn to a serving platter and sprinkle with 0.25 cup chopped fresh parsley. The parsley adds a fresh, vibrant contrast to the crispy, herby corn. Serve immediately while still hot and crispy—these bites won't stay that way for long. For extra presentation, arrange the corn on a platter surrounded by lemon wedges for squeezing over the top.
Pro Tips For Making Fried Corn Recipe With Canned Corn
- DRAIN AND PAT DRY: Canned corn comes swimming in its own juice—don’t skip draining it. After draining, spread the kernels on a clean towel and gently pat them dry with another towel. Wet corn will turn to mush in the pan instead of crisping up like you want.
- USE A SPLASH OF WATER: Mix your corn with the flour and spices, then add just 1 tablespoon of water per cup of corn. This helps the coating stick better and prevents the kernels from burning before they crisp. Sounds counterintuitive, but it works—trust me.
- FRIED IN BATCHES: Don’t dump all the corn in at once. Split it into two or three smaller batches and fry them separately. Overcrowding the pan will lower the temperature, and you’ll end up with soggy, unevenly cooked corn instead of crispy, golden bites.
- FINISH WITH A PINCH OF SALT: Right after frying, sprinkle a little extra salt over the hot corn while it’s still in the pan. The heat will help it melt into the coating, making every bite more flavorful. I used to skip this, and the dish always felt just a little flat.
Make-ahead tips for leftovers
Prep Ahead
Pat the drained corn dry and toss it with seasonings up to 2 hours before frying. Store in an airtight container in the fridge—this lets the flavors meld beautifully.
I like to prep mine the night before for maximum convenience. Just remember to bring it to room temperature before frying for even cooking. 🌽
Batch Frying Strategy
Fry the corn in batches of 1 cup at a time to maintain the 350°F oil temperature. Keep the cooked batches warm in a 200°F oven while you finish frying.
This ensures every batch stays crispy until serving. I use a wire rack on a baking sheet to prevent sogginess. 🔥
Make-Ahead Serving
For meal prep, fry the corn completely and store in an airtight container for up to 3 days. The texture won't be as crispy, but it reheats beautifully.
Spread on a baking sheet and warm in a 375°F oven for 5-7 minutes to revive the crunch. Add fresh parsley right before serving for that restaurant-quality finish. ✨
Freezer-Friendly
This recipe freezes surprisingly well! Fry the corn, let it cool completely, then transfer to a freezer bag with parchment paper between layers to prevent sticking. Thaw overnight in the fridge, then reheat in a skillet over medium heat for 3-4 minutes until crispy again.
The flavors hold up perfectly after freezing. ❄️
Portioning for Parties
For gatherings, fry everything at once and keep warm in a slow cooker set to 170°F. The corn stays crispy for hours this way. I like to portion into individual serving cups with a side of ranch for easy grab-and-go serving.
This is a crowd-pleaser that requires minimal last-minute effort. 💪
Reheating Perfection
To revive day-old corn, spread it on a baking sheet and warm in a 400°F oven for 4-5 minutes. For stovetop reheating, use a dry skillet over medium heat for 2-3 minutes, stirring constantly. The key is high heat and minimal moisture—this restores that satisfying crunch. 💫
Nutrition facts
Frequently asked questions
Can I use frozen corn instead of canned corn for this recipe?
Fresh or frozen corn won't work as well for this fried recipe. The moisture content is too high, making it impossible to achieve that perfect crispy texture. Canned corn is ideal because it's already pre-cooked and drained, which gives you the best starting point for frying. If you're set on using frozen corn, you'd need to cook it first, drain it thoroughly, and then pat it completely dry—this extra step often leads to uneven results.
How do I keep the fried corn crispy when serving at a buffet?
Keep the fried corn warm in a slow cooker set to 170°F—this maintains crispiness for hours. For extra insurance, place the corn on a wire rack over a baking sheet in the slow cooker to prevent steam buildup. If you notice the texture softening, revive it by warming in a 400°F oven for 3-4 minutes before serving. The key is minimal moisture exposure!
What's the best way to store leftover fried corn?
Store leftovers in an airtight container for up to 3 days at room temperature, but for best results, refrigerate them. To revive, spread on a baking sheet and warm in a 375°F oven for 5-7 minutes—this restores that satisfying crunch. For longer storage, freeze fried corn (cool completely first) for up to 1 month, then reheat in a skillet over medium heat for 3-4 minutes.
Can I make this recipe without butter?
Yes, you can substitute the butter with an equal amount of olive oil or melted coconut oil. The butter adds richness, but if you're avoiding dairy, the oil will still create a flavorful finish. Just keep the lemon juice to brighten the dish. For a vegan option, use vegan butter or additional olive oil with a splash of apple cider vinegar instead of lemon juice.
Why did my fried corn turn out greasy instead of crispy?
Greasy corn usually means the oil wasn't hot enough or the corn wasn't dry enough. Always maintain 350°F oil temperature and avoid overcrowding the pan—fry in batches of 1 cup at a time. Also, make sure to pat the corn completely dry before seasoning. If the corn sinks instead of floating, it's not ready yet—wait until it sizzles and floats to the surface before removing it.