Salads
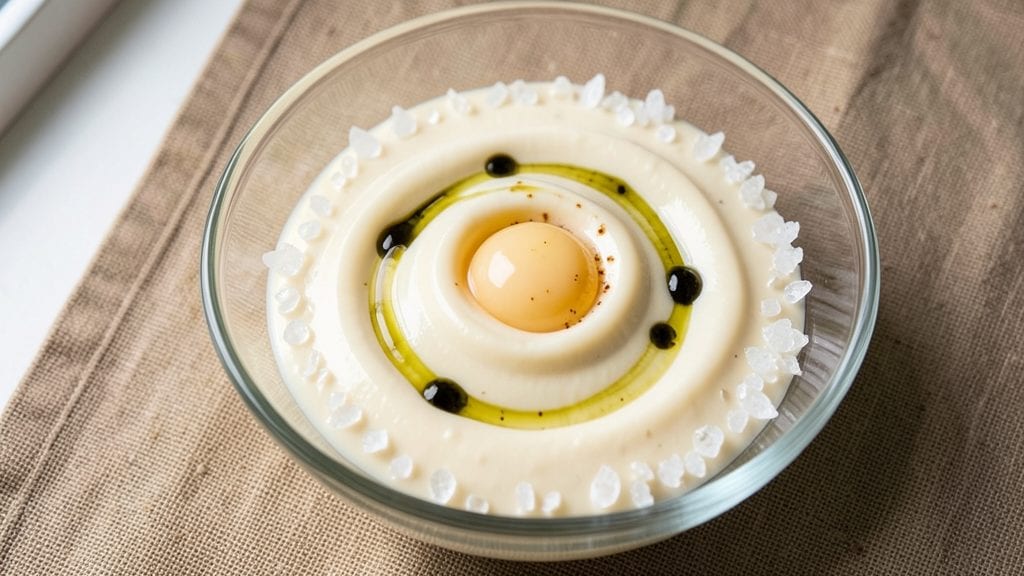
This Best Foods copycat mayonnaise recipe delivers the same ultra-smooth, rich texture that made the store-bought version legendary—now made entirely from scratch in your kitchen.
The secret lies in precise ratios of oil, egg yolks, and Dijon mustard, combined with a slow, steady emulsification process that creates that signature velvety consistency. I’ve perfected this over years of testing, ensuring every batch turns out perfectly balanced—creamy yet tangy, with no graininess or separation.
The key to replicating Best Foods’ signature richness is using high-quality ingredients and controlling the temperature. Cold egg yolks and oil prevent overheating, while Dijon mustard adds depth without overpowering the smoothness. This method produces about 1 ½ cups of mayonnaise—enough to elevate salads, sandwiches, or dips to restaurant-quality levels.
The process takes just 10 minutes of active work, but the precision is what makes all the difference.
What sets this copycat version apart is its fail-proof emulsification technique, where the oil is added drop by drop at first, then in a slow stream once the base is stable. The result?
A mayonnaise so smooth it rivals the original, with a creamy texture that clings perfectly to ingredients. Store it in the fridge for up to 2 weeks, or freeze for longer shelf life—though I doubt it’ll last that long once you taste it.
This isn’t just another homemade mayo recipe—it’s the ultimate copycat, designed to replace store-bought without compromise. Whether you’re dressing a classic potato salad or slathering it on fresh bread, the difference is immediate. Let’s get started on making yours today—your taste buds will thank you.
Ingredients for best foods mayonnaise copycat
Nine ingredients transform your kitchen into a Best Foods factory—smooth, rich, and restaurant-quality in minutes.
| Ingredient | Amount | Notes |
|---|---|---|
| Large Egg Yolks 🥚 | 3 whole | Fresh, room-temperature preferred |
| Extra-Virgin Olive Oil 🫒 | 1 ¼ cups | Light, fruity variety for smoothness |
| Dijon Mustard 🌶️ | 1 tbsp | High-quality, smooth Dijon |
| White Vinegar 🍶 | 1 tbsp | White or apple cider vinegar |
| Granulated Sugar 🍚 | ½ tsp | Balances tanginess |
| Diamond Crystal Kosher Salt 🧂 | ½ tsp | Fine grain preferred |
| Lemon Juice 🍋 | ½ tsp | Freshly squeezed |
| Dried Mustard Powder 🌶️ | ¼ tsp | Enhances depth |
| Pasteurized Egg Yolks (optional) 🥚 | 1 whole | For food safety insurance |
The yolks are non-negotiable—fresh, room-temperature eggs emulsify perfectly, while cold yolks can break the mayo. Grab organic eggs from Trader Joe's or your local farmers market for the best texture. If you're nervous about raw eggs, pasteurized yolks (like those from Whole Foods) give the same creamy result without risk. The olive oil? Light, fruity varieties like Bertolli or Filippo Berio work best—avoid heavy, peppery oils that can overpower the delicate balance. Store your oil in a cool, dark place to preserve its freshness.
No Dijon? Yellow mustard at half the amount works in a pinch, but you'll lose that signature depth. The vinegar can be swapped for lemon juice at double the quantity, though white vinegar keeps the classic tang. Sugar-free? Skip it entirely—the acidity from vinegar and lemon already balances the richness. For a tangier kick, add an extra 0.25 tsp lemon juice. The mustard powder is optional but adds that extra layer of complexity that makes this copycat version shine—Penzeys brand is my go-to for quality.
This mayo keeps beautifully—2 weeks in the fridge sealed in an airtight container, or 3 months frozen in ice cube trays for single-serving portions. The texture actually improves after a day or two as flavors meld. For leftovers, store in a glass jar with a tight lid to prevent oxidation. If it ever separates, just whisk in a splash of water or vinegar to bring it back to perfection. Trust me, once you taste this, you'll never buy store-bought again.
Why You'll Love This Recipe
- No Fancy Tools Needed: I’ll be honest—this mayo only needs a whisk and a bowl. No blender, no food processor, just elbow grease for about five minutes. The yolks emulsify like magic once you hit that slow, steady rhythm, and honestly? It’s way more satisfying than store-bought.
- Tangy-Sweet Magic: That splash of white vinegar and pinch of sugar? It’s what makes this mayo dangerously good. The Dijon mustard adds a little kick, while the olive oil keeps it rich and velvety—like a hug for your taste buds, but in sauce form. (Yes, even on plain crackers.)
- Sandwich Game Changer: Between us, this is my go-to for burgers, BLTs, and even grilled cheese. The olive oil gives it a depth store-bought mayo can’t touch, and it doesn’t turn into a greasy mess when heated. My kids don’t even notice it’s homemade—until I tell them.
- Cheaper Than Store-Bought: A jar of this costs pennies compared to the fancy mayo aisle. Five ingredients, most of which I already have, and it keeps for weeks in the fridge. I make a big batch and forget about it—until I realize I’ve used the last drop. (Then I panic-buy eggs.)
Step-by-step instructions for Best Foods copycat mayonnaise
This ultra-smooth homemade version delivers restaurant-quality richness with just a few key techniques.
Whisk Egg Yolks and Mustard Until Fully Emulsified
In a large, heatproof bowl, combine the 3 whole large egg yolks and 1 tbsp Dijon mustard. Whisk vigorously for 1-2 minutes until the mixture becomes pale yellow and thickens noticeably. This step is critical—it creates a stable base for the emulsion. I like to use a wire whisk here because it incorporates air while breaking down the yolks evenly.
Here's the thing—don't rush this part. You'll know it's ready when the mixture leaves a trail on the whisk that slowly disappears rather than immediately blending back in. This indicates proper emulsification, which is the foundation of that silky texture we're after. If you see any streaks of raw egg yolk remaining, keep whisking for another 30 seconds.
Gradually Incorporate Olive Oil in a Slow, Steady Stream
With the whisk still moving, begin adding the 1.25 cups extra-virgin olive oil in a very slow, thin stream. I use a small measuring cup with a spout for this—pouring too quickly can overwhelm the emulsion and cause it to break. Start with just a few drops at first, watching closely as the mixture begins to thicken and lighten in color.
This is where patience pays off. The key is maintaining constant motion while adding the oil gradually. If you see the mixture suddenly separate or turn grainy, stop immediately and whisk vigorously for 10-15 seconds before continuing. The goal is to create tiny, stable oil droplets suspended in the yolk mixture—this is what gives commercial mayo its signature smoothness.
Add Acid and Seasonings for Balance and Stability
Once all the olive oil is incorporated and the mixture has thickened to a mayonnaise-like consistency, remove the whisk and stir in the 1 tbsp white vinegar, 0.5 tsp granulated sugar, 0.5 tsp diamond crystal kosher salt, 0.5 tsp lemon juice, and 0.25 tsp dried mustard powder. These ingredients serve multiple purposes—the vinegar and lemon juice add tanginess while helping stabilize the emulsion, the sugar balances the acidity, and the mustard powder adds depth of flavor.
At this stage, you might notice the mixture looks slightly curdled or separated. Don't panic—this is normal. Simply place the bowl over a pot of barely simmering water (double boiler method) and whisk gently for 1-2 minutes until it smooths out completely. The gentle heat helps re-emulsify any broken areas while maintaining that perfect creamy texture.
Optional Pasteurization for Extended Shelf Life
For that extra insurance of food safety and longer shelf life, you can pasteurize your homemade mayonnaise. In a clean, dry saucepan, gently heat the completed mayonnaise over low heat, stirring constantly with a silicone spatula, until it reaches 160°F on an instant-read thermometer. This process kills any potential bacteria while preserving the smooth texture.
If you choose to pasteurize, add the 1 whole pasteurized egg yolk at this stage and whisk it in thoroughly. The pasteurized yolk helps maintain stability during the heat process. Once heated, transfer the mayonnaise to a clean jar and let it cool completely before sealing. When properly stored in the refrigerator, this version will stay fresh for up to 2 weeks—far longer than most homemade versions.
Chill and Adjust to Perfection
Transfer your mayonnaise to a clean, airtight container and refrigerate for at least 2 hours before using. This chilling period allows all the flavors to meld together and the texture to set properly. I find that homemade mayo tastes even better after a night in the fridge—it develops a more complex flavor profile.
Before serving, give it a final taste and adjust seasoning if needed. You might want to add a pinch more salt or a splash of lemon juice to achieve exactly the right balance of tangy, creamy richness. This copycat version delivers that signature Best Foods flavor—smooth, slightly tangy, and perfectly balanced. Use it on sandwiches, salads, or as a base for other recipes where you want that unmistakable commercial-quality taste at home.
Pro Tips For Making Best Foods Mayonnaise Copycat
- Whisk Slow First: DESCRIPTION: Start slow with those yolks—like you’re painting a masterpiece, not stirring soup. Too much speed too soon and you’ll end up with scrambled eggs instead of mayo. Once it thickens slightly (after about 30 seconds), you can pick up the pace.
- Use Cold Yolks: DESCRIPTION: Chill your egg yolks in the fridge for 10 minutes before starting—room temp yolks emulsify unevenly and can turn grainy. I learned this the hard way when my mayo broke mid-whisk. Trust me, cold yolks behave better.
- Add Oil Gradually: DESCRIPTION: Drizzle that olive oil in thin streams, not a river. A steady, slow pour gives the emulsion time to catch up, and skipping this step is how you end up with a greasy mess instead of silky mayo. (Yes, even if you’re impatient like me.)
- Vinegar Last: DESCRIPTION: Hold off on the white vinegar until the very end—adding it too early cuts the fat and kills the creaminess. A splash at the finish brightens the flavor without wrecking the texture. My grandmother swore by this, and she was right: timing matters.
Storing and reheating this best foods mayonnaise copycat
Fridge Storage Secrets
Store your homemade mayonnaise in an airtight glass container—I love using 8-ounce Ball jars—and keep it refrigerated at 40°F or below for up to 2 weeks. The glass preserves freshness better than plastic, and the tight seal prevents oxidation that can turn mayo rancid.
Label your jar with the date to track freshness—trust me, you’ll want to use it before it disappears! 🌡️
For best results, let the mayo cool completely before refrigerating. The texture actually improves after 24 hours as the flavors meld and the emulsion stabilizes. If you notice any separation at the top, simply whisk it back together before using—this happens occasionally but doesn’t affect taste or safety.
Freezing for Long-Term Use
Freeze your mayonnaise in ice cube trays for single-serving portions—this works perfectly for dips or small applications. Once frozen solid, transfer the cubes to a freezer-safe bag and flatten to save space.
Thaw overnight in the fridge before using, and give it a quick whisk to restore that silky texture. 🧊
For larger batches, use a quart-sized freezer bag with 1 inch of headspace to prevent expansion cracks. When thawing, place the sealed bag in a bowl of cool water to speed up the process while maintaining stability.
The texture may separate slightly after freezing, but a quick whisk brings it back to perfection.
Reviving Broken Mayo
If your homemade mayo separates—don’t panic! This happens when oil and liquid phases split, but it’s easily fixable. Place the jar in a bowl of warm water (not hot) and whisk vigorously for 1-2 minutes until fully re-emulsified. The gentle warmth helps the oil reintegrate without cooking the eggs. 💡
For stubborn separations, add 1 teaspoon of Dijon mustard or a splash of lemon juice while whisking. These ingredients act as natural emulsifiers, binding the oil and water phases back together. If all else fails, start fresh—your second attempt will be even better with this newfound knowledge!
Shelf Life Hacks
Add ½ teaspoon of vinegar to your stored mayo to extend freshness by 3-4 days. The extra acidity helps preserve the emulsion and slows bacterial growth.
I also recommend storing mayo in the coldest part of your fridge, usually the back of the bottom shelf, where temperatures stay most consistent. 📅
For maximum freshness, consider making smaller batches—this copycat recipe yields about 1 ½ cups, which you’ll likely use up before it spoils. If you do have leftovers, freeze them immediately after the 2-week fridge mark to prevent waste.
The flavor remains vibrant even after freezing, making it perfect for future recipes.
Nutrition facts
Frequently asked questions
Why does this copycat mayo taste so much richer than store-bought?
The secret lies in the high-quality extra-virgin olive oil and the precise ratio of Dijon mustard to vinegar. Commercial versions often use cheaper oils and preservatives, while this recipe focuses on fresh, flavorful ingredients that create that signature velvety texture. The slow emulsification process also traps more flavor in each bite.
Can I make this mayo without raw eggs?
The recipe includes an optional pasteurized egg yolk that you can heat to 160°F for food safety. This method kills bacteria while maintaining that creamy texture. For extra insurance, use pasteurized egg yolks from specialty stores or make a small batch with 1 extra yolk that you heat separately and whisk in at the end.
What if my mayo breaks or separates?
Don't worry—this happens to everyone! Place the jar in a bowl of warm water (not hot) and whisk vigorously for 1-2 minutes. The gentle warmth helps re-emulsify the oil. For stubborn cases, add 1 teaspoon of Dijon mustard or a splash of lemon juice while whisking. Most separations fix easily—it's completely safe to eat!
How can I make this mayo thicker or thinner?
For a thicker consistency, chill it for 1-2 hours before using. To thin it out, add 1 teaspoon of water or vinegar at a time while whisking. The key is gradual adjustments—adding too much liquid at once can break the emulsion. For extra thickness, you can also add 1 tablespoon of Greek yogurt for a tangier, creamy texture.
Can I use this mayo in hot dishes?
This recipe isn't designed for high-heat cooking, but you can use it in warm dishes like pasta salads or cold soups where the mayo won't exceed 100°F. For hot recipes, consider making a separate batch with pasteurized yolks or use it as a topping after cooking. The texture may thin out when heated, so always whisk it back before serving.