Desserts
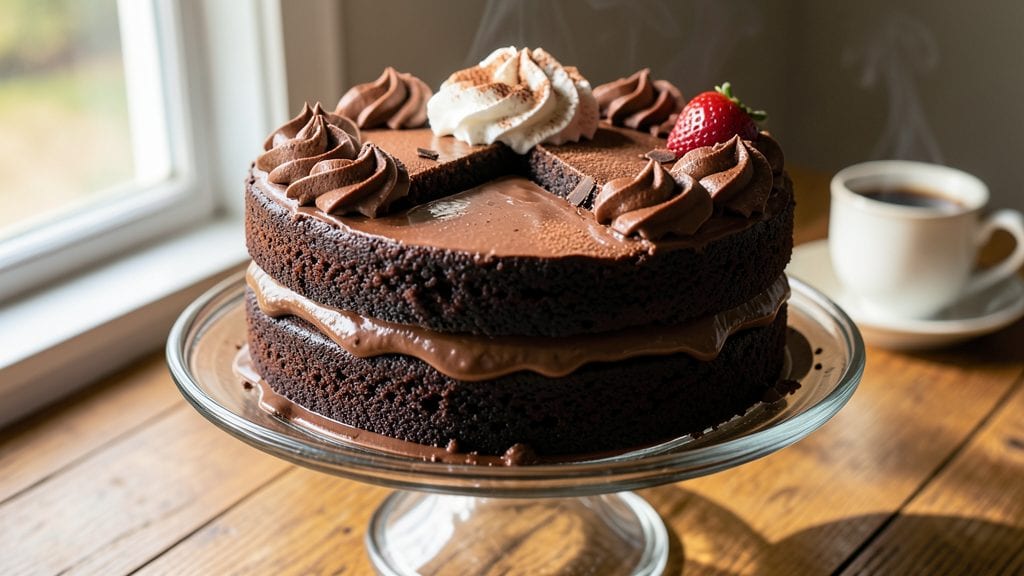
The old fashioned devil's food cake recipe delivers that perfect balance of fudgy layers and a moist center that makes every slice irresistible. This classic recipe has been passed down through generations, offering rich chocolate flavor without being overly sweet.
The secret lies in precise ingredient ratios and proper baking techniques that ensure your cake turns out tender yet dense.
What sets this recipe apart is its traditional approach—no shortcuts, just time-tested methods that create a cake with a velvety texture and deep chocolate taste. The cake batter is mixed just until combined, preserving moisture while developing the signature fudgy quality.
Baking at the right temperature ensures even cooking without drying out the center.
Once baked, this devil's food cake becomes a blank canvas for classic toppings like whipped cream, chocolate ganache, or a scoop of vanilla ice cream. The moist center contrasts beautifully with the slightly crisp edges, creating a texture that's impossible to resist.
Every bite delivers that nostalgic flavor you remember from childhood.
Perfect for birthdays, holidays, or just because—this recipe guarantees a cake that tastes homemade and feels special. Let's get started on creating your perfect slice of chocolate heaven.
Ingredients for old fashioned devil's food cake
Classic ingredients that create that legendary devil's food texture—fudgy outside, moist center every time.
| Ingredient | Amount | Notes |
|---|---|---|
| Unsalted Butter 🧈 | 1 cup | Room temperature for creaming |
| Granulated Sugar 🍚 | 2 cups | White sugar preferred |
| Cocoa Powder 🍫 | ¾ cup | Natural, unsweetened |
| All-Purpose Flour 🌾 | 1 ¾ cups | Sifted for light texture |
| Baking Powder 🍞 | 2 tsp | Aluminum-free preferred |
| Salt 🧂 | ½ tsp | Fine sea salt |
| Vanilla Extract 🌿 | 2 tsp | Pure bourbon vanilla |
| Hot Water 💧 | ½ cup | Freshly boiled |
| Large Eggs 🥚 | 2 whole | Room temperature |
| Buttermilk 🥛 | ½ cup | Fresh or cultured |
| White Vinegar 🍶 | 1 tbsp | For homemade buttermilk |
| Vegetable Oil 🫒 | ¼ cup | For greasing pans |
The cocoa powder is non-negotiable here—Hershey's Special Dark or Dutch-processed from Penzeys gives that deep, rich flavor. King Arthur flour or Gold Medal works best for the tender crumb, but any all-purpose will do in a pinch. The butter needs to be room temperature—press it to test, it should dent but not flatten. For the buttermilk, mix 0.5 cup milk with 1 tbsp vinegar and let sit for 5 minutes if you don't have store-bought. That tang balances the sweetness perfectly.
No buttermilk? Plain yogurt thinned with milk works in a bind. Short on cocoa? Melted dark chocolate at half the amount gives extra richness, but the texture changes slightly. The baking powder must be fresh—if it's over a year old, test it with vinegar (should bubble vigorously). For a moister cake, add 1 tbsp extra oil or swap 0.25 cup sugar for corn syrup. The eggs should be at room temperature—cold eggs can cause cracks in your cake layers.
Store baked layers wrapped in plastic at room temperature for 2 days—they actually improve as they sit. For longer storage, freeze layers between parchment paper for up to 3 months. The frosting can be made ahead and refrigerated for 5 days. I always bake an extra layer—leftover slices taste even better the next day when the flavors meld.
Why You'll Love This Recipe
- Just Five Ingredients: I swear by this list—rich butter, sweet sugar, pure cocoa, flour, and baking powder. That’s it. No fancy stabilizers or weird additives; just the good stuff that actually delivers.
- Deep Chocolate Soul: The cocoa here isn’t some dusty powder—it’s the real deal. Creamed with butter and sugar until it’s velvety, then folded into flour so gently the crumbs stay tender. One bite and you’ll forget about all the "artisanal" nonsense.
- Weeknight or Celebration: Make it for a quick dinner (yes, really) with a scoop of ice cream, or bake it ahead for birthdays—it stays moist for days. Between us, I’ve even served it cold with whipped cream for a lazy Sunday. Works every time.
- Fridge Goldmine: This cake doesn’t just taste better the next day—it becomes better. Slice it, store it, and pull out perfect squares whenever cravings hit. Honestly, I’ve had leftovers last a full week, and no one’s complained. Budget win.
Step-by-step instructions for old fashioned devil's food cake recipe
Here's how to achieve that legendary fudgy texture with a moist center that melts in your mouth.
Cream the Butter and Sugar for Maximum Fluffiness
In a stand mixer fitted with the paddle attachment, beat the 1 cup unsalted butter and 2 cups granulated sugar on medium speed for 3-4 minutes until the mixture is light, fluffy, and nearly doubles in volume. You'll notice the color lighten noticeably as air is incorporated—this is crucial for that classic devil's food texture. Scrape down the sides of the bowl with a spatula to ensure even mixing.
Here's the thing—don't rush this step. The creaming process develops the structure that prevents a dense cake. You want to see ribbons form when you lift the paddle, and the mixture should be thick enough to leave a trail that holds its shape for several seconds. This ensures your cake will rise properly and maintain that signature moistness throughout.
Incorporate Eggs and Vanilla for Rich Depth
Add the 2 whole large eggs, one at a time, mixing on low speed for 30 seconds after each addition until fully incorporated. Then add the 2 teaspoons vanilla extract and mix for another 10 seconds. The mixture will look slightly curdled at first, but that's normal—it will smooth out as we proceed.
This is where the magic happens for that authentic old-fashioned flavor. The vanilla extract infuses deeply during this stage, and the eggs provide the necessary fat and protein structure. I always use room-temperature eggs here—they blend more smoothly and create a lighter batter. If your eggs are cold, warm them slightly in their shells under hot water for 5 minutes before adding.
Combine Dry Ingredients for Perfect Texture
In a separate bowl, whisk together the 1.75 cups all-purpose flour, 2 teaspoons baking powder, and 0.5 teaspoon salt. Sift the mixture directly into the wet ingredients while mixing on low speed for 30-45 seconds until just combined. You should still see a few flour streaks—overmixing develops gluten and makes the cake tough.
Here's a pro tip: Don't worry if the batter looks slightly thick. The 0.5 cup hot water we'll add next will help create steam for that perfect rise. The key is to combine everything gently—this ensures we maintain that delicate balance between fudgy and moist that makes this cake legendary.
Add Buttermilk and Hot Water for Moisture Magic
In a small bowl, combine the 0.5 cup buttermilk with the 1 tablespoon white vinegar (this creates fresh buttermilk if you don't have store-bought). Add this mixture to the batter along with the 0.5 cup hot water, mixing just until combined. The batter should be thick but pourable—almost like a brownie batter.
This combination of buttermilk and hot water creates a chemical reaction that produces steam during baking, which is essential for that moist center. The acidity from the vinegar also helps activate the baking powder for better rise. The hot water also helps dissolve the cocoa powder more completely, ensuring even distribution of that rich chocolate flavor.
Bake to Perfect Doneness
Preheat your oven to 350°F and grease two 8-inch round cake pans with the 0.25 cup vegetable oil, coating the bottom and sides thoroughly. Divide the batter evenly between the pans and smooth the tops. Bake for 25-30 minutes, or until a toothpick inserted in the center comes out with just a few moist crumbs (not wet batter).
Don't overbake—this is where many cakes go wrong. The moment the toothpick test shows just a few moist crumbs, remove the cakes immediately. The residual heat will continue cooking them slightly as they cool in the pans. Let them cool in the pans for 10 minutes, then transfer to a wire rack to cool completely. This gradual cooling helps set the texture perfectly—fudgy on the outside, moist in the center, with that signature devil's food richness throughout.
Pro Tips For Making Old Fashioned Devil'S Food Cake
- Whisk Butter & Sugar First: I learned this the hard way—skipping the butter-sugar whip until later leaves you with a dense, heavy cake. Cream them together until light and fluffy (about 3-5 minutes) before adding anything else. That air gets trapped, and your cake will rise properly instead of sinking like a lead weight.
- Sift the Cocoa Twice: Cocoa powder clumps like a stubborn mule, and those lumps turn into dry pockets in your cake. Sift it into the dry ingredients before mixing, then sift it again right before folding it into the wet mix. Yes, it’s extra work, but your cake won’t taste like you’re eating floury cocoa bricks.
- Don’t Overmix the Batter: The second you add the flour, stop mixing the moment it’s just combined. I used to think more mixing = better texture, but no—you’ll end up with a tough, chewy cake that’s more like a brownie’s sad cousin. A few lumps? Doesn’t matter. Overmixing does.
- Test for Doneness at 325°F: Old-fashioned recipes often call for lower temps, but 325°F is where this cake shines. Stick a toothpick in the center—it should come out with moist crumbs, not wet batter (underbaked) or dry flour (overbaked). If your oven runs hot, tent it with foil after 20 minutes to keep the top from cracking like a sunbaked road.
Make-ahead tips for leftovers
Batter Prep Ahead
Prepare the cake batter up to the point of adding the buttermilk and hot water, then store it in an airtight container in the refrigerator for up to 24 hours. When ready to bake, simply add the buttermilk mixture and hot water, then proceed with the recipe.
This gives the flour time to hydrate fully, resulting in a more tender crumb. I always label the container with the date to track freshness. 📅
Layer Assembly Prep
Bake the cake layers and let them cool completely, then wrap each layer individually in plastic wrap. Store the wrapped layers in the refrigerator for up to 2 days or freeze them for up to 3 months.
When ready to assemble, let the layers sit at room temperature for 30 minutes before frosting. This prevents condensation from making the frosting soggy. 🧊
Frosting Make-Ahead
Prepare your favorite chocolate frosting (like buttercream or ganache) and store it in an airtight container in the refrigerator for up to 5 days. For a smoother finish, let the frosting sit at room temperature for 15-20 minutes before spreading.
I often make a double batch—one for assembly and one for extra slices. The frosting tastes even better after resting overnight as the flavors meld. ✨
Full Cake Assembly
Assemble the cake layers with frosting the day before serving, then wrap the entire cake in plastic wrap. Store it in the refrigerator for up to 24 hours—this allows the frosting to set and the flavors to develop.
Let the cake sit at room temperature for 1 hour before serving to bring out the best texture and taste. This method ensures your cake is always fresh and delicious. 💫
Freezing Fully Assembled
For longer storage, assemble the cake completely and wrap it tightly in plastic wrap, followed by aluminum foil. Freeze for up to 2 months. To serve, thaw the cake in the refrigerator overnight, then let it sit at room temperature for 2 hours before slicing.
This preserves the moisture and prevents a dry texture. I’ve done this for holiday parties—it always impresses guests! ❄️
Nutrition facts
Frequently asked questions
Why does this recipe call for hot water?
The 0.5 cup hot water serves two key purposes: it helps dissolve the cocoa powder completely for even flavor distribution, and creates steam during baking that produces that signature moist center. The hot water also activates the baking powder more effectively, ensuring a better rise.
Can I substitute buttermilk in this recipe?
Yes! Mix 0.5 cup milk with 1 tablespoon white vinegar or lemon juice, let sit for 5 minutes until slightly thickened. This homemade version works perfectly and gives the same tangy flavor. For a dairy-free option, use 0.5 cup coconut milk plus 1 tablespoon vinegar.
How do I fix a cake that's too dense?
Overmixing or underbaking usually causes dense texture. For next time: mix dry ingredients just until combined (don't overbeat), and bake until a toothpick comes out with moist crumbs (not wet batter). If your cake turned out dense, try slicing it thin and serving with extra whipped cream to balance the texture.
What's the best way to store leftover cake?
Wrap individual layers tightly in plastic wrap and store at room temperature for 2 days, or freeze for up to 3 months. For a fully assembled cake, refrigerate for 24 hours wrapped in plastic. The flavors actually improve overnight! Let it sit at room temperature for 1 hour before serving.
Can I make this cake in a different pan size?
Yes, but adjust baking time accordingly. For 9-inch pans, bake 20-25 minutes (they'll be thinner), and for 6-inch pans, bake 30-35 minutes. Always use the toothpick test to check doneness. Grease pans thoroughly to prevent sticking, especially with the rich chocolate batter.