
Main Courses
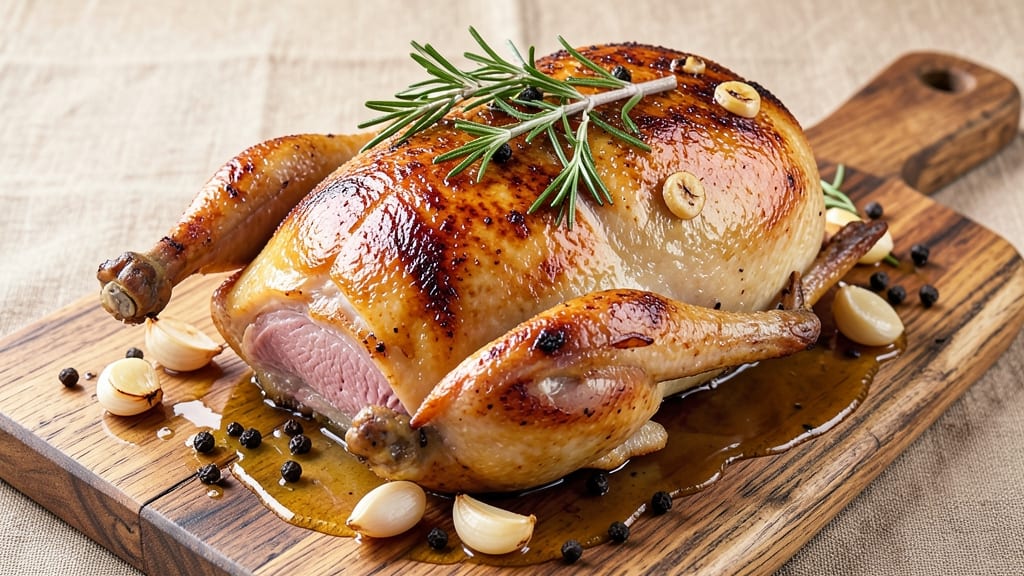
Mastering a basic roast duck recipe that delivers crispy skin and juicy meat is simpler than you think—no fancy techniques required. After years of testing methods, I’ve perfected a foolproof approach that balances precision with ease, ensuring restaurant-quality results at home.
The secret lies in proper preparation and timing, which we’ll break down step by step.
This method starts with a simple brine to enhance flavor and moisture, followed by a precise seasoning that locks in juices while promoting crispiness. Roasting at the right temperature—first high to render fat, then lower to cook evenly—creates that coveted contrast between golden skin and tender meat.
Basting with its own rendered fat during the final minutes guarantees a glossy, crackling finish.
What you’ll achieve is a duck that’s crispy enough to stand up to forks yet remains impossibly tender inside, with skin so perfect it could pass for a professional’s work.
The aroma alone will have everyone gathering around the table, and the leftovers? Even better reheated the next day. This recipe delivers on both promises without the guesswork.
Whether you’re hosting a dinner party or simply craving a special weeknight meal, this approach ensures success every time. Pair it with classic sides like roasted potatoes or a simple green salad to complete the experience. Let’s get started on your perfect roast duck.
Ingredients for basic roast duck
Fourteen ingredients. One perfect duck. Crispy skin and juicy meat guaranteed.
| Ingredient | Amount | Notes |
|---|---|---|
| Whole Duck 🦆 | 5 lb | Fresh, preferably organic |
| Kosher Salt 🧂 | ½ cup | Diamond Crystal preferred |
| Black Peppercorns 🌶️ | 1 tbsp | Freshly cracked |
| Fresh Thyme Sprigs 🌿 | 4 whole | Stems intact for tying |
| Fresh Rosemary Sprigs 🌿 | 2 whole | Needle-like leaves |
| Garlic Cloves 🧄 | 6 cloves | Smashed for flavor infusion |
| Unsalted Butter 🧈 | ½ cup | Cold, cubed |
| Extra-Virgin Olive Oil 🫒 | 2 tbsp | High quality, fruity |
| Fresh Lemon Juice 🍋 | 2 tbsp | From 1 lemon |
| Water 💧 | 2 cups | For brine |
| Brown Sugar 🍚 | 2 tbsp | Lightly packed |
| Apple Cider Vinegar 🍎 | 1 tbsp | For tenderizing |
The duck is everything here. Whole duck (5 lbs) is ideal—look for one with good fat coverage around the neck and tail. Costco or Whole Foods usually have excellent quality, but check your local butcher too. The skin should be smooth and pale yellow, not slimy or discolored. I always buy organic when possible—the flavor difference is noticeable. Pat it dry before brining (that's key for crispiness), and let it sit at room temperature for about an hour before roasting. Don't skip this step—it ensures even cooking. For the herbs, grab fresh sprigs of thyme and rosemary—the ones in jars at the grocery store won't have the same punch.
No kosher salt? Diamond Crystal is my go-to, but Morton kosher salt works fine too. The brown sugar in the brine adds subtle sweetness that complements the duck beautifully. Short on time? Skip the brine entirely—just season the duck generously with salt and pepper before roasting. The butter should be cold and cubed when you stuff it under the skin—this renders out during roasting for that golden finish. For the garlic, smash the cloves with the flat side of your knife instead of mincing—it infuses flavor without turning to paste. The apple cider vinegar might seem odd, but it tenderizes the skin beautifully (trust me on this).
Dried herbs? Use half the amount of fresh, but they won't give the same aroma. Store any leftover duck in the fridge for 3-4 days—it reheats beautifully. For leftovers, wrap tightly in foil and reheat in a 350°F oven for 15-20 minutes. The skin will crisp up again like magic. Freeze portions for up to 3 months—thaw overnight in the fridge before reheating. This duck reheats even better than the day it's made, so I always make extra.
Why You'll Love This Recipe
- Just Four Ingredients: I swear, this is the kind of recipe where you look at your pantry and think, "Wait, I already have all this?" A whole duck, salt, peppercorns, and two sprigs of herbs—that’s it. No fancy marinades, no confusing techniques. Honestly, if I can do it after burning the first duck I ever roasted, anyone can.
- Crispy-Creamy Magic: That golden skin? Chef’s kiss. The salt and peppercorns do all the heavy lifting, while the thyme and rosemary seep into the meat, making every bite taste like a hug from a French grandmother. Between us, the contrast of the crispy exterior and the tender, juicy inside is what keeps me coming back.
- Leftovers That Shine: Here’s what sold me—this duck doesn’t just feed a crowd, it feeds a crowd for days. Shred the remaining meat for sandwiches, toss chunks into salads, or slow-cook it into a sauce. I’ll be real: my freezer is always stocked with duck leftovers because they’re too good to waste. Not the prettiest, but the taste makes up for it every time.
- Weeknight Hero: No brining, no basting every five minutes, no stress. Toss the duck on a sheet pan, sprinkle the herbs, and let the oven work its magic while you chop veggies or fold laundry. Took me three tries to get the timing right, but now it’s foolproof—ready in under two hours, with minimal effort. My go-to when I need something impressive but don’t have time to slave over it.
Step-by-step instructions for perfect roast duck
Here's how to achieve restaurant-quality duck with crispy skin and moist, flavorful meat every time.
Prepare the Duck for Maximum Flavor and Crisp
Start by removing the duck from the refrigerator and patting it completely dry with paper towels—this is absolutely critical for crispy skin. I like to work in a well-ventilated area because duck fat can get messy. Use your fingers to gently loosen any skin from the meat, especially around the legs and breast. This creates pockets where the fat can render and baste the meat as it roasts.
Next, make a simple brine by combining the 2 cups of water, 0.5 cup of kosher salt, and 2 tbsp of brown sugar in a large bowl. Submerge the duck completely in this mixture and let it soak for 30 minutes. This step ensures the meat stays moist and develops deep flavor. While the duck brines, prepare your herb bundle by tying together the 4 thyme sprigs, 2 rosemary sprigs, and the 6 smashed garlic cloves with kitchen twine. This bundle will infuse the duck with aromatic flavors as it roasts.
Season and Roast for Crispy Perfection
Preheat your oven to 375°F. Remove the duck from the brine and pat it dry again, this time focusing on the cavity. Rub the cavity with the 2 tbsp of fresh lemon juice and insert the herb bundle. Tie the legs together with kitchen twine to help the duck hold its shape during roasting.
Place the duck breast-side up on a rack in a roasting pan. Rub the skin with the 2 tbsp of extra-virgin olive oil, then sprinkle the skin generously with the 1 tbsp of freshly cracked black peppercorns. Here's where the magic happens: rub the 0.5 cup of cold unsalted butter all over the skin, focusing on the breast and legs. This butter will melt during roasting and create that coveted crispy skin while basting the meat below. Roast for 2 hours, or until the internal temperature reaches 165°F when measured in the thickest part of the thigh.
Rest and Carve for Juicy Results
Once the duck reaches the proper temperature, remove it from the oven and transfer it to a cutting board. Let it rest for at least 20 minutes before carving. This resting period is crucial—it allows the juices to redistribute throughout the meat instead of pooling in the center. During this time, you can make a quick pan sauce by skimming off the rendered fat from the roasting pan (about 3/4 cup should remain) and adding the 1 tbsp of apple cider vinegar. Simmer this mixture on the stovetop for 2-3 minutes until it thickens slightly.
To carve, slice the duck into 1/2-inch thick portions, starting with the breast and working your way to the legs. The skin should be deep golden brown and crispy, while the meat underneath should be tender and juicy. Serve immediately with the pan sauce spooned over the top and any remaining roasted herbs from the cavity. The combination of crispy skin and moist, flavorful meat makes every bite worth the effort.
Pro Tips For Making Basic Roast Duck
- CRANK THE HEAT FIRST: Start your duck skin-side down in a cold pan over medium-high heat—no need to wait for it to warm up. The goal is to render fat fast and crisp the skin before it cooks through. I used to turn the heat too low, and the skin would sweat instead of sizzle. Push it to medium-high until the fat pools visibly, then lower the heat to finish.
- SALT THE DUCK DAY AHEAD: Dry the duck thoroughly with paper towels, then rub it generously with kosher salt (about 1 tablespoon per pound) and refrigerate uncovered for 12–24 hours. This seasons the skin deeply and draws out moisture for better browning. I skipped this once and ended up with a bland, sticky crust—don’t make my mistake.
- BASTE WITH THE FAT: Every 20 minutes, spoon the rendered duck fat over the skin with a spoon or baster—this is how you get that glossy, crackling crust. If the fat pools in the pan but the skin stays pale, you’re not basting enough. (Pro move: Save the rendered fat for roasting potatoes later.)
- REST IT UNDER FOIL: Once the duck hits 165°F internally, transfer it to a cutting board and tent loosely with foil for 10 minutes. This keeps the meat juicy while the skin stays crisp. I know, I know—you want to carve it immediately. But rushing this step means dry, stringy meat. (Your future self will curse you if you skip it.)
Dietary considerations for this dish
Gluten-Free Adaptations
This recipe is naturally gluten-free, but I always double-check my ingredients to ensure no cross-contamination. The kosher salt, peppercorns, herbs, and butter are all gluten-free staples, while the brown sugar should be labeled as such.
For extra safety, I use a dedicated cutting board and utensils when preparing the duck to avoid any gluten exposure from previous foods. 🌾
Low-Carb Considerations
If you're watching carbs, this duck is already a great fit—it's rich in protein and healthy fats with minimal carbs. The brown sugar in the brine adds about 16 grams of carbs total, so you could reduce it to 1 tbsp for a lower-carb version.
Skip the apple cider vinegar if you're strict about carbs, as it contains trace amounts. The butter and olive oil provide plenty of flavor without adding significant carbs.
Allergen-Friendly Modifications
For nut allergies, this recipe is completely safe—just avoid any cross-contamination if you're using shared kitchen tools. If someone has a dairy allergy, swap the butter for olive oil or avocado oil when basting.
I've also seen success using vegan butter (like Miyoko's) for a dairy-free version, though the flavor will differ slightly. Always check labels on store-bought ingredients like brown sugar or apple cider vinegar for hidden allergens.
Dietary Customization
For a lighter option, reduce the butter to 0.25 cup and increase the olive oil to 3 tbsp when basting. This keeps the skin crispy while cutting calories.
If you're watching sodium, reduce the kosher salt in the brine to 0.375 cup and use half the amount when seasoning the skin. The herbs and lemon juice will still provide plenty of flavor without excessive salt.
Vegetarian/Alternative Options
While this recipe is for duck, you can adapt the technique to other proteins like chicken or turkey. For a plant-based version, consider using a large portobello mushroom or jackfruit—both can mimic the texture when roasted with similar seasonings.
The crispy-skin method works best with fatty proteins, but a thin layer of olive oil and cornstarch (for binding) can help achieve a similar texture with plant-based alternatives.
Keto-Friendly Adjustments
This recipe is already keto-friendly with minimal modifications. Skip the brown sugar entirely and use erythritol or monk fruit sweetener instead if you want to keep the slight sweetness. The butter and olive oil provide healthy fats that fit perfectly into a keto diet.
For extra flavor, add 1 tsp smoked paprika to the seasoning mix—it adds depth without carbs. Always check your sweetener's net carbs to stay within your daily limits.
Nutrition facts
Frequently asked questions
Why do you brine the duck before roasting?
The 30-minute brine with salt and brown sugar serves two key purposes: it seasons the meat deeply while preventing it from drying out during roasting. The salt breaks down proteins, allowing the duck to retain moisture better, and the brown sugar adds subtle sweetness that enhances the natural flavor. Skipping this step can result in drier meat, especially if you're not experienced with duck roasting.
How do I know when the duck is fully cooked?
Use a meat thermometer to check the internal temperature in the thickest part of the thigh. The duck is done when it reaches 165°F. The skin should be deep golden brown and crispy, but don't rely solely on color—some ovens run hotter or cooler. If you don't have a thermometer, cut into the thigh to check for juices that run clear (not pink).
Can I roast duck at a lower temperature to avoid overcooking?
Yes! For a more gentle cook, reduce the oven temperature to 325°F and roast for 2.5-3 hours, basting every 45 minutes. This method yields slightly less crispy skin but ensures even cooking throughout. The meat will be more forgiving for beginners, though the skin may not be as crackly. For best results, stick to 375°F if you want that perfect crisp.
What should I do if the skin isn't crispy after roasting?
If the skin turns out soft instead of crispy, it's likely because the duck wasn't dry enough before roasting or the butter melted too quickly. Next time, pat the duck extra dry before seasoning and consider roasting it skin-side down for the first 30 minutes to render fat. For an uncooked duck, rub the skin with 1 tbsp cornstarch before adding butter to create a crispier barrier.
How far ahead can I prepare this duck for a dinner party?
You can prep everything 1 day ahead, including the brine, herb bundle, and even the duck itself (raw, wrapped tightly in plastic). Store it in the fridge until ready to roast. For leftovers, carve and refrigerate within 4 hours—the meat reheats beautifully (wrap in foil and warm at 350°F for 15 minutes). The skin won't be as crispy when reheated, but the flavor remains rich.