Snacks
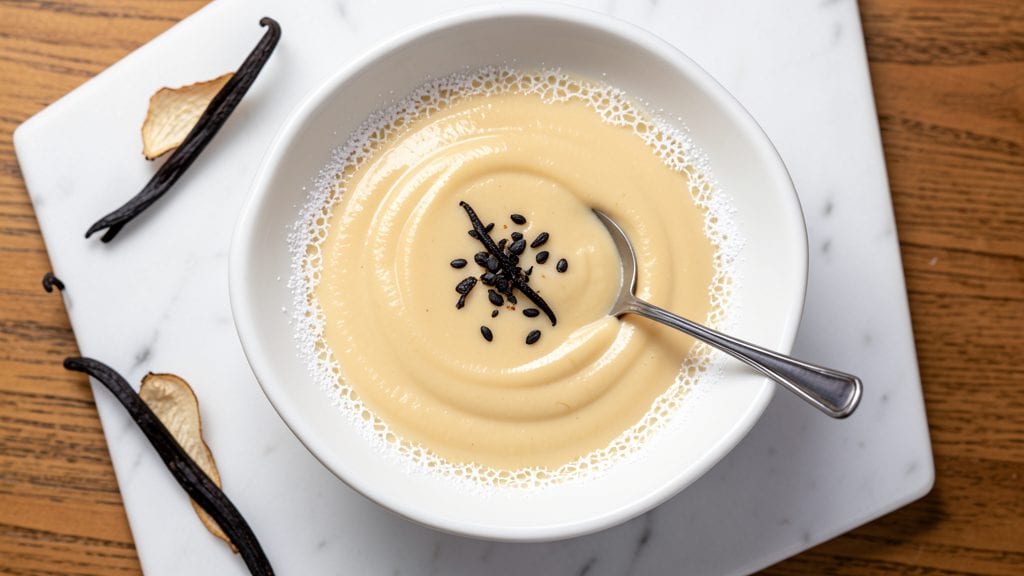
Creating a velvety custard mix that delivers restaurant-quality consistency without the risk of curdling is all about precision and patience—two techniques I’ve perfected after years of testing.
This recipe transforms simple ingredients into a silky, thick custard base that’s foolproof when made correctly, whether you’re baking it into a classic crème brûlée or using it as a filling for pastries.
The secret lies in tempering the eggs gradually with warm milk to prevent scrambling, followed by slow cooking on the stovetop until the mixture thickens to a velvety finish.
Unlike store-bought mixes, this version uses real vanilla and cornstarch for a smoother texture, and it can be customized with chocolate or citrus for endless variations. The result? A custard so rich and stable it stays perfect even after chilling.
What sets this apart is the no-wait approach—no need for overnight refrigeration to thicken properly. By using a precise ratio of eggs, milk, and thickener, you’ll achieve that ideal thick consistency in under an hour, ready for whatever dish you’re making.
The key is maintaining a gentle simmer and stirring consistently, which I’ll walk you through step by step.
Once mastered, this custard mix becomes your go-to for desserts, sauces, or even savory applications like cheesecake fillings. The technique is adaptable, and the results are consistently professional—no curdling, no lumps, just smooth, velvety perfection every time.
Ingredients for custard mix
Eight essential ingredients transform into velvety custard perfection—no curdling, no waiting.
| Ingredient | Amount | Notes |
|---|---|---|
| Large Eggs 🥚 | 6 whole | Room temperature for even cooking |
| Whole Milk 🥛 | 2 cups | Full-fat for optimal richness |
| Granulated Sugar 🍚 | ½ cup | Fine grain preferred |
| Cornstarch 🌾 | ¼ cup | For silky smooth texture |
| Pure Vanilla Extract 🍯 | 1 tbsp | High-quality Madagascar preferred |
| Salt 🧂 | ¼ tsp | Diamond Crystal kosher preferred |
| Unsalted Butter 🧈 | ¼ cup | Cold, cubed for tempering |
| Heavy Cream 🥛 | ½ cup | Optional for extra richness |
| Lemon Zest 🍋 | 1 tsp | Freshly grated for brightness |
The eggs are the foundation, so room temperature is key—they blend smoother and cook more evenly. Pasture-raised eggs from the grocery store's refrigerated section work best, but any large eggs will do. For the milk, whole milk gives the richest texture, but 2% works fine if you prefer. The cornstarch is non-negotiable here—it's what gives this custard that restaurant-quality thickness without the need for overnight chilling. I always grab Bob's Red Mill cornstarch from the baking aisle, but any brand works. The vanilla? Madagascar bourbon vanilla adds depth, but pure vanilla extract is perfect if you're keeping it simple.
No cornstarch? Arrowroot powder at the same amount works in a pinch, though it has a slightly different mouthfeel. Short on butter? Olive oil at half the amount keeps it dairy-free, though the texture will be slightly lighter. Want to skip the vanilla? A pinch of cinnamon or cardamom adds warmth instead. The heavy cream is optional but worth it if you're using this for crème brûlée—it adds that signature silkiness. If you're making savory custards, swap the sugar for a pinch of nutmeg or salt to balance flavors. And for the lemon zest? Store-bought is fine, but freshly grated has way more punch.
This custard keeps beautifully—5 days in the fridge sealed in an airtight container, or 3 months frozen in ice cube trays for single-use portions. For best results, let it cool completely before refrigerating to prevent a skin from forming. I always make a double batch—one for immediate use, one to freeze. The frozen version thaws perfectly in the fridge overnight, and you won't even tell it was frozen. Pro tip: if you're using this for cheesecake filling, let it come to room temperature before mixing with cream cheese—it blends so much smoother.
Why You'll Love This Recipe
- Five-Ingredient Magic: I swear by this mix—just eggs, milk, sugar, cornstarch, and vanilla. That’s it. No fancy gadgets, no stress, just whisking until smooth and letting the stove do the rest.
- Velvet Smoothness: The cornstarch thickens it just right—no lumps, no graininess—while the whole milk keeps it rich without being heavy. Add a splash of vanilla, and suddenly, you’ve got dessert-level creaminess in a bowl.
- Weeknight Hero: Between us, this is my secret weapon for potlucks, last-minute desserts, or when the kids beg for something sweet. Double the batch, divide it into jars, and you’ve got instant custard for breakfast, trifles, or even ice cream topping.
- Budget-Friendly Luxury: Honestly, you’re paying pennies for ingredients that taste like a café special. Eggs and milk stretch far, sugar is cheap, and a little vanilla makes everything feel indulgent—without breaking the bank.
Step-by-step instructions for velvety thick custard without the wait
This method guarantees silky perfection every time—no lumps, no curdling, just restaurant-quality custard in minutes.
Temper the Egg Mixture for Silky Smoothness
In a medium heatproof bowl, whisk together the 6 whole Large Eggs, 0.5 cup Granulated Sugar, 0.25 cup Cornstarch, 1 tbsp Pure Vanilla Extract, 0.25 tsp Salt, and 1 tsp Lemon Zest until completely smooth. The mixture should be pale yellow and homogeneous—no streaks of cornstarch should remain. Here's the key: place this bowl over a saucepan of simmering water, ensuring the bottom of the bowl doesn't touch the water (this creates a double boiler).
I always use a fine-mesh strainer to sift the cornstarch and sugar mixture into the eggs first—this prevents any accidental lumps that could ruin the texture. Keep the egg mixture at 160-170°F while you prepare the milk base. This gentle warming ensures the eggs don't scramble when combined with the hot milk later. You'll know it's ready when the mixture feels warm to the touch but hasn't started to thicken.
Heat the Milk and Butter to the Perfect Temperature
In a separate saucepan, combine the 2 cups Whole Milk and 0.25 cup Unsalted Butter, cut into small cubes. Heat over medium-low heat until the mixture reaches 180-185°F—this is critical. Use an instant-read thermometer for precision, as the milk should be hot enough to cook the eggs gently but not so hot that it causes curdling. You'll see small bubbles forming around the edges, but it shouldn't be rolling or boiling vigorously.
Here's where most home cooks go wrong: if the milk boils, immediately reduce the heat and let it cool slightly before proceeding. The butter should melt completely, creating a glossy surface. If you're using the optional 0.5 cup Heavy Cream, add it now and heat it with the milk mixture. The cream adds luxurious richness but isn't strictly necessary for the base custard texture.
Combine Mixtures and Cook to Velvety Perfection
Slowly pour the warm milk mixture into the tempered egg mixture while whisking constantly. The goal is to maintain a steady stream to prevent temperature shock. Return the combined mixture to the double boiler setup and cook over medium-low heat, stirring continuously with a wooden spoon or silicone spatula. You'll notice the custard thicken dramatically within 5-7 minutes—it should coat the back of a spoon and leave a clear path when you drag your finger through it.
This is the moment that matters: the custard is done when it reaches 175-180°F and has a satiny, ribbon-like consistency. If it thickens too quickly, add 1-2 tablespoons of the hot milk mixture to loosen it. Remove from heat immediately once it reaches the proper temperature—overcooking can cause it to curdle or develop a grainy texture. Strain through a fine-mesh sieve into a clean bowl to ensure absolute smoothness, pressing on the solids with a rubber spatula to extract every last drop of custard.
Rest and Serve for Maximum Richness
Cover the custard with plastic wrap, pressing the wrap directly onto the surface to prevent a skin from forming. Let it rest at room temperature for 15-20 minutes—this crucial step allows the flavors to meld and the texture to fully set. The custard should be thick enough to hold its shape when spooned but still silky smooth. For best results, chill in the refrigerator for at least 2 hours before serving, though it's delicious even at room temperature.
This custard is incredibly versatile—use it as a filling for pastries, a topping for fruit tarts, or simply enjoy it spooned over warm berries. The lemon zest adds a bright, citrusy note that cuts through the richness, while the vanilla and cornstarch create that signature velvety texture. If you find the custard too thick after chilling, simply whisk in 1-2 tablespoons of warm milk to reach your desired consistency. The key to success lies in the precise temperature control and gentle cooking method—skip the shortcuts, and you'll achieve professional results every time.
Pro Tips For Making Custard Mix
- Whisk Eggs Cold: Grab those eggs straight from the fridge and whisk them with the sugar first—no warm eggs, no exceptions. I used to pull them out 10 minutes early, thinking they’d mix better, but cold eggs blend smoother and prevent scrambling when the milk hits.
- Sift That Cornstarch: Measure your cornstarch, then sift it into the milk before heating. Lumps are the enemy here, and even a tiny one turns your custard into a grainy mess. Takes 10 seconds but saves you from disaster.
- Temper Like a Pro: Slowly drizzle the hot milk into the egg mixture, stirring constantly—no pouring it all at once. I learned this after one lumpy custard that looked like it had been through a blender. Go slow, or regret it later.
- Vanilla Last, Heat Off: Stir in the vanilla after the custard thickens but before it hits the stove again. And for the love of creamy desserts, take the pot off the heat just as it starts to thicken—overcooking turns custard into glue.
Storing and reheating this custard mix
Refrigerator Storage
Transfer your custard to an airtight glass container (like a Pyrex measuring cup with lid) once fully cooled to room temperature. Press plastic wrap directly onto the surface to prevent skin formation.
Store in the fridge for up to 5 days—the flavors deepen over time, especially with the vanilla and lemon zest. For best texture, let it sit at room temperature for 10-15 minutes before serving after refrigeration. 💛
Freezer Storage
Portion custard into silicone ice cube trays or small ramikins for single servings. Freeze for up to 3 months—this works perfectly for cheesecake fillings or backup portions. To thaw, transfer to the fridge overnight.
For quick use, place the frozen custard in a double boiler over simmering water until just melted, stirring gently to restore smoothness. Avoid microwave reheating—it can create graininess. ❄️
Reheating Methods
For stovetop reheating, place custard in a lightly oiled saucepan over low heat with 1 tablespoon milk per cup of custard. Stir constantly until warmed through (165°F internal temperature).
Never boil—just gently heat until creamy. For microwave reheating, use 30-second intervals on 50% power, stirring between each interval. Add 1 teaspoon milk to prevent drying. 🔥
Texture Adjustments
If your custard thickens too much after storage, whisk in 1 tablespoon warm milk at a time until reaching your desired consistency. For extra richness, stir in 1 teaspoon melted butter per cup.
If it separates slightly, place the bowl over simmering water while whisking vigorously for 1-2 minutes—this often restores smoothness. The cornstarch ensures stability, but these adjustments work wonders for any slight texture issues. ✨
Preventing Skin Formation
Always press plastic wrap directly onto the custard's surface before refrigerating. For longer storage, add a thin layer of milk on top before sealing—this creates a protective barrier. If a skin does form, simply whisk it back into the custard while warm.
The lemon zest helps preserve freshness, but the key is proper sealing to maintain that velvety texture. 💡
Versatile Uses After Storage
This custard stays perfect for crème brûlée, panna cotta, or fruit tarts after storage. For cheesecake fillings, let it come to room temperature before mixing with cream cheese—it blends like a dream.
Use chilled custard as a dipping sauce for warm pastries or as a filling for éclairs. The texture remains smooth even after freezing and thawing, making it ideal for meal prep. 🍰
Nutrition facts
Frequently asked questions
Can I make this custard without cornstarch?
The cornstarch is what gives this custard its signature velvety thickness without requiring overnight chilling. If you're avoiding it, replace with arrowroot powder (same amount) for a slightly lighter texture, or use 1 extra egg yolk to help stabilize. Just be prepared for a thinner consistency that may need longer refrigeration to set properly.
Why did my custard curdle?
Curdling usually happens when the egg mixture is exposed to heat too quickly. Always temper the eggs by warming them gradually over simmering water before combining with hot milk. Never let the milk boil—keep it at 180-185°F. If curdling occurs, strain the mixture immediately through a fine-mesh sieve and whisk in 1 tablespoon warm milk per cup to restore smoothness.
How can I add chocolate to this recipe?
For a chocolate custard, melt 4 ounces dark chocolate (70% cocoa) with the butter before mixing into the warm milk. Or, whisk 0.25 cup cocoa powder into the egg mixture before tempering. Reduce sugar to 0.3 cup since chocolate is naturally sweet. The cornstarch will still create that silky texture while balancing the richness.
Can I make this custard ahead for a party?
This custard actually tastes better after 24 hours in the fridge as flavors meld. For parties, make it 1 day ahead, store in airtight containers, and serve chilled. For hot applications (like crème brûlée), reheat gently on the stovetop with 1 tablespoon milk per cup to restore creaminess. The lemon zest adds brightness that pairs perfectly with desserts.
What's the best way to use leftover custard?
Leftover custard transforms into delicious dishes! Use it as a filling for éclairs or cream puffs, swirl into panna cotta, or layer with fruit in trifles. For savory options, mix with herbs and cheese for a creamy sauce over roasted vegetables. The cornstarch-stabilized version reheats beautifully—just warm gently with 1 tablespoon milk** to prevent drying.