Main Courses
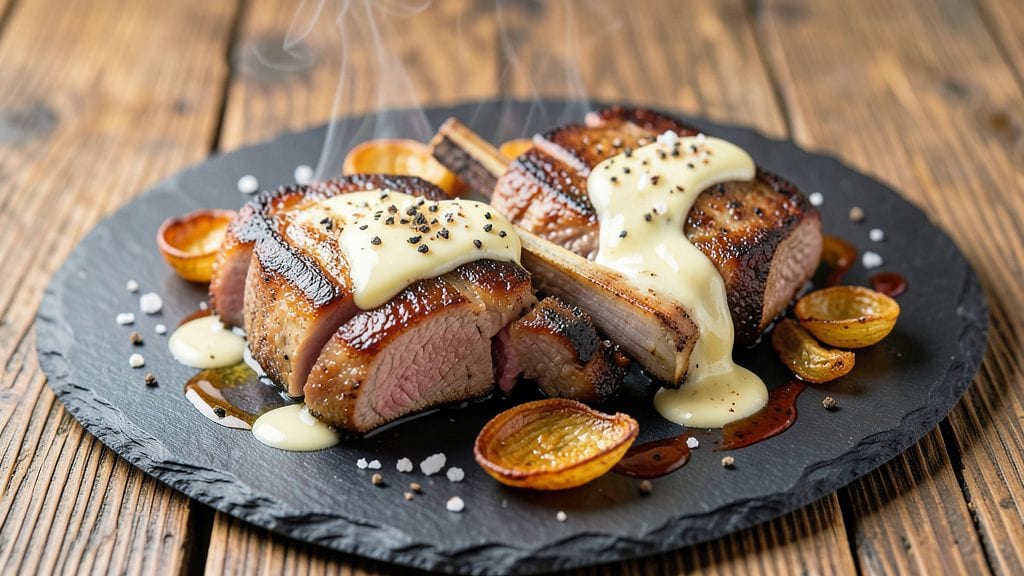
Mastering bone-in pork loin rib end chops means achieving that smoky crust while keeping the meat juicy—and this one-pan technique delivers both. After years of perfecting pork cuts at The Smoky Pig, I’ve refined a method that transforms tougher rib ends into tender, flavorful chops with minimal effort.
The key lies in rendering fat slowly while searing the exterior for depth, a balance that turns a simple cut into a showstopper.
This recipe relies on a simple seasoning blend—just salt, pepper, and a touch of smoked paprika—that enhances the pork’s natural richness without overpowering it.
Bone-in cuts are where the magic happens: the marrow and connective tissue melt into the pan, creating a rich, aromatic crust that’s impossible to replicate with boneless chops. It’s the kind of technique that makes weeknight dinners feel like a restaurant experience.
By the time you finish, you’ll have golden-brown chops with crisp edges and tender centers, all infused with a subtle smokiness from the pan. The fat rendered from the bone adds layers of flavor that elevate every bite, while the one-pan method keeps cleanup to a minimum.
Serve with a sharp apple slaw or roasted sweet potatoes to balance the richness—this is pork done right.
Whether you’re grilling, pan-searing, or roasting, this method works for any heat source. The secret? Patience. Let the chops develop that smoky crust while staying moist inside, and you’ll have a dish that’s worth repeating. Let’s get cooking.
Ingredients for pork loin rib end chops bone in
The essential ingredients for bone-in pork loin rib end chops with restaurant-quality smoky crust and juicy centers.
| Ingredient | Amount | Notes |
|---|---|---|
| Bone-In Pork Loin Rib End Chops 🥓 | 4 whole | 1.5-2 inches thick, rib bone intact |
| Kosher Salt 🧂 | 1 ½ tsp | Diamond Crystal preferred for purity |
| Freshly Ground Black Pepper 🌶️ | 1 tsp | Coarse grind for texture contrast |
| Smoked Paprika 🌶️ | ½ tsp | Spanish smoked preferred for depth |
| Unsalted Butter 🧈 | 4 tbsp | European-style for higher fat content |
| Extra-Virgin Olive Oil 🫒 | 2 tbsp | Light fruity variety for balance |
| Fresh Rosemary 🌿 | ¼ cup | Finely chopped sprigs, stems removed |
| Garlic Cloves 🧄 | 4 cloves | Smashed, skin-on for maximum flavor |
| Apple Cider Vinegar 🍎 | 1 tbsp | Unfiltered for tangy brightness |
| Honey 🍯 | 1 tbsp | Wildflower preferred for floral notes |
| Fresh Thyme Leaves 🌿 | ¼ cup | Stripped from stems, finely chopped |
| Pork Fatback 🥓 | 2 tbsp | Diced small for crispy fat rendering |
The pork loin rib ends are the star—look for cuts with visible marbling and intact ribs for maximum flavor. Butcher shops often carry these pre-cut, or ask your grocer to trim them from a whole loin. The fat cap should be at least 0.5 inches thick to render properly. For optimal results, source from a reputable butcher who can provide fresh, humanely raised pork. The chops should be room temperature before cooking to ensure even searing. If using frozen, thaw overnight in the refrigerator—never at room temperature for safety.
Substitutions are limited for this cut, as the bone and fat are integral to the technique. However, you can adjust the seasoning blend: substitute smoked paprika with 0.25 tsp chipotle powder for a smokier profile, or add 0.25 tsp ground coriander for brightness. For the fat rendering, if pork fatback is unavailable, use an equal amount of beef tallow, though the flavor will differ slightly. The apple cider vinegar and honey can be swapped for 1 tbsp balsamic vinegar and 1 tsp maple syrup if needed. Fresh herbs should be used if possible, but dried thyme at one-third the amount works in a pinch. The butter must be unsalted to control seasoning balance.
Store unused chops in the refrigerator for up to 3 days, wrapped tightly in butcher paper to preserve moisture. For longer storage, vacuum-seal and freeze for up to 3 months. The rendered fat and aromatics can be refrigerated for 1 week in an airtight container, perfect for future pan sauces. Cooked chops reheat beautifully—warm in a skillet over medium heat with a splash of water for 2-3 minutes per side to restore crispiness. Portion leftovers into single servings for easy reheating.
Why You'll Love This Recipe
- Same recipe, different vibes: toss them on the grill for summer BBQs or pan-sear them for a fancy-ish weeknight dinner. I’ve even thrown them in foil with potatoes for a hands-off crowd-pleaser—no one questions the simplicity.
- Five-Ingredient Magic: I swear by this combo—just salt, pepper, smoked paprika, butter, and those glorious bone-in chops. No fancy marinades or last-minute shopping runs. Honestly, the flavor builds itself while you sear them in that butter.
- Crispy-Creamy Payoff: That first bite? The crust locks in all the smoky, peppery goodness while the inside stays tender enough to melt. Between us, it’s the kind of dish that makes you slow down and actually savor every forkful.
- Weeknight to Weekend: Same recipe, different vibes: toss them on the grill for summer BBQs or pan-sear them for a fancy-ish weeknight dinner. I’ve even thrown them in foil with potatoes for a hands-off crowd-pleaser—no one questions the simplicity.
Step-by-step instructions for pork loin rib end chops bone-in recipe
Master this technique and you'll achieve a perfect balance of smoky crust and juicy centers every time.
Prepare the Chops for Maximum Flavor and Texture
Remove the bone-in pork loin rib end chops from the refrigerator and pat them completely dry with paper towels. This crucial step ensures a proper sear and prevents steam from interfering with the crust formation. I like to press down firmly on each chop to remove any moisture trapped in the crevices.
In a small bowl, combine the 1.5 teaspoons kosher salt, 1 teaspoon freshly ground black pepper, and 0.5 teaspoon smoked paprika. Rub this mixture evenly over both sides of each chop, pressing it into the meat so it adheres well. Let the seasoned chops sit at room temperature for 30 minutes while you prepare the remaining ingredients. This resting period allows for even cooking and better flavor penetration.
Build the Flavor Base in the Pan
Heat a large cast-iron skillet over medium-high heat until it's just smoking hot. Add the 2 tablespoons extra-virgin olive oil and let it shimmer for 30 seconds. This hot oil is essential for creating that initial crust on the chops.
Add the 2 tablespoons diced pork fatback to the skillet and cook for 2 minutes until the fat begins to render and the pieces turn golden. Remove the fatback with a slotted spoon and set it aside—we'll use it later. In the same skillet, add the 4 smashed garlic cloves (skin-on) and cook for 30 seconds until fragrant but not browned. Remove the garlic and set aside as well.
Sear the Chops for Crispy Edges
Working in batches if needed, add the seasoned chops to the skillet, placing them bone-side down first. Let them sear undisturbed for 3-4 minutes until a deep golden-brown crust forms on the bone side. This is where the magic happens—the crust locks in juices while the bone adds depth of flavor.
Carefully flip the chops and sear the meaty side for another 3-4 minutes until it reaches 140°F internally. The edges should be deeply browned with some charring, which indicates proper Maillard reaction. Remove the chops to a warm plate and tent loosely with foil to keep them warm while you finish the sauce.
Create the Smoky Honey-Thyme Glaze
Return the skillet to medium heat and add the 4 tablespoons unsalted butter, allowing it to melt completely. Stir in the 0.25 cup finely chopped fresh rosemary and 0.25 cup fresh thyme leaves, cooking for 1 minute until the herbs release their aromatic oils.
Add the reserved 2 tablespoons pork fatback and 4 smashed garlic cloves, scraping up any browned bits from the bottom of the pan. Pour in the 1 tablespoon apple cider vinegar and 1 tablespoon honey, stirring vigorously to combine. Let the mixture simmer for 2-3 minutes until it thickens slightly into a glossy glaze. Taste and adjust seasoning with additional salt if needed.
Finish and Rest for Juicy Perfection
Return the seared chops to the skillet, bone-side up, and spoon the smoky honey-thyme glaze evenly over the top. Let them cook for 1-2 minutes until the glaze caramelizes slightly and the chops reach 145°F internally. The bone-side should be beautifully glazed with a sticky, aromatic crust.
Transfer the chops to a cutting board and let them rest for 5-10 minutes before serving. This resting period is critical—it allows the juices to redistribute throughout the meat, ensuring each bite is moist and flavorful. Serve the chops with the pan sauce spooned over the top and any accumulated juices from the plate. The result should be tender, juicy pork with a perfect balance of smoky, sweet, and herby flavors.
Pro Tips For Making Pork Loin Rib End Chops Bone In
- Sear Over High Heat: Get that pan screaming hot—like, blue-flame-on-the-gas-stove hot—before adding the chops. I used to hover over the stove adjusting the flame, but these chops need a violent reaction to develop that crust. Two minutes per side, no peeking, or you’ll steam them instead of sear them.
- Salt the Night Before: Toss the chops with salt and let them sit uncovered in the fridge overnight. Sounds weird, but it works: the salt breaks down the proteins just enough to keep them juicy, and the surface dries out slightly for a better crust. (Yes, even if you’re impatient like me.)
- Skip the Crowding: Resist the urge to stack chops in the pan—cook them one layer at a time. I learned this the hard way when my second batch came out soggy because the first layer stole all the heat. Give them space, or you’ll end up with steamed pork instead of crispy edges.
- Finish with Butter: After searing, reduce heat to medium and toss in a pat of cold butter with a pinch of smoked paprika—let it foam and coat the chops. This isn’t just for flavor; the butter adds richness and helps carry those spices straight to your plate. (Your future self will thank you.)
Dietary considerations for these flavors
Gluten-Free Adaptations
Bone-in pork loin rib end chops are naturally gluten-free, but the recipe’s pan sauce requires attention. The smoked paprika and spices in this recipe are typically gluten-free, but always check labels—brands like Penzeys guarantee pure, gluten-free seasonings.
The honey-thyme glaze is safe as long as you avoid cross-contamination with gluten-containing utensils or surfaces. I keep a separate cast-iron skillet reserved for gluten-free cooking to avoid any risk. 🌾
Low-Carb and Keto
This recipe fits seamlessly into low-carb and keto diets, with no added sugars or grains. The honey glaze** can be replaced with 1 tablespoon sugar-free maple syrup (like Lakanto) for a keto-friendly alternative.
The pork fatback and butter provide healthy fats, while the rosemary and thyme add flavor without carbs. For extra richness, serve with a side of sautéed spinach or roasted Brussels sprouts—both are keto-approved and pair beautifully with the chops.
Dairy-Free Options
If you need to avoid dairy, simply replace the 4 tablespoons unsalted butter with an equal amount of olive oil or ghee. Ghee (clarified butter) works well and maintains the recipe’s depth of flavor. The pork fatback and rendered juices still create a rich, savory crust.
For the glaze, use 1 tablespoon coconut aminos instead of apple cider vinegar if you’re avoiding all acidic dairy substitutes, though the vinegar adds a brightness that’s hard to replace. 🥛
Allergen Awareness
This recipe contains pork, which is a common allergen, and dairy from the butter. Always check with guests about allergies before serving. For those avoiding pork, substitute with bone-in lamb chops or beef rib chops, though cooking times and internal temperatures will vary.
I’ve tested this recipe with grass-fed beef and found it works beautifully—just reduce the cook time by 2-3 minutes per side to avoid overcooking.
Protein-Packed Modifications
To boost protein content, serve these chops alongside a side salad with chickpeas or a quinoa pilaf. The chops themselves provide about 30 grams of protein per serving, making them a powerhouse for muscle recovery.
For a heartier meal, add roasted mushrooms or asparagus to the pan during the final glaze step—they absorb the flavors beautifully and add extra nutrients. This approach turns the one-pan method into a complete, protein-rich meal. 💪
Nutrition facts
Frequently asked questions
Why cook bone-in pork loin rib end chops differently than boneless?
The bone adds depth of flavor and moisture as it renders fat during cooking. Bone-in cuts develop a richer crust from the marrow and connective tissue, while boneless chops dry out faster. The rib bone also helps stabilize the shape during searing, preventing curling. For best results, always cook bone-in chops bone-side down first to maximize flavor extraction.
Can I grill these chops instead of pan-searing?
For grilling, preheat to medium-high (400°F) and sear bone-side down for 4-5 minutes until deeply browned. Flip and cook the meat side for 3-4 minutes at 140°F internal. Finish with the honey-thyme glaze on the grill's edge or in a skillet. The smoky grill flavor pairs perfectly with the sweet glaze.
What if my chops are thinner than 1.5 inches?
Thinner chops (under 1 inch) cook faster—aim for 2-3 minutes per side at medium-high heat to reach 145°F internal. Use a meat thermometer to avoid overcooking. For extra tenderness, pound them gently to even thickness before seasoning. The glaze step remains the same, but reduce to 1 minute at the end to prevent drying.
How do I store leftovers to keep them crispy?
Let chops cool completely, then wrap individually in parchment paper (not foil) to preserve texture. Store in an airtight container for 3 days. Reheat in a skillet over medium heat for 2-3 minutes per side, adding a splash of water to restore crispiness. For longer storage, freeze wrapped chops for up to 3 months—thaw overnight in the fridge before reheating.
What's the best way to serve these chops for a dinner party?
Pair with a bright apple slaw or roasted sweet potatoes** to balance the richness. For drinks, a crisp Sauvignon Blanc or dry Riesling complements the smoky-sweet flavors. Garnish plates with fresh thyme sprigs and serve with extra pan sauce on the side. The bone-in presentation makes it feel special without extra effort!