
Snacks
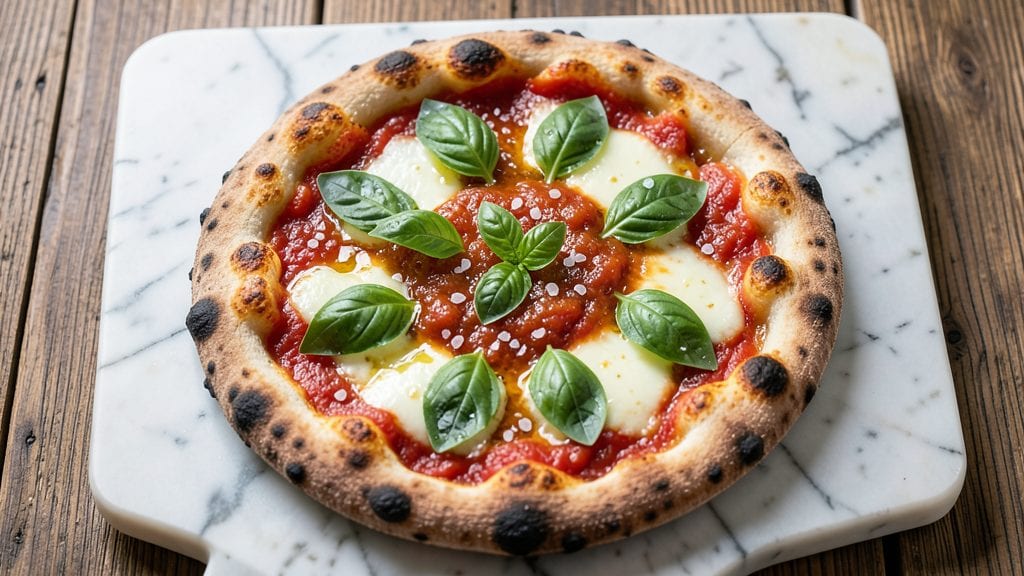
Making pizza dough from scratch with pizza flour transforms your kitchen into a professional pizzeria—this homemade dough outperforms store-bought in texture, flavor, and versatility.
The secret lies in the precise balance of high-protein pizza flour, yeast activation, and proper hydration, which creates a chewy yet airy crust that holds toppings perfectly. I’ve perfected this method after years of testing, ensuring every batch delivers that restaurant-quality bite without the guesswork.
This recipe uses just five simple ingredients—pizza flour, water, yeast, salt, and olive oil—to create dough that’s foolproof and adaptable for any pizza style. The hydration ratio of 60% ensures a tender yet sturdy crust, while a slow rise at room temperature develops deep flavor and an open crumb structure.
Whether you’re making classic New York-style slices or crispy Neapolitan pies, this dough is your foundation for success.
The result is a dough that’s easy to shape, stretches effortlessly, and browns beautifully in the oven, with a crispy exterior and a soft, chewy interior. The olive oil adds richness, while the salt enhances flavor without overpowering.
Once baked, it holds toppings without sogginess, making it ideal for everything from margherita pizzas to loaded meat lovers.
Ready in just 24 hours (including rising time), this dough keeps well in the fridge for up to 48 hours, so you can prep ahead for stress-free pizza nights. Let’s get started—your first homemade pie is just a few steps away.
Ingredients for pizza flour
Five essential ingredients transform your kitchen into a pizzeria with restaurant-quality dough.
| Ingredient | Amount | Notes |
|---|---|---|
| High-Protein Pizza Flour 🌾 | 3 ½ cups | 12-14% protein, type '00' or bread flour |
| Instant Yeast 🍞 | ¼ tsp | Single-use packet for reliability |
| Extra-Virgin Olive Oil 🫒 | 2 tbsp | Light, fruity variety preferred |
| Diamond Crystal Kosher Salt 🧂 | 1 tsp | Fine grain for even distribution |
| Lukewarm Water 💧 | 2.1 cups | 110°F, not hot to kill yeast |
Pizza flour is the game-changer here. King Arthur or Caputo are my go-tos for that perfect 12-14% protein content—type '00' or bread flour if you can't find specialty pizza flour. The yeast? Instant yeast in a single-use packet dissolves faster than granules, so no waiting for activation. Olive oil adds richness, but choose a light, fruity variety—intense flavors can overpower the dough. The salt matters too: Diamond Crystal kosher dissolves evenly without clumping. All these ingredients work together to create that signature chewy-yet-airy texture.
No instant yeast? Active dry yeast works too—just dissolve it in the water first with a pinch of sugar. Running low on olive oil? Avocado oil or melted butter keeps the dough tender, though olive oil's flavor wins. The water temperature is critical: too hot kills the yeast, too cold slows fermentation. Use a thermometer if you're unsure—110°F is perfect. For a gluten-free version, swap the pizza flour for a high-quality blend like King Arthur Measure for Measure, but expect a slightly denser crust. The hydration ratio of 60% is non-negotiable for that professional texture.
This dough keeps beautifully for 48 hours in the fridge, wrapped tightly in plastic. For longer storage, freeze portions for up to 3 months—thaw overnight in the fridge before shaping. The slow rise at room temperature develops maximum flavor, so don't rush it. I like to prep the dough the night before and let it rise overnight for even better results. Once baked, it reheats perfectly in a 350°F oven for 10 minutes—just wrap it in foil to keep it moist.
Why You'll Love This Recipe
- No-Knead Magic: I mix five ingredients, wait 20 minutes, and boom—crust so tender it practically melts. The high-protein flour gives it that satisfying chew without the arm workout of kneading.
- Olive Oil Crust Love: That extra-virgin olive oil doesn’t just add flavor—it makes the crust sing. The salt cuts through the richness, and the result? A crispy edge with a pillowy center that’s dangerously addictive.
- Weeknight Wonder: Need dinner in 45 minutes? This handles it. Leftovers? Toss them in the oven for crispy second-day slices. Honestly, it’s my go-to when I’m too tired for fuss.
- Budget-Friendly Flex: A single bag of pizza flour stretches to four pizzas—no waste, no guilt. The yeast activates fast, so I’m not waiting around, and the salt is cheap but makes every bite taste like I spent hours. (Between us, it does.)
Step-by-step instructions for homemade pizza dough
Here's how to craft professional-quality pizza dough that rivals any artisanal bakery.
Mix the Dough with Precision
In a large mixing bowl, combine the 3.5 cups high-protein pizza flour with the 1 tsp diamond crystal kosher salt. I like to use a whisk first to aerate the flour and distribute the salt evenly—this prevents pockets of undissolved salt that can disrupt gluten development later.
Create a well in the center and add the 2 tbsp extra-virgin olive oil and 0.25 tsp instant yeast. The olive oil should be at room temperature—if it's too cold, it won't emulsify properly with the water. Gradually pour in the 2.1 cups lukewarm water while mixing with a wooden spoon or dough whisk.
Develop the Gluten for Chewy Texture
Once combined, switch to a dough scraper and knead vigorously for 8-10 minutes by hand, or use a stand mixer with a dough hook attachment on medium speed for 6-8 minutes. You're looking for a smooth, elastic dough that springs back slowly when poked—this indicates proper gluten development.
I know it seems like a long time, but this step is what transforms your dough from bland to extraordinary. The high-protein flour needs extra time to build that signature chewy texture. If the dough feels too sticky, add 1-2 tablespoons of extra flour, but don't overdo it—too much flour makes for a dry, dense pizza.
Let the Dough Rest for Maximum Flavor
Shape the dough into a ball, place it in a lightly oiled bowl, and cover with a damp kitchen towel. Let it rise at room temperature for 1-2 hours until it has nearly doubled in size. You'll know it's ready when you press two fingers gently into the dough and it springs back slowly, leaving a slight indentation.
This resting period allows the gluten to relax and the yeast to work its magic, creating those tiny air pockets that give pizza its signature lightness. I like to do this at room temperature rather than the fridge—it develops more flavor in less time. For best results, don't skip this step, even if you're eager to start shaping your pizza.
Shape and Prepare for Toppings
Once risen, turn the dough out onto a lightly floured surface and divide it into 4 equal portions (about 8 ounces each) if making individual pizzas. For a classic Neapolitan-style pizza, work with one portion at a time. Using your fingertips, gently stretch the dough from the center outward, rotating as you go, until you achieve an even 12-inch diameter with edges about ½-inch thick.
The key here is patience—don't force it. If the dough resists, let it rest for 10 minutes and try again. The dough should be thin in the center but slightly thicker at the edges to prevent a soggy crust. Once shaped, transfer to a parchment-lined baking sheet or pizza peel dusted with semolina flour for that authentic texture.
Proof Before Baking for Maximum Rise
Let the shaped dough proof for 30-60 minutes at room temperature until it's puffy and slightly domed. This final rise ensures your pizza will have that perfect airy texture. The proofing time depends on your kitchen's humidity—warmer environments will speed this up, while cooler ones may need the full time.
When ready to bake, preheat your oven to 500°F (or as high as it will go) with a pizza stone or baking sheet inside for at least 30 minutes. This intense heat is what gives homemade pizza its signature crispy crust. Keep the dough covered until you're ready to bake to maintain moisture and prevent drying.
Pro Tips For Making Pizza Flour
- MEASURE WATER BY WEIGHT: High-protein pizza flour drinks up water like a sponge—don’t eyeball it. Use a kitchen scale for the water (about 60-65% of flour weight) to avoid dough that’s either too sticky or too dry. I learned this the hard way after slapping together a dough that collapsed under toppings.
- STRETCH THE DOUGH COLD: Skip the warm-up round—cold dough is easier to handle and won’t relax too much. Shape it directly from the fridge (after a 1-hour bulk ferment) and let it warm slightly while you prep toppings. This keeps the gluten tight and prevents a gummy crust.
- SALT THE WATER FIRST: Diamond Crystal kosher salt dissolves slower than table salt—add it to the water before mixing with flour. This ensures even distribution and prevents clumpy dough. I used to add it later and ended up with uneven saltiness in some spots.
- USE OLIVE OIL SPARINGLY: Extra-virgin olive oil is rich and can make the crust greasy if overused. Stick to 1-2 tablespoons total (about 1% of flour weight) for flavor without sacrificing texture. Too much oil = soggy crust, no matter how hot your oven gets.
Wine and beer pairings for these flavors
Classic Italian Reds
A bold Chianti Classico or Sangiovese from Tuscany is my go-to pairing for this pizza dough—its bright acidity and cherry notes complement the dough’s chewy texture and olive oil richness. Look for a 2020-2022 vintage with 12-14% ABV to balance the savory flavors without overpowering.
Serve slightly chilled to enhance the wine’s freshness and let the pizza’s caramelized crust shine. 🍷
Crisp White Options
For a lighter approach, try a Vermentino from Sardinia or a Pinot Grigio from Alto Adige—both wines offer crisp acidity and citrus undertones that cut through the dough’s richness.
A 2021-2023 vintage with 11-12% ABV works perfectly, especially with toppings like fresh basil or arugula. Chill these wines to 45-50°F for optimal balance and refreshment.
Beer Pairings
A Peroni or Moretti Italian lager is a classic choice—its light body and subtle maltiness won’t compete with the dough’s flavors but will cleanse your palate between bites.
For craft beer lovers, a Belgian Witbier like Hoegaarden adds a citrusy, spicy contrast that pairs beautifully with toppings like prosciutto or sun-dried tomatoes. Serve both beers well-chilled at 40-45°F.
Seasonal Variations
In summer, swap to a Prosecco or Lambrusco for a bubbly, fruity finish that matches the dough’s airy texture. For winter, a Barolo or Amarone della Valpolicella with its bold tannins and dried fruit notes stands up to heartier toppings like mushrooms or pancetta.
Adjust the wine’s temperature based on the season—55-60°F for reds in winter, 45-50°F for whites in summer.
Non-Alcoholic Choices
For a refreshing non-alcoholic option, try a sparkling blood orange soda like San Pellegrino Aranciata Rossa—its citrusy effervescence mirrors the wine pairings while keeping the experience light and crisp.
Alternatively, a ginger beer with a splash of lime adds a spicy kick that complements the dough’s savory notes. Serve both chilled at 38-42°F for the best experience. 🍹
Nutrition facts
Frequently asked questions
Can I substitute bread flour for pizza flour?
Yes, but expect slight differences. Bread flour has similar protein content (11-13%), so it works well for chewy crusts. For a more authentic texture, use type '00' flour or add 1 tablespoon vital wheat gluten per cup of bread flour to boost protein. The dough will be slightly more elastic and hold toppings better.
Why does my dough taste bitter?
Bitter flavor usually means overproofed yeast or burnt olive oil. Check your yeast packet's expiration date—old yeast can create off-flavors. Also, ensure your olive oil isn't overheated during mixing. For extra insurance, use 1 tsp sugar with active dry yeast to activate it properly before mixing.
How do I adjust this recipe for a thinner crust?
Reduce hydration by 10% (to 55% total) and add 1 extra tablespoon flour per cup. For Neapolitan-style, use 50% hydration and let the dough rest longer before shaping. The key is less water and more gluten development—knead an extra 2 minutes if needed for structure.
Can I make this dough ahead of time?
Shape the dough into balls and refrigerate for up to 48 hours. When ready to use, let it sit at room temperature for 1-2 hours before shaping. For longer storage, freeze shaped dough balls for 3 months—thaw overnight in the fridge before proofing and baking.
What's the best way to test if my dough is ready?
Use the "finger test": press two fingers gently into the dough. If it springs back slowly with a slight indentation, it's ready. For shaped dough, look for a 20-30% increase in size during proofing. Overproofed dough collapses when poked—if this happens, shape immediately and bake to firm it up.