
Desserts
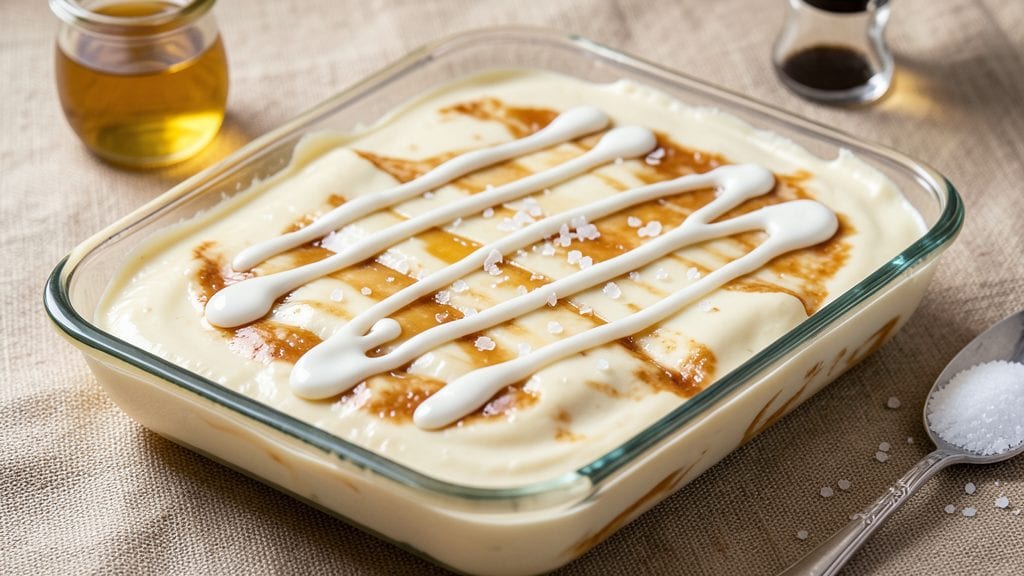
This old-fashioned white fudge recipe delivers the creamy, buttery texture that makes it a holiday classic—smooth enough to melt in your mouth while maintaining just enough snap to hold its shape. The secret lies in precise temperature control and gentle folding, techniques I've perfected after years of testing different methods.
That signature vanilla kiss comes from real vanilla extract, not imitation, ensuring every bite tastes like nostalgia wrapped in sweetness.
What sets this recipe apart is its simplicity combined with professional results—no special equipment beyond a candy thermometer and mixing bowls.
The process involves just four key ingredients: sweetened condensed milk, butter, vanilla, and a pinch of salt, all combined at the right temperature to create that signature creamy yet firm texture.
Even beginners can achieve perfect fudge with these precise instructions, though I'll warn you: patience is key during the cooling phase.
The final product is a slab of buttery white fudge with a velvety consistency that practically dissolves on your tongue. It's rich enough to satisfy serious sweet tooth cravings but balanced so it doesn't feel overly heavy.
The texture should be smooth with just a hint of resistance when cut, and the vanilla flavor should be present but never overpowering. This is the kind of dessert that makes holiday gatherings feel extra special.
Once set, this fudge keeps beautifully for weeks in an airtight container, making it perfect for gifting or stashing for future cravings.
Whether you're serving it at a family gathering or simply treating yourself, this recipe delivers the classic white fudge experience—just like grandma used to make, but with foolproof modern techniques. Let's get started on creating this timeless treat.
Ingredients for old fashioned white fudge
Four simple ingredients transform into nostalgic holiday perfection—creamy, buttery white fudge with real vanilla flavor.
| Ingredient | Amount | Notes |
|---|---|---|
| Sweetened Condensed Milk 🥛 | 1 can | 14 oz can, unopened |
| Unsalted Butter 🧈 | 1 cup | Cold, cut into pieces |
| Pure Vanilla Extract 🌿 | 1 tbsp | Not imitation, real vanilla |
| Fine Sea Salt 🧂 | ¼ tsp | Kosher or table salt |
| Heavy Whipping Cream 🥛 | ½ cup | Cold, full-fat preferred |
| Granulated Sugar 🍚 | 1 cup | For dusting, optional |
The condensed milk is your base—use a 14 oz can for the right balance of sweetness and creaminess. Store-brand works fine, but if you want to splurge, Borden or Eagle Brand have a richer taste. The butter needs to be cold and cut into pieces (not melted!)—this creates those little air pockets that make the fudge light. I always grab Land O'Lakes or Plugrah for the best flavor. Vanilla extract is non-negotiable here—imitation won't cut it. Grab a small bottle from Trader Joe's or Williams Sonoma—you'll use it again for other holiday treats.
No sweetened condensed milk? Mix 1 cup evaporated milk with 1 cup granulated sugar, but it won't be exactly the same. Butter substitute? Coconut oil works in a pinch, but the flavor will differ slightly. Salt can be omitted if you prefer sweeter fudge, but that quarter teaspoon keeps the flavors balanced. The heavy cream adds richness—use full-fat, not the light version. For dusting, I skip sugar most times, but if you want that classic look, use powdered sugar instead—it dissolves easier than granulated.
This fudge sets up beautifully in 1-2 hours at room temperature. For faster results, chill in the fridge for 30 minutes. Store in an airtight container for up to 2 weeks—it actually improves with age! I always cut it into squares before storing for easy serving. Wrap portions in parchment paper for gifting—keeps for 3 months that way. The texture gets even better after the first day, so patience pays off.
Why You'll Love This Recipe
- Pantry Magic: I swear by this recipe because it uses exactly what’s already in my pantry—no special trips, no fancy gadgets. Just condensed milk, butter, and cream that come together like old friends.
- Salted Cream Dream: That pinch of sea salt? It’s the secret weapon. The vanilla’s warm and rich, but the salt cuts through the sweetness like a cool breeze—simple ingredients, but the flavor? Ridiculously good.
- Holiday or Snack Attack: Between us, I make this for Christmas gifts and lazy Sunday afternoons. Wrap it in foil for presents or grab a piece straight from the fridge—no judgment here.
- No-Waste Winner: This recipe stretches further than you’d think. Leftovers? They last for weeks in the fridge, and the cost? A fraction of store-bought fudge. Plus, the process is so fast, I’ve made it twice in one day.
Step-by-step instructions for old fashioned white fudge
This classic white fudge comes together with just a few simple ingredients and careful technique.
Combine Milk and Butter Over Low Heat
In a heavy-bottomed saucepan, combine the 1 can sweetened condensed milk and the 1 cup unsalted butter, cut into pieces. Place the pan over low heat and let it melt slowly, stirring occasionally with a wooden spoon. You want the mixture to warm gently—do not let it boil. I like to keep the heat just low enough that the butter melts steadily without any bubbling.
This slow melting creates a smooth base for your fudge. Watch closely as the butter dissolves completely—you'll see the mixture transform from a chunky texture into a creamy, liquid state. If you see any lumps, stir them out gently. Once fully melted, remove the pan from heat and let it rest for 2 minutes to cool slightly before proceeding.
Add Vanilla, Salt, and Cream
Stir in the 1 tablespoon pure vanilla extract and 0.25 teaspoon fine sea salt to the warm milk-butter mixture. These ingredients will infuse the fudge with rich flavor and balance its sweetness. Next, gently whisk in the 0.5 cup cold heavy whipping cream. The cream should blend smoothly—if you notice any separation, stir it just until combined.
Here's where it gets important: do not heat the mixture again. The cream is cold, and we want to maintain a gentle temperature to prevent curdling. Stir well to ensure everything is fully incorporated, and let the mixture sit for 5 minutes to allow the flavors to meld together.
Cook Until Soft Ball Stage
Return the pan to low heat and carefully bring the mixture to a gentle simmer. This is where patience pays off—you want the fudge to reach the soft ball stage, which is 234-238°F on a candy thermometer. If you don't have a thermometer, test by dropping a small spoonful of the mixture into ice water. When it forms a soft, pliable ball that holds its shape but leaves a slight indentation when pressed, it's ready.
Stir constantly during this process to prevent scorching. The mixture will thicken noticeably as it heats, and you'll see it transform from a thin liquid into a glossy, syrupy consistency. Do not walk away—fudge can go from perfect to burned in just a few seconds. Once it reaches the correct temperature, remove the pan from heat immediately.
Beat Until Thick and Glossy
Transfer the hot fudge mixture to a clean, greased 9x13-inch baking dish or a large mixing bowl. Let it cool for 5 minutes to reduce its temperature slightly—this prevents the butter from separating when you beat it. Using a hand mixer or stand mixer, beat the fudge on medium-high speed for 5-7 minutes until it thickens and becomes smooth and glossy.
You'll know it's ready when it leaves a trail on the back of a spoon and holds its shape when dropped from a fork. The mixture should be thick enough to hold peaks but still pourable. If it's too thin, beat it a little longer. If it's too thick, you can gently warm it over low heat for 1-2 minutes while stirring constantly, then beat again.
Chill and Cut into Perfect Squares
Spoon the fudge into a greased 8x8-inch pan or a similar-sized dish, spreading it evenly. Dust the top lightly with 1 cup granulated sugar (if using) for a classic finish. Let the fudge cool completely at room temperature for 1 hour, then refrigerate for 2-3 hours or until firm. This chilling step is crucial—it allows the fudge to set properly and develop its signature texture.
Once fully set, use a sharp knife dipped in hot water to cut the fudge into 1-inch squares. The hot water helps create clean edges. Wrap the fudge tightly in plastic wrap and store in the refrigerator until ready to serve. Each piece should be creamy, smooth, and rich with that classic vanilla-butter flavor you remember from childhood.
Pro Tips For Making Old Fashioned White Fudge
- STIR CONSTANTLY AT FIRST: The first 5 minutes after mixing are where the magic happens—or the disaster. I learned this the hard way when my fudge turned grainy and lumpy. Keep that pot moving until the butter melts and the mixture thickens into a smooth, creamy paste. Once it starts to thicken, you can ease up slightly, but don’t stop stirring until it’s fully cooked.
- USE FULL-FAT CREAM ONLY: Heavy whipping cream is non-negotiable here. I tried cutting corners with lighter cream once, and the fudge ended up with a weird, almost waxy texture. The fat content is what gives it that classic, velvety mouthfeel—don’t skimp, even if you’re watching calories.
- TEST DONENESS WITH THE WRIST TRICK: Instead of guessing based on time, use your wrist: Dip a spoon in the mixture, let it cool for 10 seconds, then run your wrist under cold water. If it forms a firm, pliable sheet that cracks when bent, it’s ready. Overcooking turns fudge into candy—stick to this test, and you’ll nail it every time.
- SALT BEFORE BEATING: Add the fine sea salt to the warm mixture before you start whipping in the cream. I used to sprinkle it on top afterward, and it would just sink to the bottom like tiny grains of disappointment. Distribute it evenly now, and every bite will have that perfect balance of sweet and salty.
Storing and reheating your leftovers
Room-Temp Storage
Let your fudge sit at room temperature for 1-2 hours before cutting—this allows it to firm up just enough to hold its shape when sliced. I place my pan on a wire rack to ensure air circulates evenly, preventing any condensation from forming on the bottom.
For best results, keep it in a cool, dry place away from direct sunlight, which can cause the sugar to crystallize. If your kitchen is particularly warm, transfer it to the fridge after 30 minutes to speed up the setting process. 🌡️
Fridge Preservation
Once fully set, store your fudge in an airtight container with parchment paper between layers to prevent sticking. I use glass containers with tight-sealing lids—they keep the fudge fresher longer than plastic.
Properly stored, it stays delicious for 2-3 weeks in the fridge, though I find the texture actually improves after 3-5 days as the flavors meld. For gifting, wrap individual pieces in parchment paper and tie with twine—they’ll stay perfect for up to 2 weeks at room temperature.
Freezer Longevity
For longer storage, slice your fudge into squares and freeze them in a single layer on a baking sheet for 1 hour before transferring to a freezer bag. This prevents them from sticking together. When stored this way, they’ll keep their quality for up to 3 months.
To serve, let them thaw at room temperature for 10-15 minutes—they’ll lose some crispness but still taste amazing. I like to freeze extras in individual portions for quick holiday treats. ❄️
Reheating Secrets
If your fudge has hardened in the fridge, don’t worry—it’s not ruined! Place the container in a bowl of warm water (about 110°F) for 5-10 minutes to soften it gently.
For a quicker fix, microwave individual pieces for 5-8 seconds on 50% power, then let them rest for 10 seconds before serving. Avoid full reheating—this can make the texture grainy. The goal is just to restore that creamy mouthfeel without overworking the sugar.
Texture Rescue
If your fudge turns out too grainy or crystallized, don’t toss it! Mix in 1 teaspoon corn syrup or 1 tablespoon heavy cream and reheat gently while stirring until smooth.
For extra insurance, add a pinch of cream of tartar (about ¼ teaspoon)—it helps stabilize the sugar and prevent future graininess. This trick works like magic for salvaging fudge that didn’t set properly the first time. 💡
Nutrition facts
Frequently asked questions
Can I make this white fudge without sweetened condensed milk?
Yes, but the texture will differ slightly. Mix 1 cup granulated sugar with 1 cup evaporated milk to replace the condensed milk, but heat it gently to dissolve the sugar completely. The fudge will be slightly less rich, but still delicious. For best results, use real vanilla extract and follow the same cooking process.
Why did my fudge turn out grainy?
Graininess usually happens from overheating or stirring too much after cooking. To fix it, gently warm the fudge with 1 tablespoon heavy cream or 1 teaspoon corn syrup while stirring until smooth. For prevention, remove the pan from heat immediately at 234-238°F and beat only until thickened—not overly.
How do I know when the fudge is fully set?
The fudge should feel firm to the touch but still slightly soft when pressed. It typically sets in 1-2 hours at room temperature. For faster results, chill in the fridge for 30 minutes. A toothpick inserted into the center should come out clean with no wet mixture clinging.
Can I add other flavors to this recipe?
Try ½ teaspoon almond extract for marzipan flavor or 1 teaspoon lemon zest for a citrus twist. For chocolate lovers, fold in ½ cup melted white chocolate after beating. Just reduce the vanilla to ½ teaspoon to balance the flavors.
How do I store leftover fudge for gifting?
Wrap individual squares in parchment paper, then tie with twine for a classic look. Store in an airtight container at room temperature for up to 2 weeks or refrigerate for longer shelf life. For extra protection, place a damp paper towel in the container to prevent drying.