
Main Courses
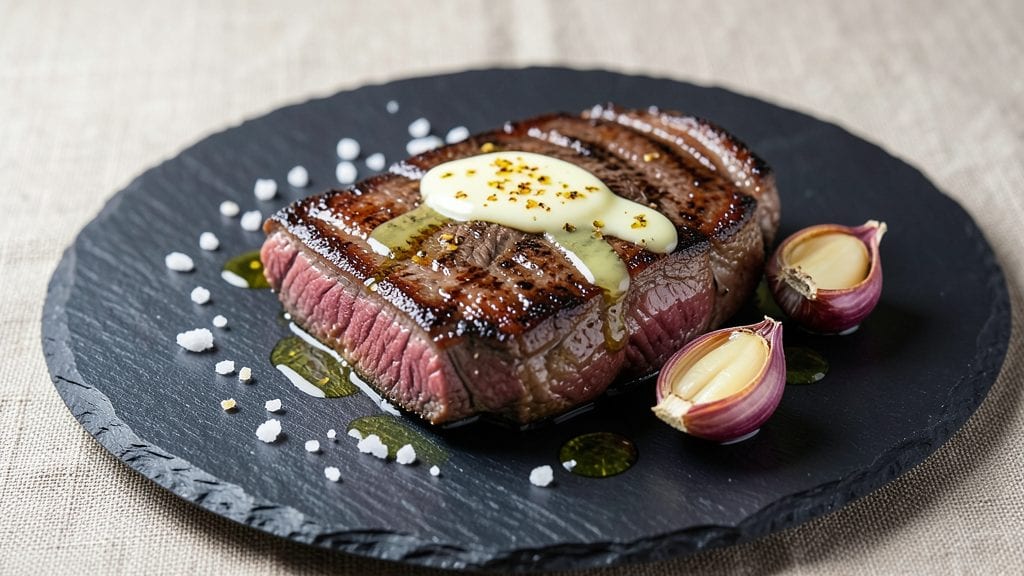
Cooking a dry aged New York strip steak transforms an ordinary dinner into a culinary experience that rivals high-end steakhouses. The secret lies in achieving that perfect buttery crust while preserving a tender, juicy interior—something I’ve perfected after years of testing different techniques.
This method delivers restaurant-quality results in just 20 minutes, ensuring every bite is packed with deep, complex flavors.
The process begins with a high-heat sear to lock in those rich, caramelized flavors, followed by a precise internal temperature check to guarantee a perfectly pink center.
Dry-aged beef already offers intense umami depth, but the key to elevating it further is controlling the heat and resting the steak properly. I’ll walk you through each step—from seasoning to plating—to ensure your steak comes out with a crispy crust and melt-in-your-mouth tenderness.
What sets this recipe apart is the balance of simplicity and precision—no complicated equipment or lengthy prep. A cast-iron skillet and a reliable meat thermometer are all you need to achieve professional results at home.
The dry aging process enhances the beef’s natural flavors, so the focus shifts to technique: how long to sear, when to flip, and how to rest the steak for maximum juiciness.
Pair this steak with a bold red wine reduction or a side of roasted garlic mashed potatoes to complete the meal. The rich, buttery crust and deep beefy flavor make it ideal for special occasions or when you want to impress without spending hours in the kitchen.
Let’s get started on creating the perfect steak.
Ingredients for dry aged new york strip steak
Fourteen ingredients, twenty minutes, restaurant-quality dry aged New York strip steak.
| Ingredient | Amount | Notes |
|---|---|---|
| Dry Aged New York Strip Steak 🥩 | 1 ½ lb | Center-cut, 1.5-inch thick |
| Kosher Salt 🧂 | 1 ½ tsp | Diamond Crystal preferred |
| Freshly Ground Black Pepper 🌶️ | 1 tsp | Cracked peppercorns preferred |
| Unsalted Butter 🧈 | 4 tbsp | European-style, cold and cubed |
| Extra-Virgin Olive Oil 🫒 | 2 tbsp | High smoke point preferred |
| Garlic Cloves 🧄 | 4 cloves | Smashed, skin-on |
| Fresh Rosemary 🌿 | ¼ cup | Needles finely chopped |
| Fresh Thyme 🌿 | ⅛ cup | Leaves only, chopped |
| Heavy Cream 🥛 | ½ cup | Full-fat for richness |
| Red Wine 🍷 | ¼ cup | Cabernet Sauvignon, dry |
| Beef Tallow or Duck Fat 🧈 | 2 tbsp | For extra crust development |
| Bone Marrow (optional) 🦴 | 1 piece | For serving enhancement |
The steak is non-negotiable here. Dry aged New York strips from a reputable butcher—like Snake River Farms or your local specialty shop—deliver unmatched depth. Look for 1.5-inch thick center cuts with visible marbling. If you can't find dry aged, wet aged for 30 days is the next best thing. The European-style unsalted butter (Plugrá or Kerrygold) is key for that buttery crust—don't substitute regular butter. For the fat, beef tallow adds incredible richness, but duck fat works too if you're in a pinch. The Diamond Crystal kosher salt
No red wine? Dry sherry or beef stock works in a bind, but the acidity is different. Short on fresh herbs? Dried rosemary and thyme at half the amount will work, but fresh is worth the effort. The garlic should be smashed, not minced—it releases more flavor when it fries in the fat. For the butter, cold cubes create better crust than melted butter. If you're feeling fancy, add a piece of bone marrow to the pan when you sear—the rendered marrow adds incredible depth to the steak's surface. And trust me on the heavy cream—full-fat makes all the difference in the reduction. Steaks should rest 10-15 minutes before slicing—this keeps them juicy. The butter and garlic mixture can be made ahead and stored in the fridge for 3 days, or frozen for 1 month. The red wine reduction keeps for 5 days in the fridge, but it's even better the next day as the flavors meld. If you're serving a crowd, double the steaks and prep everything in advance. The cast-iron skillet is non-negotiable—it retains heat perfectly for that perfect crust.
Why You'll Love This Recipe
- Five-Ingredient Magic: The pantry already has everything—no fancy gadgets, no last-minute grocery runs. Just that perfect steak, a pinch of salt, a crack of pepper, and a pat of butter. I swear, it’s the kind of dinner where you feel like a chef without the stress.
- Deep Umami Crunch: That dry-aged richness? It’s like the steak whispers secrets to your taste buds. The crust from the olive oil and butter seals in the flavor, while the pepper adds a sharp little bite that makes every bite feel like a reward.
- Date Night or Lazy Sunday: Same recipe, two vibes. Dress it up with a glass of red for a fancy night in, or serve it with crusty bread for a no-fuss weekend meal. Honestly, it’s the steak that does all the work—you just get to enjoy the results.
- Leftovers That Don’t Suck: Cold slices the next day? Still incredible—tender, flavorful, and perfect for sandwiches or salads. Between us, I’ve reheated mine in a cast-iron skillet with a splash of olive oil, and it’s just as good as day one. No sad, dry steak here.
Step-by-step instructions for dry aged New York strip steak
Here's how to transform that precious dry aged strip into a restaurant-quality masterpiece with perfect crust and melt-in-your-mouth tenderness.
Season and Rest the Steak for Maximum Flavor
Take the 1.5 lb dry aged New York strip steak out of the refrigerator and pat it completely dry with paper towels - this is absolutely critical for that perfect crust. Season both sides generously with 1.5 tsp kosher salt and 1 tsp freshly ground black pepper, pressing the seasoning into the meat so it adheres well. Let the steak rest at room temperature for 30 minutes while you prepare everything else.
This resting period ensures even cooking throughout. I like to place the steak on a wire rack set over a plate to catch any drippings, which we'll use later for flavor. The dry aging process has already concentrated those deep beefy flavors, so we're just enhancing them now with proper seasoning and temperature control.
Create the Perfect Searing Environment
Heat a heavy cast iron skillet over high heat until it's screaming hot - you should see a thin layer of steam evaporating when you sprinkle a few drops of water. Add 2 tbsp extra-virgin olive oil and 2 tbsp beef tallow or duck fat, letting them shimmer but not smoke. The combination of olive oil and animal fat gives us both flavor and the high smoke point needed for that perfect crust.
While the pan heats, prepare your aromatics by finely chopping the 0.25 cup fresh rosemary and 0.125 cup fresh thyme leaves. Keep these nearby - we'll add them just before the steak goes in. The high heat is essential here; if your pan isn't properly heated, you'll end up with steamed steak instead of seared perfection.
Sear to Develop Crust and Build Flavor
Place the steak in the hot pan and let it sit undisturbed for 2 minutes - this is where that beautiful crust begins to form. Press down gently on the steak during the first minute to prevent curling. After 2 minutes, carefully flip the steak and sear the other side for another 2 minutes. Now add the 4 smashed garlic cloves and the chopped herbs to the pan.
You'll notice the aromatics start to sizzle immediately - this is when they release their oils and infuse the steak with their flavors. The crust should be deep golden brown with some caramelization starting. If you see smoke, your heat is too high - reduce it slightly. The steak should release easily from the pan when ready to flip.
Baste and Finish with Butter and Wine
Reduce heat to medium-high and add the 4 tbsp cold cubed unsalted butter to the pan. As the butter melts, spoon it over the steak repeatedly for 1-2 minutes - this basting creates that luxurious buttery crust we're after. After about 30 seconds, pour in the 0.25 cup red wine, scraping up any browned bits from the bottom of the pan with a wooden spoon.
The wine will bubble vigorously - let it reduce by about half before removing the steak from the pan. The steak should reach an internal temperature of 125°F for medium-rare (use a meat thermometer to check). Transfer the steak to a warm plate and tent loosely with foil. Let it rest for 10 minutes - this crucial step allows the juices to redistribute throughout the meat.
Prepare the Cream Sauce and Serve
Return the skillet to medium heat and add the 0.5 cup heavy cream, scraping up any remaining browned bits. Let the sauce simmer gently for 2-3 minutes until it thickens slightly. Season with additional salt and pepper if needed - the sauce should coat the back of a spoon but still be silky smooth.
Slice the steak against the grain into 0.5-inch thick portions. To serve, spoon the cream sauce over each portion and garnish with any remaining herbs. If using the optional bone marrow, roast it separately at 400°F for 15 minutes and serve on the side for dipping. The steak should be perfectly pink in the center with a beautiful crust, and the sauce should cling beautifully to each slice.
Pro Tips For Making Dry Aged New York Strip Steak
- Salt Before Chilling: Dry-aged steak already has deep flavor, but a light coat of kosher salt before refrigerating (even just 30 minutes ahead) lets it absorb moisture and develop a better crust later. I used to skip this—now I swear by it for that perfect sear.
- Start with Olive Oil: Heat your pan until it’s smoking hot, then add a thin layer of extra-virgin olive oil first—it creates a better crust than butter alone. The butter comes in later for richness, but the oil locks in those dry-aged flavors from the jump.
- Don’t Overcrowd the Pan: One steak at a time, or you’ll steam it instead of sear it. I’ve ruined a perfect dry-aged strip by cramming two in—now I wait for the first to develop a crust before adding the second.
- Rest Under Foil: After cooking, tent the steak loosely with foil for the first 5 minutes of resting. The crust stays intact while the inside finishes redistributing juices—no more dry edges or lost flavor. (Yes, even if you’re impatient like me.)
Storing and reheating this dish
Refrigerator Storage
If you're not serving your dry aged New York strip steak immediately, store it properly to maintain its quality. Wrap the steak tightly in plastic wrap or place it in a ziplock bag with excess air removed.
I recommend storing it on the bottom shelf of your refrigerator where the temperature is most consistent. The steak will stay fresh for up to 3 days this way, though I always aim to cook it within 24 hours for peak tenderness. 🥩
Freezer Prep
For longer storage, freeze the steak in its original packaging or vacuum-sealed bag. Label with the date and freeze for up to 3 months. When ready to cook, thaw it in the refrigerator overnight—never at room temperature.
I like to use the cold water thaw method for a 2-hour thaw, but always pat it completely dry before seasoning to ensure that perfect crust. 🧊
Reheating Leftovers
If you have leftovers (which I rarely do with this steak!), reheating requires care. Slice the steak into ½-inch portions and warm in a cast-iron skillet over medium-low heat for 2-3 minutes per side with a splash of beef broth.
Avoid microwaving—it destroys the texture. For best results, reheat only what you plan to eat immediately. 🔥
Butter and Sauce Storage
The garlic-herb butter mixture can be stored in an airtight container in the fridge for 3 days or frozen for 1 month. The red wine reduction keeps for 5 days in the fridge, but it's even better the next day as flavors meld.
I like to reheat the sauce gently on the stove before serving to restore its silky texture. 🍷
Resting After Storage
If your steak has been refrigerated or frozen, always let it sit at room temperature for 30 minutes before cooking. This ensures even heating and prevents cold spots. I also recommend seasoning it just before cooking—this helps create that perfect crust.
Never skip the rest after cooking either; let it rest for 10 minutes before slicing to lock in juices. ⏳
Equipment Essentials
Your cast-iron skillet is non-negotiable for reheating—it maintains even heat distribution. For storage, use vacuum-sealed bags or heavy-duty plastic wrap to prevent freezer burn. A meat thermometer is also crucial to ensure safe reheating temperatures of 165°F.
I keep all my steak tools in a dedicated drawer for easy access. 🔧
Nutrition facts
Frequently asked questions
What's the difference between dry aged and regular New York strip steak?
Dry aged beef undergoes a 28-45 day aging process where it's exposed to air in controlled conditions, creating a concentrated, deeper flavor with a firmer texture. Regular steak lacks this complexity—it's more tender but milder. The dry aging process enhances the beef's natural umami and reduces fat, making it ideal for high-heat cooking methods like searing.
How do I know when my dry aged steak is perfectly cooked?
Use a meat thermometer for precision: 125°F for medium-rare (recommended), 135°F for medium, or 145°F for medium-well. For perfect results, let the steak rest for 10-15 minutes after cooking—this redistributes juices and ensures a juicy bite every time. Never rely on visual cues alone, as dry aged beef can vary in thickness.
Can I use a different cut of dry aged beef for this recipe?
While this recipe is optimized for New York strip, you can adapt it for other dry aged cuts like ribeye or filet mignon. Ribeye benefits from the extra fat and marbling, while filet needs slightly lower heat (medium-high) to avoid overcooking. Adjust resting times—thicker cuts (like ribeye) may need 15 minutes to rest. The butter basting technique works universally for all dry aged steaks.
Why does my dry aged steak turn out tough instead of tender?
Overcooking is the #1 culprit—dry aged beef loses moisture faster than regular steak. Always cook to 125°F-135°F internal temp and rest 10+ minutes. Other mistakes: skipping the 30-minute room temp rest before cooking, or using a pan that's not hot enough. A cast-iron skillet is non-negotiable for even heat distribution. For extra tenderness, pat the steak very dry before seasoning.
What's the best way to reheat leftover dry aged steak?
Slice into ½-inch portions and warm in a cast-iron skillet over medium-low heat for 2-3 minutes per side with a splash of beef broth. Never microwave—it turns the steak rubbery. For best results, reheat only what you'll eat immediately. The butter crust won't be as crispy, but the beef will retain its tenderness. Pair with fresh herbs to revive flavors.