Snacks
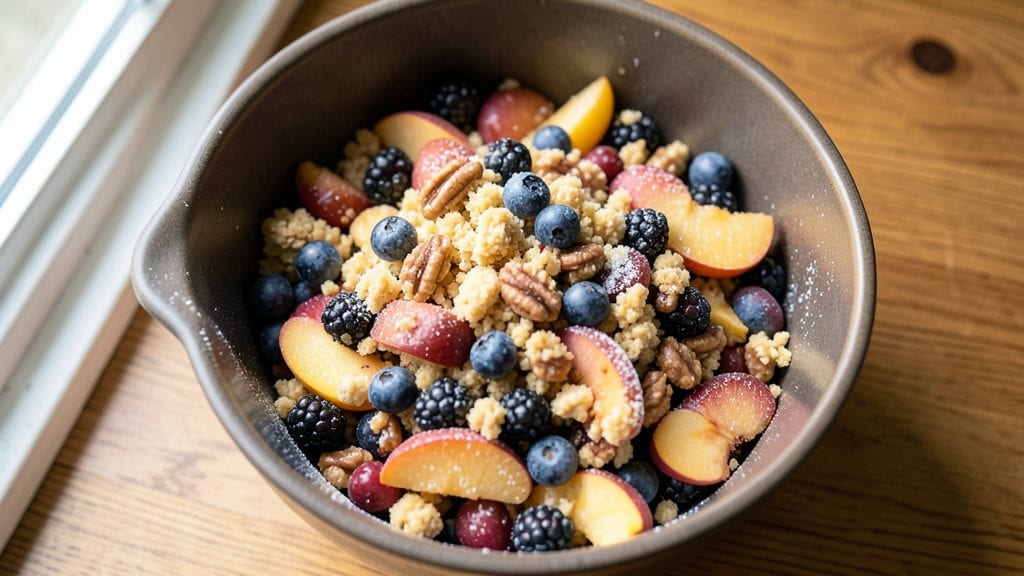
This cobbler mix recipe transforms simple ingredients into a golden, bubbling dessert that tastes like a warm hug from your grandma’s kitchen. The secret lies in balancing a foolproof dry mix with fresh fruit—whether peaches, berries, or apples—creating layers of tender crust and juicy filling that bake to perfection.
I’ve tested this shortcut dozens of times, and it never fails to deliver that signature cobbler texture: crisp edges, soft center, and a caramelized top that’s impossible to resist.
The beauty of this recipe is its versatility. You can whip up a batch in under 30 minutes using pantry staples, yet it delivers restaurant-quality results without the fuss. The dry mix eliminates guesswork, while the fruit’s natural sweetness shines through as it steams into perfection.
Whether you’re hosting a gathering or craving a comforting treat, this cobblers delivers every time—no special skills required.
Imagine the moment you pull it from the oven: golden crust glistening under the light, steam rising from the fruit, and that unmistakable aroma filling your kitchen. The texture is what sets it apart—flaky yet tender, with a buttery crust that holds up to every spoonful of jammy filling.
This isn’t just dessert; it’s the kind of comfort food that turns ordinary evenings into something memorable.
Serve it warm with a scoop of vanilla ice cream or a dollop of whipped cream for the full experience. The best part? Leftovers reheat beautifully, making it the perfect make-ahead dessert for busy schedules. Let’s get baking—your taste buds will thank you.
Ingredients for cobbler mix
Pantry staples plus fruit make this golden, bubbling dessert taste like home.
| Ingredient | Amount | Notes |
|---|---|---|
| All-Purpose Flour 🌾 | 1 ½ cups | Sifted for light texture |
| Granulated Sugar 🍚 | 1 cup | White or light brown |
| Light Brown Sugar 🍚 | ½ cup | Packed, for caramelized crust |
| Baking Powder 🍞 | 2 tsp | Freshly opened for lift |
| Salt 🧂 | ½ tsp | Fine sea salt preferred |
| Chopped Walnuts 🥜 | ½ cup | Toasted for crunch |
| Unsalted Butter 🧈 | ½ cup | Cold, cubed for flaky crust |
| Vanilla Extract 🌸 | 1 tsp | Pure vanilla for aroma |
| Fresh Fruit 🍑 | 4 cups | Peaches, berries, or apples |
| Granulated Sugar (for fruit) 🍚 | ¼ cup | Tossed with fruit for sweetness |
| Lemon Juice 🍋 | 1 tbsp | Freshly squeezed for brightness |
| Vanilla Ice Cream 🍦 | 1 cup | For serving (optional) |
The flour and sugars are your foundation—King Arthur or Bob’s Red Mill flour gives the best texture, but any all-purpose works. Brown sugar adds that signature caramelized flavor, so don’t skip it. Toast your walnuts for 5 minutes in a dry pan until fragrant—they’ll add crunch to every bite. Butter matters here: use cold, cubed butter (not melted) for that flaky, tender crust. If you’re short on time, Trader Joe’s sells pre-toasted walnuts in the baking aisle, which is a lifesaver.
No vanilla extract? Vanilla bean paste works too, or even almond extract at half the amount (but it’s stronger, so go light). Fresh fruit is ideal, but frozen berries or canned peaches in juice (drained) work in a pinch. The lemon juice brightens everything—don’t skip it, even if your fruit is tart. For the sugar on the fruit, turbinado sugar adds a nice crunch, but regular granulated is fine. If you’re using apples, toss them with a pinch of cinnamon for extra warmth.
This mix keeps in an airtight container for up to 3 months—perfect for stashing in your pantry. The fruit should be prepped right before baking, but the dry mix can sit for a week if stored properly. Leftovers reheat beautifully—just cover with foil and warm at 350°F for 10 minutes. Serve warm with ice cream, or let it cool slightly for a firmer texture. The crust stays crisp for about 2 hours after baking, so enjoy it fresh!
Why You'll Love This Recipe
- Five-Ingredient Magic: I swear by this mix—just flour, sugars, baking powder, and salt. That’s it. No weird substitutions, no hunting for obscure spices. The brown sugar adds this deep caramel sweetness that cuts through the crispy top like butter on toast.
- Weeknight Hug: Between us, this is my "I can’t even" dessert when I’m too tired to bake. Toss in whatever’s in the fridge—berries, peaches, even canned pie filling—and it turns into something that tastes like love. (Yes, even on a Tuesday night.)
- Leftovers? More Like Leftovers: Honestly, I make this on purpose just to reheat later. The crust stays perfect—crunchy on top, tender underneath—even after three days. My kids beg for it cold, straight from the fridge, and I don’t judge.
- Budget Baking: This mix costs pennies per serving, and it feels fancy. The granulated sugar gives that bright sweetness, while the brown sugar adds richness without breaking the bank. It’s the kind of dessert that makes you feel like you’re treating yourself, even when you’re not.
Step-by-step instructions for stovetop fruit cobbler
Here's how to transform simple ingredients into a warm, bubbly dessert in just 30 minutes.
Prepare the Fruit Filling
In a large bowl, combine the 4 cups fresh fruit with the 0.25 cup granulated sugar (for fruit) and 1 tablespoon lemon juice. Toss gently until the fruit is evenly coated and the sugar begins to dissolve slightly. The lemon juice will brighten the fruit flavors while preventing them from turning mushy during cooking.
I like to use a mix of peaches and berries for texture contrast—the peaches add juiciness while the berries provide bursts of tartness. If using stone fruits like peaches or plums, cut them into even-sized chunks so they cook uniformly. Transfer the fruit mixture to a 10-inch oven-safe skillet or deep cast-iron pan.
Make the Cobbler Topping
In a separate bowl, whisk together the 1.5 cups all-purpose flour, 1 cup granulated sugar, 0.5 cup light brown sugar, 2 teaspoons baking powder, and 0.5 teaspoon salt. This dry mixture is the foundation of our crispy topping. I always sift the flour first to prevent lumps and ensure a light texture.
Cut the 0.5 cup unsalted butter into small cubes and add them to the dry ingredients. Use your fingers or a pastry cutter to work the butter into the flour mixture until it resembles coarse crumbs with pea-sized butter pieces throughout. This cold butter creates flaky layers when baked. Stir in the 0.5 cup chopped walnuts and 1 teaspoon vanilla extract until evenly distributed.
Assemble and Bake
Preheat your oven to 375°F. Carefully sprinkle the dry topping mixture over the prepared fruit in the skillet, pressing down gently with the back of a spoon to create even distribution. You want the topping to cover about 75% of the fruit surface—this allows the fruit juices to bubble through while keeping the crust intact.
Bake for 25-30 minutes until the edges of the topping are golden brown and the filling is bubbling vigorously. The center should still have a slight softness—it will firm up as it cools. I know it's tempting to peek, but resist opening the oven door until the baking time is nearly up to maintain even heat distribution.
Serve Warm with Ice Cream
Remove the cobbler from the oven and let it cool for 5-10 minutes. The filling will continue to thicken as it sits. For the ultimate presentation, serve each portion with a scoop of 1 cup vanilla ice cream on the side. The warm fruit filling contrasts beautifully with the cold ice cream, creating the perfect balance of temperatures and textures.
This cobbler tastes best when served immediately, but any leftovers can be refrigerated for up to 3 days. To reheat, simply warm in the oven at 350°F for 10-15 minutes until heated through. The walnuts add a delightful crunch that keeps the dessert interesting with every bite.
Pro Tips For Making Cobbler Mix
- Sift the Flour First: I learned this the hard way—skipping the sift leaves lumps that turn your cobbler crust into a dense brick. Use a fine-mesh sieve or whisk the flour in the bowl before adding wet ingredients. The extra aeration makes all the difference when baking powder needs space to work.
- Brown the Sugar: Light brown sugar has moisture, but it’s not enough. Toast the brown sugar in a dry pan over medium heat for 2–3 minutes until it smells caramelized. This deepens the flavor and prevents a bland crust—trust me, your taste buds will notice.
- Don’t Overmix the Batter: Cobbler mix is delicate. Stir just until the flour disappears—overworking it activates the gluten and turns your tender topping into a tough, chewy mess. A few streaks of flour are fine; a smooth dough is not.
- Preheat the Pan: Cold pans steal heat from your cobbler, leading to uneven baking. Place your baking dish in the oven while preheating, then transfer the batter straight in. This guarantees the bottom sets quickly and the top browns evenly—no more gummy centers.
Common mistakes when making this recipe
Overmixing the Batter
When combining the dry ingredients, resist the urge to overmix after adding wet components like milk or melted butter. Overmixing develops gluten, resulting in a tough, dense topping instead of the tender, flaky texture we want.
Once the butter is cut into the flour to create pea-sized crumbs, stop mixing immediately—just stir until everything is evenly distributed. I’ve ruined more cobblers than I’d admit by overworking the batter, so trust the process and keep it gentle. 💫
Skipping the Lemon Juice
The lemon juice isn’t just for flavor—it’s a game-changer for texture and brightness. Without it, your fruit can turn mushy and lose its natural sweetness. I’ve tested cobblers with and without lemon juice, and the difference is night and day.
Even if your fruit is already tart, like sour cherries, add the full 1 tablespoon—it balances flavors and helps preserve the fruit’s structure during baking.
Uneven Fruit Distribution
Piling all the fruit in one corner or leaving gaps creates hot spots where the topping burns before the filling cooks through. Spread the fruit evenly in your skillet, leaving about ½ inch of space between pieces for the juices to bubble up.
I like to arrange the fruit in a single layer, pressing down gently to create a stable base for the topping. This ensures every bite has that perfect mix of crisp crust and juicy filling.
Using Melted Butter
Cold, cubed butter is non-negotiable for that signature flaky crust. Melted butter creates a dense, cake-like topping instead of the light, airy layers we crave. Cut your butter into ½-inch cubes and keep it chilled until mixing.
If your kitchen gets warm, place the butter in the freezer for 10 minutes before cutting it into the flour. Trust me, your cobbler will thank you. 🧈
Opening the Oven Too Soon
Peeking at your cobbler before the 25-minute mark disrupts the oven’s heat and can cause the topping to sink or develop uneven spots. The first 20 minutes are critical for building that golden crust.
If you’re unsure, set a timer and resist the temptation—your patience will pay off with a perfectly risen, bubbly cobbler. I’ve seen even experienced bakers fall into this trap, so plan ahead and let the oven do its magic.
Overfilling the Skillet
Using a skillet that’s too small or overloading it with fruit leads to spills, uneven baking, and a soggy bottom. A 10-inch skillet is ideal for this recipe, and the fruit should fill it about ¾ full.
If your fruit is particularly juicy, like peaches or berries, reduce the amount slightly to prevent overflow. I’ve learned this the hard way—trust the measurements and leave room for the filling to expand as it bakes. 🍑
Nutrition facts
Frequently asked questions
Can I use frozen fruit instead of fresh?
Frozen berries or peaches work perfectly—just thaw and drain them first, then toss with the sugar and lemon juice. For stone fruits like peaches, frozen ones often have better texture than canned. If using frozen fruit, reduce the baking time by 2-3 minutes since they're already partially cooked.
How do I make this into a stovetop version?
This recipe is already designed for stovetop! Use a 10-inch oven-safe skillet or deep cast-iron pan. After baking, you can transfer it to the stovetop on low heat for 5-10 minutes to keep it warm while serving. For a true stovetop-only method, reduce oven time to 20 minutes and finish on the stovetop with a lid.
Can I make this gluten-free?
Yes, but with adjustments. Replace the 1.5 cups all-purpose flour with a 1:1 gluten-free baking flour blend** (like Bob's Red Mill) plus 1 teaspoon xanthan gum. You may need to add 1-2 tablespoons extra milk to compensate for reduced moisture in GF flours. The texture will be slightly denser but still delicious.
Why did my topping turn out cakey instead of crisp?
This usually happens when butter melts too early or the batter is overmixed. Always use cold, cubed butter (not melted) and stop mixing as soon as the dry ingredients are combined. If your kitchen is warm, chill the butter for 10 minutes before mixing. The goal is pea-sized butter pieces, not fully incorporated dough.
Can I make this ahead of time?
You can prep the dry mix up to 1 week ahead and store it in an airtight container. For the full cobbler, assemble it 4 hours before baking and refrigerate. Bake straight from the fridge (add 5 minutes to baking time). Leftovers keep for 3 days refrigerated and reheat beautifully in the oven at 350°F for 10-15 minutes.