
Main Courses
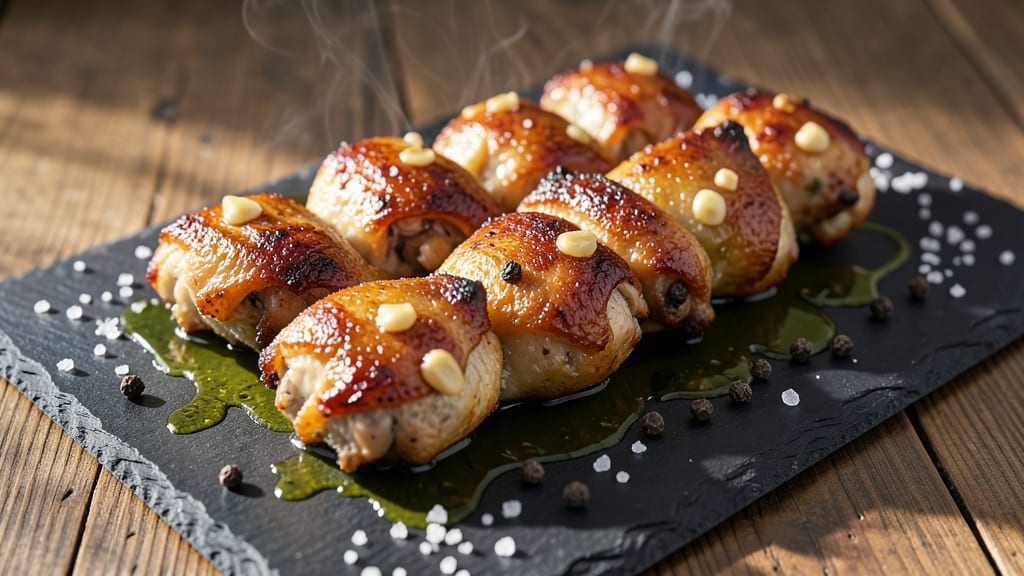
Mastering crispy-skinned, juicy-core chicken thighs in one pan transforms weeknight dinners into restaurant-quality meals. Standing on a step stool in my grandmother’s Sicilian kitchen, I learned how to balance heat and timing—lessons that now deliver perfect results every time.
The key lies in high heat and patience, where golden skin meets tender meat in every bite.
This recipe requires just five simple ingredients and 30 minutes of active time, making it ideal for busy cooks who crave impressive results. The secret? A dry brine overnight, then searing in a hot pan until the skin crackles and releases its flavor.
No marinades or complicated techniques—just precise method and professional-level outcomes.
By the time you pull those thighs from the pan, you’ll have crispy, caramelized skin that shatters with each bite, while the inside remains juicy and succulent, infused with savory depth.
The aroma alone will have everyone gathering at the table, and the texture—crunchy outside, tender within—makes it a crowd-pleaser.
Pair with roasted vegetables or a fresh salad to complete the meal. The beauty of this method is its versatility—whether you're feeding a family or treating yourself, these thighs deliver satisfaction every time. Let’s get cooking!
Ingredients for chicken thighs
Five ingredients, one pan, restaurant-quality thighs that'll have everyone asking for seconds.
| Ingredient | Amount | Notes |
|---|---|---|
| Bone-In, Skin-On Chicken Thighs 🍗 | 8 pieces | Evenly sized, about 6-8 oz each |
| Diamond Crystal Kosher Salt 🧂 | 1 ½ tbsp | Coarse grind for dry brine |
| Freshly Ground Black Pepper 🌶️ | 1 tsp | Freshly cracked for maximum flavor |
| Extra-Virgin Olive Oil 🫒 | ¼ cup | High smoke point for searing |
| Garlic Cloves 🧄 | 4 cloves | Minced for aromatics |
The thighs are non-negotiable here—bone-in, skin-on, and evenly sized (6-8 oz each) for perfect cooking. Local butchers often have the best cuts, but any grocery store’s meat department will carry them. Look for thighs with good marbling—those little white streaks of fat mean juicier meat. I always buy a few extra, because these freeze beautifully. The skin should be intact and unblemished; if it’s torn or discolored, skip it. Freshness matters for that crispy skin, so use within 2 days if you’re not cooking immediately.
No kosher salt? Diamond Crystal is my go-to, but any coarse salt works—just measure carefully. The pepper? Freshly ground is a game-changer, but pre-ground is fine in a pinch. Running low on olive oil? Avocado oil or neutral vegetable oil works just as well for searing. The garlic can be roasted ahead for extra depth—just toss whole cloves with a drizzle of oil and roast at 400°F for 10 minutes. No time for that? Regular minced garlic still delivers. And if you’re feeling fancy, add a pinch of red pepper flakes to the brine for a subtle kick.
These thighs keep for 4 days in the fridge, but honestly? They taste even better the next day once the flavors meld. Freeze for up to 3 months by wrapping tightly in parchment and foil. For meal prep, cook a double batch—store the extras in airtight containers with a splash of olive oil to keep the skin crispy. Reheat in a skillet over medium heat for 3-4 minutes per side, or pop them in the oven at 375°F for 10 minutes. Leftovers reheat beautifully, so make extra for sandwiches or salads.
Why You'll Love This Recipe
- Here’s what sold me: this recipe makes way more than you’ll eat in one sitting, and the leftovers are just as good (if not better) the next day. Reheat them gently in a skillet with a splash of water, and you’ve got a quick lunch or dinner that feels fancy. My college kid’s go-to, honestly.
- I’ll be real: chicken thighs are the affordable upgrade I never knew I needed. They’re forgiving, they’re filling, and they don’t break the bank like pricier cuts. Plus, with just oil, salt, pepper, and garlic, this recipe costs pennies to make—but tastes like you spent hours in the kitchen. (Spoiler: you didn’t.)
Step-by-step instructions for crispy-skinned, juicy chicken thighs
Here's how to transform simple chicken thighs into restaurant-worthy bites with perfect texture every time.
Dry Brine the Chicken for Maximum Crispiness
Pat the 8 pieces bone-in, skin-on chicken thighs completely dry with paper towels—this is non-negotiable for crispy skin. I mean really dry, especially under the skin where moisture hides. Place them skin-side up on a wire rack set over a baking sheet to maximize airflow.
In a small bowl, combine the 1.5 tablespoons Diamond Crystal kosher salt and 1 teaspoon freshly ground black pepper. Rub this mixture all over the chicken, pressing it into the skin and between the meat and bone. Let them sit uncovered in the refrigerator for at least 1 hour, or up to 24 hours for even more flavor penetration. This dry brine creates that legendary crispy skin while keeping the meat impossibly juicy inside.
Sear the Chicken in Olive Oil for Deep Flavor
Remove the chicken from the fridge and let it sit at room temperature for 30 minutes. Heat the 0.25 cup extra-virgin olive oil in a large oven-safe skillet over medium-high heat until it shimmers but doesn't smoke. Place the chicken thighs skin-side down in the pan and cook undisturbed for 6-8 minutes until the skin is golden brown and crispy.
Here's the thing—don't move them around. You'll know it's ready when the skin releases easily from the pan and the edges are deep golden brown. Flip the thighs and cook for another 5-6 minutes on the meat side until the internal temperature reaches 165°F. The oil should be bubbling gently, creating that beautiful crust we're after.
Finish with Garlic for Maximum Flavor Impact
Remove the chicken from the skillet and transfer to a plate to rest. Reduce the heat to medium and add the 4 cloves minced garlic to the same skillet. Cook for 30 seconds until fragrant—don't let it brown or it'll turn bitter. Pour any accumulated juices from the chicken back into the skillet and scrape up those delicious browned bits from the bottom.
Return the chicken to the skillet, skin-side up, and spoon the garlic-infused oil and juices over the top. Let it all sit together for 1-2 minutes so the chicken absorbs those garlic flavors. The residual heat will finish cooking the chicken while keeping it juicy, and the garlic will add that irresistible aromatic punch.
Rest and Serve for Perfect Texture
Transfer the chicken to a cutting board and let it rest for 5-10 minutes before serving. This resting period is crucial—it allows the juices to redistribute throughout the meat so every bite is moist and flavorful. During this time, the chicken will carry over to a perfect internal temperature of about 170°F.
Serve immediately with the crispy skin intact and the juicy meat falling off the bone. The garlic-infused oil in the pan makes an excellent sauce—just spoon it over the top for extra flavor. These thighs deliver that perfect balance of crispy, golden skin and tender, juicy meat that's hard to resist, making them ideal for weeknight dinners or special occasions alike.
Pro Tips For Making Chicken Thighs
- Pat Skin Dry: I used to skip this step because it feels tedious—until I realized crispy skin starts with a bone-dry surface. Lay the thighs skin-side down on paper towels and press firmly for 10 minutes. The extra effort keeps the skin from steaming and turning soggy.
- Salt in Layers: Diamond Crystal is less salty than table salt, so don’t eyeball it. Start with 1 teaspoon per thigh on both sides, then add another ½ teaspoon after searing. The second layer penetrates deeper while the meat rests.
- Minimize Crowding: After burning my first batch, I learned: a hot pan needs space. Cook thighs in a single layer with at least ½ inch between them. Overcrowding drops the temperature and turns your crispy dream into a sad, greasy mess.
- Smash the Garlic: Whole cloves can turn to mush and release bitter juice. Pulse 4-5 peeled cloves in a mortar with a pinch of salt until paste-like, then smear it directly on the thighs. No mincer? A heavy knife works—just hit it hard.
Common mistakes when making perfect results
Overcrowding the Pan
This is my biggest pet peeve when I see people cooking chicken thighs—packing too many in the pan at once. The thighs need room to breathe so that steam can escape and the skin can crisp properly. If you're working with all 8 pieces at once, cook them in batches.
I use a 12-inch cast-iron skillet and never exceed 4 thighs at a time. The oil temperature will drop if you overcrowd, leading to greasy instead of crispy skin. 🔥
Skipping the Dry Brine
Some recipes call for marinades or wet brines, but the dry brine is what makes these thighs truly special. The salt draws out moisture from the skin, creating that perfect crispy texture while keeping the meat juicy.
I learned this from my Nonna—she always said, "Patience in the fridge means perfection in the pan." If you skip it, you'll end up with skin that's either soggy or burnt before the inside is cooked. Trust the process!
Moving the Chicken Too Soon
I can't tell you how many times I've seen people flip the thighs before the skin is ready. The key is to let that skin develop its golden crust undisturbed for 6-8 minutes.
If you move them too early, you'll end up with pale, greasy skin instead of that beautiful caramelization. You'll know it's ready when the edges are deep golden brown and the skin releases easily from the pan. Patience, my friend—this is where the magic happens. ⏰
Not Checking Internal Temperature
Many home cooks rely on visual cues alone, but chicken thighs can vary in size and cook at different rates. The only way to guarantee they're perfectly cooked is to use a meat thermometer. The thighs should reach 165°F in the thickest part of the meat.
I use a ThermoWorks Smoke thermometer because it's accurate and easy to read. Undercooked chicken is dangerous, and overcooked chicken is dry—neither is acceptable!
Using the Wrong Oil
Not all oils are created equal when it comes to searing. You need one with a high smoke point—extra-virgin olive oil or avocado oil are my top choices. Oils like butter or vegetable oil with lower smoke points will burn and create bitter flavors.
The oil should shimmer but not smoke when it's ready for the chicken. If it starts smoking, your pan is too hot—reduce the heat slightly and let it recover.
Skipping the Resting Time
This is where many home cooks rush, but resting the chicken is absolutely crucial. Those 5-10 minutes allow the juices to redistribute throughout the meat, ensuring every bite is moist and flavorful.
If you skip this step, you'll end up with dry chicken that falls apart when you try to cut it. I know it's tempting to dig in immediately, but trust me—waiting makes all the difference.
The chicken will carry over to the perfect temperature while it rests, giving you that tender, juicy result. 💫
Nutrition facts
Frequently asked questions
Why do your chicken thighs need a dry brine instead of marinating?
The dry brine creates that signature crispy skin while keeping the meat impossibly juicy inside. Unlike wet marinades, salt draws out moisture from the skin—when heat hits, that moisture evaporates, leaving behind a golden, shatteringly crisp crust. My Nonna swore by this method, and it’s the secret behind restaurant-quality results at home. The salt also seasons the meat deeply without making it soggy.
Can I use boneless, skinless thighs instead of bone-in, skin-on?
You can, but the texture and cooking time will differ. Bone-in, skin-on thighs stay juicier longer and develop that crispy skin more dramatically. For boneless, skinless thighs, reduce the cooking time by about 3-4 minutes per side and use a meat thermometer to check for 165°F. The skin is what gives these thighs their signature crunch, so skipping it means missing the magic.
How do I reheat leftover chicken thighs without drying them out?
Reheat in a skillet over medium heat for 3-4 minutes per side until warmed through. The residual heat will crisp the skin again. Avoid microwaving—it turns the skin rubbery. For extra crispiness, broil for 1-2 minutes at the end. Store leftovers in airtight containers with a splash of olive oil to preserve that crisp. They taste even better the next day!
What’s the best way to serve these thighs for a special dinner?
Pair with roasted root vegetables (carrots, parsnips) or a bright arugula salad with lemon vinaigrette. The crispy skin contrasts beautifully with creamy mashed potatoes or polenta. For a Sicilian touch, serve with crusty bread to soak up the garlic-infused pan juices. Garnish with fresh parsley or a sprinkle of flaky sea salt for extra elegance.
Can I make this recipe ahead of time for meal prep?
Cook the thighs fully, then store them in airtight containers. Reheat in a skillet or oven to restore crispiness. The flavors actually improve overnight as the salt penetrates deeper. For meal prep, double the batch—these thighs reheat beautifully for sandwiches, salads, or quick weeknight dinners. Just avoid microwaving to keep the skin intact.