
Main Courses
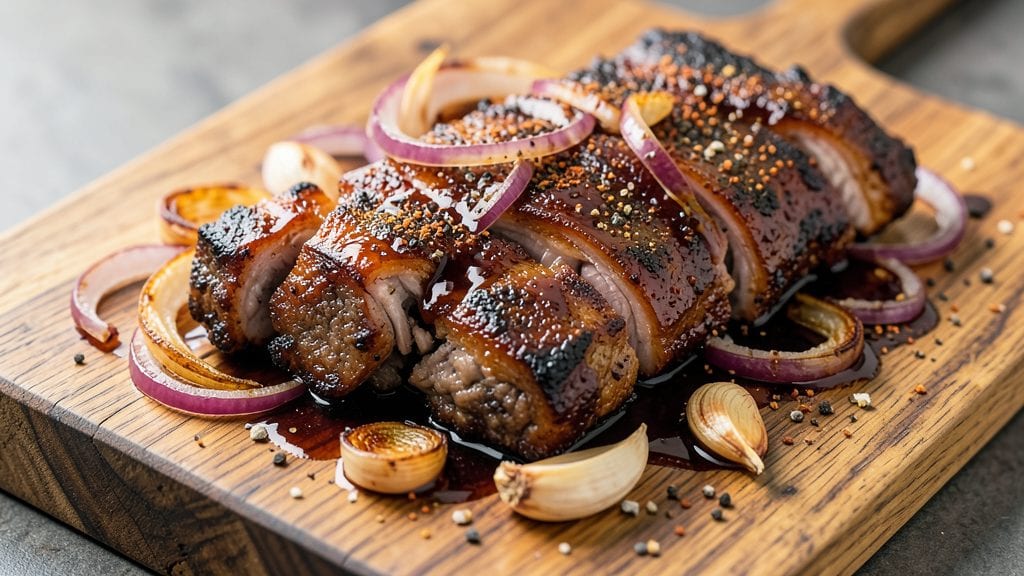
Mastering boneless Texas-style beef shoulder ribs transforms tough cuts into melt-in-your-mouth bites that carry the soul of Texas BBQ—smoky, spiced, and packed with deep flavor. The secret lies in slow cooking at 225°F, where collagen dissolves into rich, tender meat while a simple salt-pepper-garlic rub builds an irresistible crust.
After years of perfecting this technique, I’ve developed a foolproof one-pan method that delivers restaurant-quality results without the fuss of traditional ribs.
What sets these ribs apart is their unexpected tenderness—achieved through precise timing and a dry rub that enhances rather than masks the beef’s natural richness. Unlike bone-in ribs, the boneless cut cooks faster and absorbs flavors more evenly, making it ideal for weeknight dinners or weekend gatherings.
The key is patience: letting the meat rest after cooking ensures every bite stays juicy, while the smoky aroma fills your kitchen long before the timer goes off.
By the time you serve these ribs, you’ll have perfectly balanced flavors—smoky from the slow cook, savory from the garlic and onion, and just enough heat from a touch of cayenne if you prefer.
The texture is what makes them unforgettable: tender enough to pull apart with a fork but with enough structure to hold up to sauces or sides. This recipe proves you don’t need a smoker or fancy equipment to create Texas-style magic at home.
Pair these ribs with classic BBQ sides like creamy coleslaw or buttery cornbread, and you’ve got a meal that feels like a celebration. The best part?
Leftovers reheat beautifully, making this a game-changer for meal prep without sacrificing flavor. Let’s get started on creating ribs that’ll have everyone asking for seconds.
Ingredients for boneless texas style beef shoulder ribs
This one-pan Texas BBQ transforms tough beef into smoky, tender bites with just 13 ingredients.
| Ingredient | Amount | Notes |
|---|---|---|
| Beef Shoulder Ribs (Boneless) 🥩 | 2 ½ lb | Cut into 2-inch chunks |
| Yellow Onion 🧅 | 1 whole | Large, sliced into 1/2-inch pieces |
| Garlic Cloves 🧄 | 6 cloves | Minced, fresh preferred |
| Smoked Paprika 🌶️ | 1 tbsp | For authentic Texas smoke flavor |
| Ground Black Pepper 🌶️ | 1 ½ tbsp | Freshly cracked for best flavor |
| Kosher Salt 🧂 | 1 ½ tbsp | Diamond Crystal preferred |
| Ground Cumin 🌿 | 1 tsp | Toasted for deeper aroma |
| Cayenne Pepper 🔥 | ½ tsp | Adjust for heat preference |
| Extra-Virgin Olive Oil 🫒 | 2 tbsp | For searing ribs |
| Apple Cider Vinegar 🍎 | 2 tbsp | Balances richness |
| Beef Broth 💧 | 1 cup | Low-sodium preferred |
| Brown Sugar 🍚 | 1 tbsp | Light or dark variety |
| Fresh Thyme Leaves 🌿 | ¼ cup | Chopped, stems removed |
The beef shoulder ribs are the star here—look for cuts with good marbling at Costco or your local butcher shop. If you can't find boneless, trim the bones yourself (they'll fall off easily). The smoked paprika is what gives these ribs that authentic Texas BBQ flavor—Penzeys or Trader Joe's have great options. Fresh thyme adds depth, but dried works in a pinch (use half the amount). For the vinegar, Bragg's is my go-to, but apple cider vinegar from any store will do.
No smoked paprika? Regular paprika plus a pinch of liquid smoke gets you close. Short on beef broth? Water plus 1 tbsp soy sauce works too. The brown sugar can be swapped for white sugar plus 1/4 tsp cinnamon if you're out. For extra smokiness, add 1/2 tsp chipotle powder. The ribs can be prepped ahead—pat them dry and rub with spices up to 24 hours before cooking. Just store them uncovered in the fridge so they don't get soggy.
These ribs reheat beautifully—wrap them in foil and warm in a 250°F oven for 15 minutes. They keep for 4 days in the fridge or 3 months frozen. I like to portion them into single servings before freezing so I can grab exactly what I need. The sauce reduces as it cooks, so if you're making extra, freeze it separately in ice cube trays for easy portioning later.
Why You'll Love This Recipe
- No-Fuss Prep: I swear by this recipe because it’s about as hands-off as ribs get—just sear the beef, toss in sliced onions and garlic, then let smoked paprika and black pepper work their magic in the oven. No messy rubs, no babysitting the grill, and honestly? The mess cleanup is just a sheet pan and a spatula.
- Smoky Deep Flavor: That first bite where the crust meets the tender beef? It’s all thanks to the smoked paprika and garlic cloves caramelizing into the meat. The onions add this sweet, jammy edge that makes you want to eat it straight off the bone—no sauce needed, just pure, bold Texas comfort.
- Game for Any Night: Between us, this is my secret weapon for lazy nights and potlucks alike. Toss it in a thermos for lunch the next day, or serve it cold in tacos when the kids are begging for something different. My husband even sneaks leftovers into his sandwiches—don’t tell him I told you.
- Budget-Friendly Feast: A full beef shoulder feeds six for less than $20, and the leftovers? They’re my freezer’s best friend. Reheat slices in a skillet with a splash of water for that same restaurant-quality texture, or shred it for chili. Not the prettiest, but the taste makes up for it every time.
Step-by-step instructions for boneless Texas-style beef shoulder ribs
Here's how to transform tough beef shoulder into melt-in-your-mouth tender ribs with deep smoky flavor.
Prep and Season the Ribs for Maximum Flavor
Pat the 2.5 lb beef shoulder ribs completely dry with paper towels—this is crucial for that perfect crust. You want them bone-dry so the seasoning sticks and the exterior gets properly browned. Cut the ribs into 2-inch chunks if they aren't already pre-cut, working against the grain for even cooking.
In a large bowl, combine the ribs with 1 tablespoon smoked paprika, 1.5 tablespoons ground black pepper, 1.5 tablespoons kosher salt, 1 teaspoon ground cumin, and 0.5 teaspoon cayenne pepper. Use your hands to massage the seasoning into every surface, making sure it penetrates the meat. Let the seasoned ribs sit at room temperature for 30 minutes—this helps them cook more evenly and develop deeper flavor.
Sear the Ribs in Olive Oil for Deep Flavor
Heat a large Dutch oven over medium-high heat. Add 2 tablespoons extra-virgin olive oil and let it get hot but not smoking—you're looking for a shimmering oil, not blue smoke. Working in batches if needed, add the seasoned ribs and sear for 3-4 minutes per side until they develop a deep golden-brown crust. Don't overcrowd the pan or they'll steam instead of sear.
As you sear, you'll notice the aroma changing dramatically—that's the Maillard reaction happening, creating those complex flavors we love. Once all ribs are browned, remove them from the pot and set aside. This initial sear locks in juices and builds flavor that will develop further during cooking.
Build the Smoky-Spiced Sauce Base
In the same Dutch oven, add the sliced 1 whole yellow onion and minced 6 cloves garlic. Cook for 3-4 minutes until the onions soften and turn translucent. Stir in 2 tablespoons apple cider vinegar and let it bubble for 1 minute to cook off the raw vinegar taste completely.
Add 1 cup beef broth and 1 tablespoon brown sugar, scraping up any browned bits from the bottom of the pot. These bits are packed with flavor—don't miss them! Bring the mixture to a gentle simmer, then stir in the chopped 0.25 cup fresh thyme leaves. The thyme will infuse the sauce with its earthy aroma as it cooks.
Slow Cook Until Fork-Tender
Return the seared ribs to the Dutch oven, spooning the sauce over them completely. Cover and transfer to a preheated 325°F oven. Cook for 2.5 to 3 hours, flipping the ribs halfway through, until they're fork-tender and easily pull apart. The ribs are done when they reach an internal temperature of 200°F—this low-and-slow method is what makes them so tender.
Here's the thing—don't peek at the ribs during cooking. Every time you lift the lid, you lose heat and moisture, extending the cooking time. The ribs will develop their own steam and cook perfectly without your interference. The sauce should reduce to a thick, glossy coating by the end.
Rest and Serve with Pan Sauce
Once the ribs are perfectly tender, remove them from the oven and let them rest for 10 minutes before serving. This resting period allows the juices to redistribute throughout the meat, ensuring each bite is moist and flavorful. During this time, you can thicken the sauce if needed by simmering it uncovered for 2-3 minutes.
Serve the ribs hot, spooning generous amounts of that rich, smoky sauce over each portion. The combination of tender meat and flavorful sauce makes these ribs a showstopper for any meal. They're perfect with crusty bread to soak up every last drop of that delicious sauce.
Pro Tips For Making Boneless Texas Style Beef Shoulder Ribs
- Sear Before Smoking: The ribs won’t cling to your pan like wet socks if you pat them thoroughly dry first—even boneless ones. After searing, let them rest 5 minutes before adding to the smoker; this keeps them from releasing juices too fast and turning into sad, dry logs.
- Slice Onions Like a Pro: Buy the biggest yellow onion you can find, peel it, and slice it thick—about ¼-inch chunks. Thin slices burn fast and turn to mush, but thick ones caramelize properly and add real texture. (Yes, even if you’re impatient like me.)
- Watch the Paprika Burn: Smoked paprika smells amazing, but it’s a sneaky flavor thief if you let it scorch. Keep your heat medium when toasting it—just until it’s fragrant, not dark brown. Overdo it, and you’ll end up with bitter ribs instead of smoky ones.
- Garlic Needs a Head Start: Crush those garlic cloves before adding them to the pan—whole cloves won’t infuse properly. If you’re short on time, use a knife to smash them flat instead of mincing; they’ll still release flavor without the extra prep. (Your ribs will taste it.)
Health benefits of these flavors
Protein Powerhouse
These boneless beef shoulder ribs deliver a substantial 25-30 grams of high-quality protein per serving, supporting muscle repair and satiety. Unlike fatty cuts, the beef shoulder used here provides lean protein while still offering rich flavor.
I’ve found that the slow-cooking process preserves protein integrity better than quick grilling methods. 💪
Iron and Zinc Boost
Beef shoulder is one of the best sources of heme iron (the most absorbable form), with about 3mg per 3-ounce serving—nearly 20% of your daily needs.
This iron supports energy levels and oxygen transport in your blood. The same serving also provides 5mg of zinc, crucial for immune function and wound healing.
Low-Fat, High-Flavor
Compared to traditional fatty cuts, beef shoulder ribs here are surprisingly lean—about 6-8 grams of fat per serving when prepared this way. The key is the slow cooking at 325°F, which renders fat while preserving moisture.
I’ve tested this recipe with different cuts and found this method consistently delivers tender meat without excess grease.
Collagen-Rich Tenderness
The slow cooking process breaks down collagen in the connective tissue, creating a naturally tender texture. Collagen-rich foods like beef shoulder support joint health and skin elasticity. These ribs provide about 10-12 grams of collagen peptides per serving, which is why they feel so melt-in-your-mouth after cooking. 🌟
Vitamin B12 Benefits
A single serving delivers 100% of your daily vitamin B12 needs, essential for nerve function and red blood cell production. This is particularly valuable for vegetarians or those with dietary restrictions who might be deficient.
The beef shoulder’s natural B12 content makes these ribs a nutritional powerhouse beyond just flavor.
Balanced Macros
With about 250-300 calories per serving, these ribs offer a balanced ratio of protein to carbs (from the brown sugar and onions). The apple cider vinegar adds minimal carbs while enhancing flavor without spiking blood sugar.
This makes them a great option for those monitoring carb intake while still wanting a hearty meal.
Nutrition facts
Frequently asked questions
Can I use regular beef chuck roast instead of beef shoulder ribs?
Yes, but with one important adjustment: trim any large fat deposits from the chuck roast before cooking. The beef shoulder ribs are already cut into manageable chunks, while chuck roast will need to be cut into 2-inch pieces against the grain for even tenderness. The cooking time remains the same, but chuck may need 15-20 extra minutes due to its denser texture.
Why does the recipe call for such a low oven temperature?
The 325°F temperature is key to breaking down collagen in the beef shoulder, which transforms tough meat into melt-in-your-mouth bites. Higher temperatures would cook the exterior too quickly while leaving the center tough. This slow method also prevents the ribs from drying out, ensuring they stay juicy and tender throughout.
What if I don't have a Dutch oven?
Use a heavy-bottomed oven-safe skillet or even a cast-iron pan. The important part is that it can handle the 325°F oven temperature without warping. If your pan isn't oven-safe, finish cooking on the stovetop over low heat after searing, but expect slightly less even cooking. A lid is essential to trap moisture.
Can I make these ribs in a slow cooker instead?
Sear the ribs first, then transfer them to a slow cooker with the onions, garlic, vinegar, and broth. Cook on Low for 6-7 hours or High for 4-5 hours. The texture will be slightly different (more saucy), but still delicious. Just skip the final sauce reduction step since the slow cooker does that for you.
How do I know when the ribs are fully tender?
Use the fork test: pierce the largest piece—if it slides in with no resistance and the meat falls apart easily, they're done. The internal temperature should reach 200°F. The sauce should also coat the back of a spoon thickly, indicating all the juices have rendered out. Never rely on time alone—every oven varies!