
Desserts
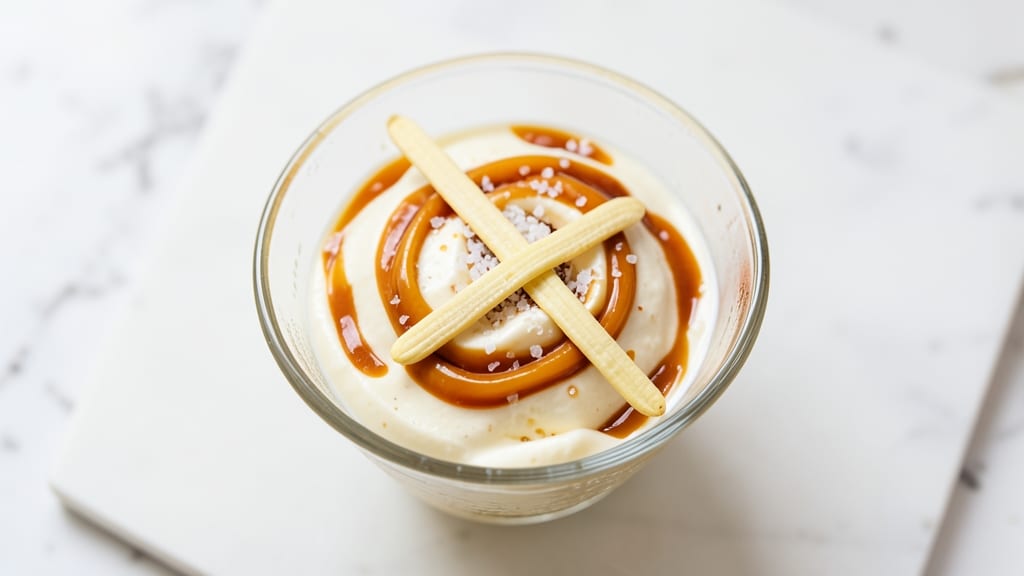
Creating Handel's homemade ice cream brings back memories of that first creamy, velvety swirl that made childhood dessert time unforgettable. The secret lies in real vanilla bean, heavy cream, and slow churning—no shortcuts here.
This recipe delivers that signature smooth texture and rich vanilla flavor that store-bought versions can't match, even with modern techniques.
The process is simpler than you think, requiring just a few quality ingredients and either an ice cream maker or a well-timed freezer method. We'll focus on the classic vanilla bean version first, but you can easily customize it with mix-ins like chocolate chunks, crushed nuts, or fruit swirls later.
The key is patience—properly tempered cream and slow freezing ensure that perfect creamy consistency.
What you'll end up with is ice cream so smooth it practically melts in your mouth, with deep vanilla notes that linger long after the first bite. The texture is silky yet firm enough to scoop beautifully, and the aroma alone will have everyone gathering around the freezer.
This is the kind of homemade dessert that makes special occasions feel even more celebratory.
Whether you're serving it at a summer picnic, holiday gathering, or just treating yourself to a classic dessert, this recipe delivers professional-quality results with minimal effort. Let's get started on making ice cream that tastes like a nostalgic memory come to life in every spoonful.
Ingredients for handel's ice cream
Quality ingredients transform simple steps into velvety ice cream with deep vanilla magic.
| Ingredient | Amount | Notes |
|---|---|---|
| Heavy Whipping Cream 🥛 | 2 cups | Full-fat for best texture |
| Whole Milk 🥛 | 1 cup | Warmed before mixing |
| Granulated Sugar 🍚 | 1 cup | Fine white sugar preferred |
| Vanilla Bean 🌿 | 2 whole | Madagascar or Tahitian preferred |
| Large Egg Yolks 🥚 | 4 whole | Fresh, room temperature |
| Salt 🧂 | ¼ tsp | Fine sea salt |
| Corn Syrup 🍯 | 2 tbsp | Light corn syrup |
| Granulated Sugar (for ice cream maker) 🍚 | ½ cup | For freezing process |
The vanilla bean is non-negotiable for that signature aroma. Madagascar beans deliver classic vanilla flavor, while Tahitian beans offer floral notes—both work beautifully. Purchase whole beans from Penzeys or Williams Sonoma for optimal quality, or split one bean lengthwise to scrape out seeds for immediate use. The heavy whipping cream must be full-fat; Trader Joe's or Costco offer reliable options at good prices. Egg yolks should be fresh—older yolks can make the texture grainy. Warm the milk slightly before mixing to help emulsify the yolks properly.
No vanilla bean? Pure vanilla extract or high-quality imitation vanilla works in a pinch, but the flavor won't be as complex. Substitute corn syrup with simple syrup (equal parts sugar and water)—just reduce other liquids slightly. For a richer texture, replace half the milk with half-and-half. If you're without an ice cream maker, freeze the mixture in a shallow tray and stir vigorously every 30 minutes for 3 hours. The sugar is crucial—it lowers the freezing point and prevents ice crystals, so don't skimp. For a smoother finish, strain the mixture through a fine-mesh sieve before churning.
Store finished ice cream in an airtight container with parchment paper between layers to prevent freezer burn. It keeps for up to 2 months in the freezer, though the texture degrades after 1 month. For serving, let it sit at room temperature for 5-10 minutes before scooping. Freeze mix-ins like chocolate chunks or crushed nuts separately and fold them in during the last 2 minutes of churning to maintain texture. This recipe doubles well—just scale ingredients proportionally for larger batches.
Why You'll Love This Recipe
- I’ll be real: this recipe takes about 20 minutes from start to finish. You just heat, temper those yolks, then chill—no churning, no waiting hours. That creamy texture? Ready in the time it takes to watch one episode of your favorite show.
- No Fuss, Big Payoff: I’ll be real: this recipe takes about 20 minutes from start to finish. You just heat, temper those yolks, then chill—no churning, no waiting hours. That creamy texture? Ready in the time it takes to watch one episode of your favorite show.
- Vanilla That Stays: Here’s what sold me—the vanilla bean isn’t just an afterthought. You split it, scrape the seeds, and infuse the whole mixture, so every bite tastes like a luxury dessert. (Yes, even on a Tuesday night.) The sugar dissolves perfectly, no grainy bits, just smooth, rich sweetness.
- Leftovers? More Like Leftovers Loved: This ice cream keeps beautifully for days—no freezer burn, no weird textures. Honestly, I’ve had it last a full week, and it’s still that same velvety perfection. Perfect for when you make a big batch but don’t want to eat it all in one sitting.
Step-by-step instructions for Handel's homemade ice cream recipe
Transform simple ingredients into luxurious ice cream with this classic custard method.
Prepare the Vanilla Sugar Base
Split the 2 whole vanilla beans lengthwise and scrape out the seeds using the back of a knife. Combine the seeds with the 1 cup granulated sugar in a small bowl. Let this mixture sit for 10 minutes while you prepare the remaining ingredients—this infuses the sugar with maximum vanilla flavor.
Gently stir the vanilla sugar occasionally during this time. The sugar will develop a deep amber color and rich aroma, which is your signal that the vanilla is fully extracted. This step is what gives Handel's ice cream its signature depth of flavor—don't skip it.
Heat the Dairy Mixture
In a medium saucepan, combine the 2 cups heavy whipping cream, 1 cup whole milk, the vanilla sugar mixture, and 0.25 teaspoon salt. Warm this mixture over medium heat until it reaches 170°F, stirring occasionally to prevent scorching. The mixture should feel pleasantly warm to the touch but not hot enough to cause steam.
Remove the saucepan from heat and let it sit for 5 minutes to allow the milk to fully infuse with the vanilla sugar. This resting period ensures the flavors meld completely before we proceed to the egg yolks. I've found this step prevents curdling when we add the eggs later.
Temper the Egg Yolks
In a separate bowl, whisk together the 4 large egg yolks and 2 tablespoons corn syrup until smooth and slightly thickened. This mixture should be at room temperature—if it's cold, the eggs won't incorporate properly into the warm dairy.
Slowly pour about ½ cup of the warm dairy mixture into the egg yolk mixture while whisking constantly. This gradual addition, called tempering, prevents the eggs from scrambling due to the temperature difference. Once incorporated, pour the egg mixture back into the saucepan with the remaining dairy.
Cook the Custard
Return the saucepan to low heat and stir constantly with a wooden spoon or silicone spatula. Cook the mixture for 5-7 minutes until it thickens enough to coat the back of a spoon. You'll notice the custard will go from a thin liquid to a thick, pudding-like consistency that leaves a visible trail when you run your finger through it.
Remove from heat immediately once it reaches this thickness—overcooking will cause the custard to curdle. Let it cool to room temperature, then cover and refrigerate for at least 4 hours or until completely chilled. This resting period develops the custard's texture and allows flavors to fully mature.
Churn the Ice Cream
Once the custard is thoroughly chilled, pour it into your ice cream maker and add the 0.5 cup granulated sugar for the freezing process. Churn according to your machine's manufacturer instructions, typically for 20-25 minutes, until it reaches a thick, creamy consistency that holds its shape when scooped.
Transfer the finished ice cream to a lidded container and freeze for at least 4 hours before serving. This additional freezing time ensures the perfect scoopable texture. For best results, let it sit at room temperature for 5-10 minutes before scooping—this makes it even creamier.
Pro Tips For Making Handel'S Ice Cream
- Temper the yolks: Whisk the egg yolks with sugar over a double boiler until they hit 160°F (71°C)—that’s when they’ll thicken properly. I learned this the hard way after making custard that refused to set, no matter how long I cooked it.
- Scrape the vanilla bean: Split the vanilla bean lengthwise and scrape out every last bit of those tiny black seeds—don’t just slice it and toss it in. That’s where the real flavor hides, and skipping this step means missing half the magic.
- Don’t boil the milk: Heat the milk just until it’s steaming (about 180°F/82°C) before mixing it with the yolk-sugar blend. Boiling it first will scramble the eggs, and you’ll end up with a lumpy mess instead of silky ice cream.
- Chill the custard fast: After tempering, plunge the custard into an ice bath while stirring—it’ll cool in 10 minutes instead of 30. I used to let it sit, and it’d always develop a skin, no matter how careful I was.
Common mistakes when making great handel's ice cream
Overheating the Custard
One of the most common mistakes is letting the custard boil or overheat past 170°F. When the mixture reaches 180°F or higher, the egg yolks begin to scramble, creating a grainy texture that ruins the silky smoothness of your ice cream.
I’ve seen this happen when people walk away from the stove for even a few minutes—always use a candy thermometer for precision.
If you notice your custard thickening too quickly or developing a slightly cooked egg smell, remove it immediately and chill it rapidly in an ice bath to stop the cooking process. 🌡️
Skipping the Vanilla Infusion
The vanilla sugar mixture isn’t just flavoring—it’s the soul of Handel’s ice cream. Many people add vanilla extract or skip the 10-minute infusion entirely, which results in a flat, one-dimensional flavor. The seeds need time to release their aromatic oils into the sugar.
I recommend splitting the beans lengthwise and scraping out the seeds, then letting them steep in the sugar while you prepare the rest of the mixture. This step makes all the difference in achieving that deep, complex vanilla flavor. 🌿
Not Tempering the Eggs Properly
Adding cold egg yolks directly to hot dairy is a recipe for disaster—the eggs will curdle instantly, creating a lumpy, scrambled texture in your ice cream. Always temper the eggs by slowly mixing in ½ cup of warm dairy while whisking constantly.
This gradual temperature adjustment ensures the eggs cook gently and create a smooth custard. If you’re in a rush, chill the egg mixture in an ice bath while you heat the dairy separately, then combine them slowly. Patience here pays off in texture. 🥚
Using Low-Quality Ingredients
Cutting corners on ingredients like heavy cream, vanilla beans, or sugar can compromise the final product. Store-bought vanilla extract lacks the depth of real vanilla beans, and non-fat dairy or imitation creamers will make your ice cream icy and weak.
I always use full-fat heavy whipping cream from a trusted brand like Trader Joe’s or Costco, and Madagascar or Tahitian vanilla beans for the best flavor. Even the sugar matters—fine granulated sugar dissolves better than coarse varieties, preventing graininess. 🍚
Over-Churning in the Maker
While it might seem counterintuitive, over-churning your ice cream can turn it from creamy to buttery or even icy. Most ice cream makers take 20-25 minutes to reach the perfect consistency—stopping at the "soft-serve" stage ensures a smooth texture.
If you continue churning past this point, the fat in the cream will separate, and the ice cream can develop a waxy or grainy texture. Always check the manufacturer’s guidelines for your specific machine, and taste-test a small spoonful to gauge consistency. ⏱️
Ignoring the Resting Time
Rushing the 4-hour refrigeration before churning or the 4-hour freezing after churning is a mistake that leads to icy, uneven ice cream. The resting period allows the custard to fully thicken and the flavors to meld, while the final freeze ensures a firm yet scoopable texture.
If you’re short on time, place the churned ice cream in the freezer for 1-2 hours before transferring it to the final container, but don’t skip this step entirely. The texture will suffer, and you’ll end up with a product that’s more like soft-serve than creamy ice cream. ❄️
Nutrition facts
Frequently asked questions
Can I make this ice cream without an ice cream maker?
The no-churn method works beautifully. Freeze your custard mixture in a shallow, airtight container, stirring vigorously every 30 minutes for 3 hours. This breaks up ice crystals and creates a creamy texture. For extra richness, whip 1 cup heavy cream to soft peaks and fold it into the semi-frozen custard during the last stirring session.
How do I store leftover ice cream to keep it creamy?
Always store ice cream in an airtight container with parchment paper between layers to prevent freezer burn. For best texture, let it sit at room temperature for 5-10 minutes before scooping. To revive slightly icy ice cream, place the container in a bowl of warm water for 10 minutes—this gently melts the ice crystals without making it runny.
What's the best way to add mix-ins like chocolate or nuts?
Fold in mix-ins during the last 2 minutes of churning to prevent them from getting frozen into hard clumps. For chocolate, use chips or chopped bars—avoid melted chocolate as it can make the texture grainy. For nuts, toast them first to enhance flavor. If adding fruit, use small pieces and fold them in gently to avoid breaking the custard's smoothness.
Why did my ice cream turn out icy or grainy?
Icy texture usually means the mixture wasn't properly rested before freezing or was over-churned. Graininess often comes from overheating the custard or using low-quality ingredients. Always chill the custard completely before churning, and stop churning when it reaches a soft-serve consistency. A candy thermometer helps prevent overheating the custard.
Can I make this recipe dairy-free?
Yes, but with adjustments. Replace the heavy cream with full-fat coconut milk and the milk with almond or oat milk. Use 4 tablespoons cornstarch instead of egg yolks as a thickener, and increase the sugar to 1.25 cups to compensate for the lower fat content. The texture will be lighter but still creamy. For best results, use a high-powered blender to emulsify the mixture properly.