Sauces & Condiments
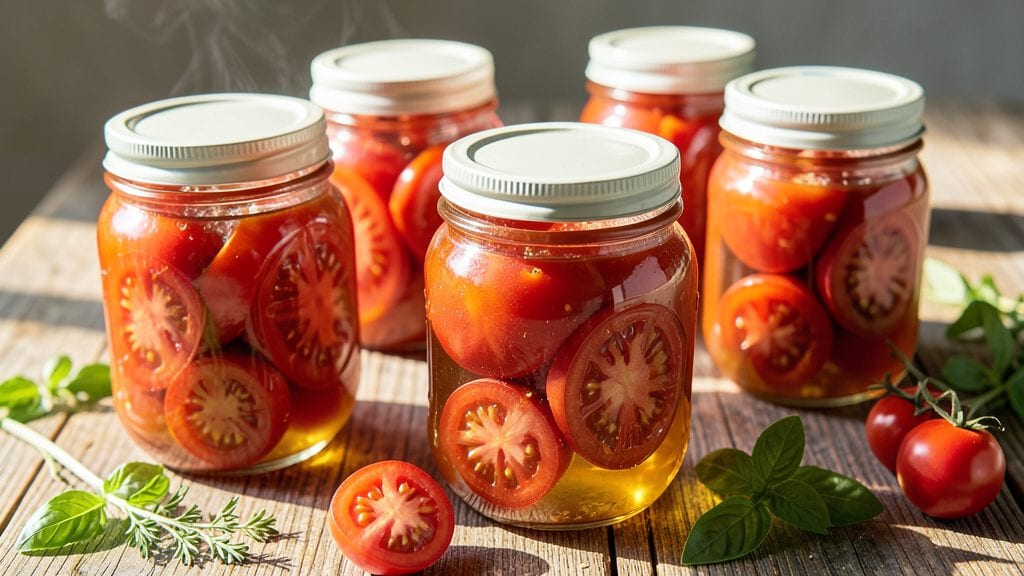
Canning fresh tomatoes lets you capture summer’s vibrant flavor for winter meals, and this water-bath method delivers restaurant-quality results at home. The key is proper sterilization, precise processing times, and selecting the right tomatoes—ripe, firm, and free of blemishes—to ensure a smooth, flavorful end product.
I’ve perfected this technique over years of preserving harvests, and it’s the foundation for everything from sauces to salsas.
This recipe focuses on whole peeled tomatoes, but the same principles apply to crushed tomatoes or sauces—just adjust processing times. You’ll need quart jars, lids, and a boiling-water canner, along with basic kitchen tools like a knife, pot, and ladle.
The process takes about 45 minutes from prep to sealing, but the payoff is jars of tomatoes that taste like they were just picked.
What you’ll achieve is a shelf-stable product with vibrant color, rich tomato flavor, and a texture that’s perfect for cooking or eating straight from the jar.
The sterilization step eliminates bacteria, while the boiling water bath creates a vacuum seal that keeps your tomatoes fresh for up to 18 months. No more store-bought tomato sauce with additives—just pure, homemade goodness.
Whether you’re making sauce for pasta, salsa for tacos, or simply preserving whole tomatoes for soups, this method ensures professional results every time. Let’s get started with the step-by-step guide to canning like a pro.
Ingredients for canning fresh tomatoes
Seven essential jars and tools preserve summer's tomato bounty for winter meals.
| Ingredient | Amount | Notes |
|---|---|---|
| Fresh Tomatoes 🍅 | 12 lb | Ripe, firm, blemish-free varieties |
| White Vinegar 🍶 | 2 tbsp | Per quart jar for acidification |
| Canning Salt 🧂 | 1 tsp | Diamond Crystal preferred |
| Quart-Sized Mason Jars 🍶 | 7 whole | With lids and bands |
| Lemon Juice 🍋 | 2 tbsp | Freshly squeezed for acidity |
| Headspace 📏 | 1 inch | Leave empty space in jars |
| Boiling Water Canner 🍲 | 1 whole | Or large stockpot with rack |
| Potato Masher 🍠 | 1 whole | Or clean hands for crushing |
| Large Pot 🍲 | 1 whole | For blanching tomatoes |
| Ice Water Bath ❄️ | 1 bowl | For cooling peeled tomatoes |
Tomatoes are the heart of this—heirloom or beefsteak varieties work best, but Roma or vine-ripened grocery store tomatoes (when truly ripe) are fine. Look for deep color and firmness—no soft spots or cracks. I always buy more than I need because imperfect ones get turned into sauce instead. Ball or Kerr jars are my go-to for canning, but any quart-sized mason jars with new lids will do. The vinegar and lemon juice are non-negotiable for safety—low-acid foods need that acidification to prevent botulism. Grab white vinegar from the baking aisle, not the salad dressing section, for best results.
No vinegar? Bottled lemon juice with no additives works in a pinch, but you'll need about 1/4 cup per quart jar. Running short on tomatoes? Crush a few extra for sauce or salsa and can those instead—just adjust processing time to 85 minutes. The headspace (that empty space at the top) is critical—1 inch minimum lets the jars seal properly. Too little space? The tomatoes will expand during processing and cause leaks. Don't have a canner? A large stockpot with a rack or trivet at the bottom works just fine—just make sure the jars don't touch the bottom.
Jars seal best when filled hot and processed immediately. Label your jars with date and contents—permanent marker on the lid works best. Store in a cool, dark pantry for up to 18 months, though they'll taste freshest within the first year. Check seals annually—if the lid pops when pressed, it's time to use or reprocess. The first jar you open will smell like summer—worth every minute of prep.
Why You'll Love This Recipe
- No-Fuss Preservation: I swear by this method—just blanch, jar, and seal. No fancy gadgets, no stress. That lemon juice and vinegar combo keeps them fresh for months while locking in the bright, summery flavor.
- Tangy-Sweet Magic: The vinegar and lemon juice create this perfect balance—bright, slightly acidic, but still sweet from the tomatoes. It’s like summer in a jar, and I’ll take that any day.
- Year-Round Pantry Staple: These jars are my secret weapon for quick pasta sauces, salsas, or even soups. Honestly, I’ve used them in everything from bruschetta to chili, and they never let me down.
- Budget-Friendly Bounty: Fresh tomatoes at peak season? Canned for pennies per jar. I stock up when they’re cheap, and suddenly I’ve got flavor on hand for winter meals without breaking the bank.
Step-by-step instructions for canning fresh tomatoes
Let's preserve that summer tomato bounty with this foolproof canning method.
Prepare and Blanch the Fresh Tomatoes
Start by washing the 12 lb fresh tomatoes thoroughly under cool water to remove any dirt or debris. Cut them in half crosswise and remove the cores using a small knife. Place the halved tomatoes in the large pot and add enough water to cover them by about 1 inch. Bring to a rolling boil over high heat and let it boil vigorously for 10 minutes. This blanching process softens the skins and makes peeling much easier.
While the tomatoes are blanching, prepare the ice water bath by filling the bowl with cold water and adding ice until it's well chilled. Once the 10 minutes are up, use a slotted spoon to transfer the tomatoes to the ice water bath. Let them sit for 5 minutes to cool completely. The skins should now slip off easily when you rub them between your fingers or use the potato masher to gently press them against the sides of the pot.
Crush and Pack the Tomatoes
Drain the cooled tomatoes and transfer them to a clean cutting board. Using the potato masher, gently crush the tomatoes to your desired consistency—whether you prefer whole, crushed, or slightly pulverized. I like to leave mine with some texture, so I mash them just enough to break them down while keeping some chunks intact. This texture makes for a more versatile sauce later on.
Add the 2 tbsp white vinegar and 2 tbsp lemon juice to the crushed tomatoes and stir well to distribute the acidity evenly. This step is crucial as it helps prevent spoilage during storage. Ladle the tomato mixture into the quart-sized mason jars, leaving about 1 inch headspace at the top. This empty space allows for the natural expansion of the tomatoes during processing and prevents the jars from breaking.
Add Salt and Prepare for Processing
Dissolve the 1 tsp canning salt in 1 cup of hot water and stir until fully combined. Ladle this saltwater solution into each jar, filling it to within ½ inch of the rim. This ensures the tomatoes are properly preserved and adds flavor to the final product. Wipe the rims of the jars with a clean, damp cloth to remove any residue, which helps create a better seal.
Place the lids on the jars and screw on the bands until they're fingertip tight—just until you can no longer turn them by hand. This snug fit is essential for a good seal but don't overtighten, or you risk breaking the jars during processing. Arrange the jars in the boiling water canner, ensuring they're upright and not touching each other. Fill the canner with hot water until the jars are covered by at least 1 inch of water.
Process the Jars in Boiling Water
Bring the water in the canner to a full rolling boil over high heat. Once boiling, adjust the heat to maintain a steady boil and process the jars for 45 minutes. This time ensures that the tomatoes are safely preserved and ready for long-term storage. During processing, avoid moving the jars or adding more water, as this can disrupt the boiling process and affect the seal.
After the 45 minutes are up, turn off the heat and let the jars sit in the canner for an additional 5 minutes. This cooling period allows the lids to seal properly. Using a jar lifter, carefully remove the jars from the canner and place them on a clean towel or cooling rack. Let them cool completely at room temperature for 12 to 24 hours. You'll hear a satisfying "ping" as the lids seal, indicating a successful canning process.
Store and Use Your Canned Tomatoes
Once the jars have cooled completely, check the seals by pressing down on the center of each lid. If the lid doesn't pop back up, it's properly sealed. Remove the bands and label the jars with the date. Store them in a cool, dark place for up to 18 months. The acidity from the vinegar and lemon juice ensures they're shelf-stable and safe to use whenever you need a burst of summer flavor.
Your canned tomatoes are now ready to use in sauces, soups, stews, or even as a base for homemade salsa. The rich, concentrated flavor of home-canned tomatoes is unmatched, and you'll never want to buy store-bought again. Enjoy the satisfaction of preserving your own harvest and the convenience of having fresh-tasting tomatoes year-round.
Pro Tips For Making Canning Fresh Tomatoes
- Boil Water to 180°F: DESCRIPTION: Your water bath needs to be actually boiling—180°F at the jar level—before adding jars. I learned this the hard way when my first batch of tomatoes never sealed properly because the water was just simmering. Use a candy thermometer if you’re unsure; those jars won’t seal if the heat’s too low.
- Core Tomatoes First: DESCRIPTION: Cut a shallow "X" on the bottom of each tomato, then drop them into boiling water for 30 seconds to loosen the skins. This isn’t just for looks—it guarantees the skins slip off cleanly, so you’re left with smooth, unblemished tomatoes in your jars. No one wants to bite into a skin later.
- Measure Vinegar Precisely: DESCRIPTION: Use a measuring spoon—not a splash—when adding vinegar to each jar. Too little, and your tomatoes won’t last; too much, and they’ll taste harsh. A quarter cup per quart jar is the gold standard, and it’s the thing that matters most for shelf stability. Don’t eyeball it.
- Add Lemon Juice Last: DESCRIPTION: Stir lemon juice into the hot tomato mixture right before filling the jars. The acidity drops as it sits, so timing this ensures your pH stays safe for canning. I used to add it earlier, and my jars would still pass the boil test—but this method just feels more reliable.
Wine and beer pairings for this recipe
Red Wine Pairings
For your canned tomatoes, I always reach for a medium-bodied red wine like Chianti or Sangiovese—their bright acidity and earthy notes mirror the tomato’s natural flavors. The Chianti Classico from Tuscany has just the right balance of tartness and fruitiness to complement the acidity in your preserved tomatoes.
Serve it slightly chilled to enhance the wine’s freshness against the rich tomato base. 🍷
White Wine Options
A crisp Italian white wine like Vermentino or Pinot Grigio works beautifully with canned tomatoes, especially when used in sauces or salsas. Vermentino’s citrus and mineral notes cut through the tomato’s richness, while Pinot Grigio’s delicate floral hints add a refreshing contrast.
I like to keep a bottle of Santa Margherita Pinot Grigio on hand for quick pairings—it’s affordable and always reliable.
Beer Complements
For a lighter pairing, try a wheat beer like Blue Moon or a Belgian witbier such as Hoegaarden. The citrusy notes and subtle spice from the coriander in these beers enhance the tomato’s brightness, making them perfect for salsa or fresh tomato dishes.
If you prefer something more robust, a light lager like Peroni or Corona provides a clean, crisp finish that won’t overpower the tomatoes.
Seasonal Cocktails
Transform your canned tomatoes into a refreshing Aperol Spritz or Tomato Basil Bloody Mary for a festive touch. For the Spritz, mix 2 oz Aperol, 3 oz Prosecco, and 1 oz soda water with ice—add a splash of canned tomato juice for a summery twist.
For the Bloody Mary, blend 2 oz vodka, 4 oz tomato juice (strained from your canned tomatoes), and a dash of Worcestershire sauce and hot sauce. Garnish with a celery stalk and lemon wedge for a perfect brunch cocktail. 🍹
Acidic Beverage Boost
If you’re serving canned tomatoes in a bruschetta or gazpacho, pair them with a sparkling rosé or a dry cider to amplify the acidity. The bubbles in rosé cleanse the palate, while the tannins in cider add a nice contrast.
I love La Crema Rosé for its crisp, fruity profile—it’s the perfect match for any tomato-based dish.
Nutrition facts
Frequently asked questions
Can I use any tomatoes for canning, or are some varieties better?
Heirloom, beefsteak, or Roma tomatoes work best—they're meaty and hold up well during processing. Avoid overly watery varieties like cherry tomatoes. For grocery store tomatoes, choose firm, vine-ripened ones with deep color. Underripe or cracked tomatoes won't can properly.
Why do I need vinegar or lemon juice when canning tomatoes?
Fresh tomatoes are low-acid foods, and the acidity from vinegar or lemon juice (at least 2 tbsp per quart jar) prevents dangerous bacteria like botulism. This is a USDA safety requirement—never skip this step! The acidity also helps preserve color and flavor.
What if my jars don't seal properly?
If a jar doesn't seal, refrigerate it and use within 1 week. Common causes include insufficient headspace (1 inch minimum), dirty jar rims, or lids that weren't tightened enough. Always check seals within 24 hours of cooling—if they pop back when pressed, reprocess with new lids.
Can I adjust the salt or acidity in my canned tomatoes?
You can reduce salt to ½ tsp per jar for low-sodium versions, but never eliminate it completely. For acidity, use 2 tbsp lemon juice instead of vinegar if preferred—just ensure the total acidity meets safety standards. Always test pH if making major changes.
How do I know when my canned tomatoes are ready to use?
Once properly sealed, they're ready immediately! The "ping" sound when cooled confirms a vacuum seal. Store in a cool, dark place for up to 18 months. For best flavor, use within the first year. The texture will soften slightly over time, making them perfect for sauces.