
Snacks
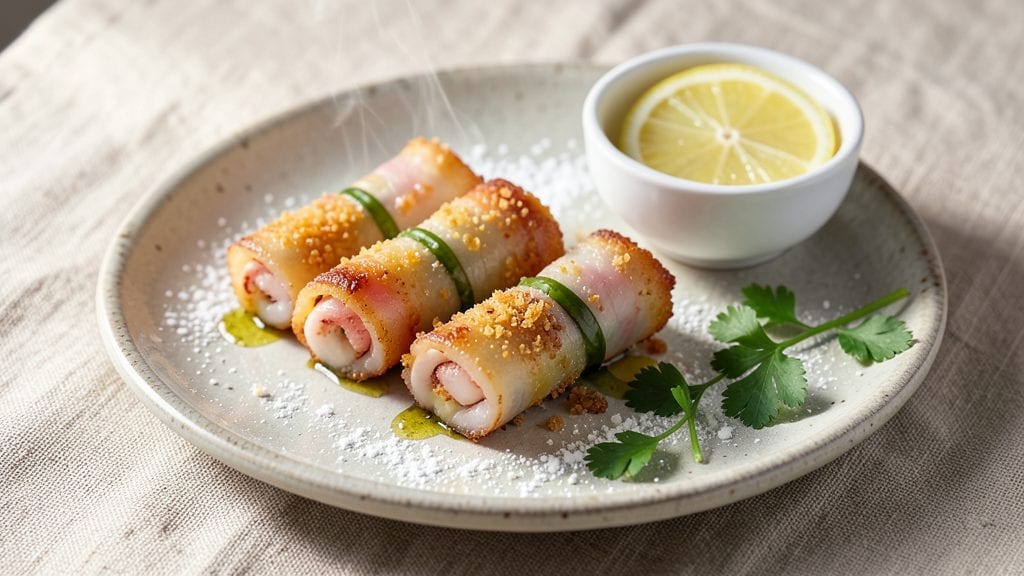
This crispy calamari roll recipe transforms tender squid into golden, parchment-wrapped bites that are crisp on the outside and tender within. The secret lies in properly preparing the calamari—cleaning, cutting, and breading it just right—before wrapping it in parchment for a foolproof cooking method that delivers restaurant-quality results every time.
Whether you're serving these as appetizers or a light main dish, the zesty lemon drizzle adds a bright, tangy finish that elevates the dish.
The beauty of this recipe is its versatility—you can bake, fry, or even grill the calamari rolls, depending on your preference. I’ve tested all three methods, and each delivers a satisfying crunch while keeping the squid juicy inside.
The parchment wrap ensures they stay intact, making it easy to serve and eat without the mess. Plus, the technique works for both traditional Japanese-style ika maki and modern twists like spicy mayo or gluten-free wraps.
By the time you’re done, you’ll have crispy, golden rolls with a satisfying crunch that gives way to tender squid in every bite. The lemon drizzle ties it all together, adding a refreshing contrast to the richness of the calamari.
This dish pairs perfectly with a crisp white wine or a citrusy gin fizz, making it ideal for gatherings or a special weeknight dinner.
Ready to impress your guests? Let’s get started with a step-by-step guide that ensures crispy, delicious calamari rolls every time.
Ingredients for calamari roll
Pantry staples plus fresh seafood—crispy, golden bites in minutes.
| Ingredient | Amount | Notes |
|---|---|---|
| Fresh Calamari (Squid) 🦑 | 1 ½ lb | Cleaned, tentacles and bodies separated |
| All-Purpose Flour 🌾 | 1 cup | For light, crispy coating |
| Cornstarch 🌾 | ¼ cup | For extra crispiness |
| Panko Breadcrumbs 🍞 | ½ cup | Japanese panko preferred |
| Large Eggs 🥚 | 2 whole | Beaten for even coating |
| Extra-Virgin Olive Oil 🫒 | ¼ cup | For light frying or brushing |
| Parchment Paper 📄 | 1 sheet | Cut into 4-inch squares |
| Lemon Juice 🍋 | ¼ cup | Freshly squeezed |
| Garlic Powder 🧄 | 1 tsp | For seasoning coating |
| Salt 🧂 | 1 tsp | Kosher or sea salt |
| Black Pepper 🌶️ | ½ tsp | Freshly ground |
| Vegetable Oil 🫒 | 1 cup | For frying (or baking spray) |
| Fresh Parsley 🌿 | ¼ cup | Chopped for garnish |
The calamari makes or breaks this dish. Buy it live or freshly frozen—look for vibrant color and firm texture at Whole Foods or your local seafood counter. If it's frozen, thaw it in the fridge overnight. The tentacles and bodies need to be cleaned thoroughly (or buy pre-cleaned to save time). For the coating, Japanese panko gives the best texture—if you can't find it, regular panko works. The flour and cornstarch combo ensures that perfect crunch without burning. I always grab extra lemon juice too—it's the secret weapon for that bright finish.
No panko? Crushed cornflakes or gluten-free breadcrumbs work in a pinch. Short on cornstarch? Add an extra tablespoon of flour instead. The olive oil is non-negotiable for frying—light, fruity varieties like California extra-virgin prevent burning. If you're baking instead of frying, use a light spray of vegetable oil on the parchment before wrapping. The lemon juice? Meyer lemons have that perfect balance of sweet and tart—regular lemons work too, but you might need a tad more. Fresh parsley is ideal, but dried parsley at half the amount gets you close if you're in a rush.
Calamari cooks fast—3-4 minutes max in hot oil. Keep it warm in the oven while you finish the batch. The parchment-wrapped rolls stay crispy for 15-20 minutes if you keep them covered. For make-ahead prep, assemble the rolls (without frying) and refrigerate for up to 4 hours. Bake them straight from the fridge for even crispiness. Garnish with extra lemon zest right before serving—it brightens everything up.
Why You'll Love This Recipe
- No Fuss Setup: I swear by this recipe because it’s basically hands-off after the first step. Rinse the squid, pat it dry, and you’re done—no chopping, no peeling, just clean tubes ready for rolling. The cornstarch mix sticks like glue, so even if my hands get a little messy, the rolls stay together.
- Crispy-Creamy Magic: That double-dip in flour and panko? It’s what makes this dish ridiculously good. The exterior gets a golden, shatteringly crisp bite while the inside stays tender—like a hug for your taste buds. Honestly, the first time I bit into one still warm from the pan, I nearly dropped the whole plate.
- Game for Any Meal: Between us, these rolls are my secret weapon for lazy nights, potlucks, or when I need to feed a crowd without stress. Serve them with lemon wedges for a bright bite, or toss them into a pasta dish for extra protein. My college-aged son even asked for seconds when I brought them to his dorm—no small feat.
Step-by-step instructions for crispy parchment wrapped calamari rolls
Here's how to create golden, crispy calamari rolls that stay perfectly shaped and packed with flavor.
Prepare the Calamari for Rolling
Start by cleaning the 1.5 lb fresh calamari if not already done—pat it completely dry with paper towels. The tentacles should be separated from the bodies. Lay each body piece flat on a cutting board and gently open it like a book by slicing along the side with a sharp knife. You want to create a flat surface about 1/4-inch thick—this makes rolling much easier.
Season both sides of each piece with 1 tsp salt, 1 tsp garlic powder, and 0.5 tsp black pepper. I like to press the seasoning in gently so it sticks. Let the seasoned calamari rest for 10 minutes at room temperature while you prepare the coating mixture. This resting time helps the seasoning adhere better and ensures even cooking.
Create the Crispy Coating Mixture
In a medium bowl, whisk together the 1 cup all-purpose flour, 0.25 cup cornstarch, remaining 0.5 tsp black pepper, and any remaining 1 tsp salt if needed. The cornstarch is key here—it creates an extra crispy texture that regular flour alone can't match. In another shallow dish, beat the 2 whole large eggs until just combined but still slightly thick.
Place the 0.5 cup panko breadcrumbs in a third shallow dish. The panko will add a delightful crunch to the outside of your rolls. For extra flavor, you can lightly toast the panko in a dry skillet over medium heat for 2-3 minutes until golden—just watch it closely so it doesn't burn. Let it cool completely before using.
Assemble and Roll the Calamari
Working with one piece at a time, dip each seasoned calamari piece into the egg wash, letting any excess drip off. Then press it into the flour mixture, coating both sides evenly. Transfer to the panko breadcrumbs and press again to adhere completely. Place on a wire rack set over a baking sheet to keep them from sticking.
Now for the rolling: using the parchment paper squares, place one on your work surface. Lay a calamari piece horizontally near the bottom edge. Using your fingers, gently roll it up tightly from the bottom, keeping the seam sealed. Brush the outside lightly with 0.25 cup extra-virgin olive oil to help with browning. Repeat with remaining pieces, working quickly so the coating stays crisp.
Fry Until Golden and Crispy
Heat 1 cup vegetable oil in a deep skillet or Dutch oven to 350°F. You'll want about 2 inches of oil depth—this ensures the rolls cook evenly without falling apart. Test the oil temperature by dropping in a small piece of panko; it should sizzle and float immediately. If it sinks, wait another minute for the oil to heat up.
Carefully add the rolls to the hot oil, working in batches if needed to avoid overcrowding. Fry for 2-3 minutes per side until they're a deep golden brown color. The rolls should feel firm when you press them gently with tongs—that's your signal they're perfectly crispy inside and out. Transfer to a paper towel-lined plate to drain excess oil.
Serve with Zesty Lemon Drizzle
While the rolls are still hot, mix the 0.25 cup lemon juice with a pinch of salt in a small bowl. Drizzle this bright citrus sauce over each calamari roll just before serving. The acidity cuts through the richness of the fried calamari beautifully. Garnish with chopped 0.25 cup fresh parsley for a pop of color and freshness.
Serve immediately with your favorite dipping sauce—whether it's marinara, aioli, or just extra lemon juice. The contrast of crispy outside, tender inside, and zesty lemon makes these calamari rolls irresistible. Don't forget to enjoy them while they're hot, as they'll lose some crispness as they cool.
Pro Tips For Making Calamari Roll
- Trim the Tentacles First: Cut off the squid’s tentacles before rolling—it’s easier to handle and they crisp up faster in the panko. I used to try rolling them whole, and half the time they’d unravel like a drunk octopus.
- Use Cold Water for Dredging: Chill your egg wash and flour mixture in the fridge for 10 minutes before dredging. Warm flour makes the batter gummy, and cold egg keeps the panko from turning into a soggy mess. Trust me, your first batch will taste like a science experiment if you skip this.
- Double-Fry for Crisp: Fry the rolls once at 350°F (175°C) until golden, then crank the oil to 375°F (190°C) for a final 30 seconds. The first fry cooks through, the second sears the crust—no more rubbery or greasy bites. (Yes, even if you’re impatient like me.)
- Toss Panko with Oil: Mix panko with 1 tablespoon oil before dredging—it sticks better and toasts into a crunchier shell. I learned this the hard way after watching my first batch turn into a sad, greasy pile. Now it’s the thing that matters most.
Essential equipment for this recipe
Frying Essentials
For perfect frying, a deep skillet or Dutch oven with 2-inch oil depth is non-negotiable. I swear by a 12-inch Lodge cast iron skillet—it maintains even heat distribution and handles high temperatures beautifully.
If you're deep-frying, a thermometer (like the Thermoworks Smoke) ensures your oil stays at 350°F precisely. For smaller batches, a deep-fat fryer like the Ninja Foodi works well too. 🔥
Baking Alternatives
If you prefer baking, a rimmed baking sheet with parchment-lined racks prevents sogginess. Preheat your oven to 425°F and bake for 8-10 minutes, flipping halfway. A wire cooling rack underneath catches any drips.
For extra crispiness, broil for 1-2 minutes at the end—just watch closely to avoid burning. I use Wilton non-stick baking sheets for easy cleanup.
Coating Prep Tools
Three shallow dishes are key for the bread, egg, and panko station. I use Ceramic-coated non-stick bowls from Le Creuset—they’re durable and easy to clean. A wire rack (like the OXO Good Grips) keeps coated calamari off the counter while it dries.
For rolling, parchment paper squares (cut from a 12x12-inch sheet) work best. A sharp paring knife helps trim excess coating before rolling.
Cleaning & Safety
Always have paper towels and a slotted spoon ready for frying. A fine-mesh strainer helps drain excess oil after frying. For cleanup, keep hot pads nearby—cast iron stays scorching hot.
I also recommend a silicone spatula for gently flipping the rolls without tearing the coating. A fire extinguisher (or baking soda) should be within reach when frying. Safety first! ⚡
Optional Upgrades
For a gluten-free version, swap panko for crushed cornflakes or gluten-free breadcrumbs. A food processor makes quick work of crushing cornflakes. For extra flavor, add 1 tsp smoked paprika or ½ tsp cayenne to the flour mix.
A mini food mill helps create a smooth lemon drizzle if you prefer it finely textured. For presentation, edible gold leaf adds a gourmet touch.
Nutrition facts
Frequently asked questions
Can I use frozen calamari for these rolls?
Thaw frozen calamari overnight in the fridge before using. Pat it completely dry—any moisture will prevent the coating from sticking properly. For best results, use calamari that's been thawed for 12-24 hours to ensure even cooking and crispiness.
What’s the best way to keep the rolls from unrolling?
Roll the calamari tightly and seal the seam with a dab of egg wash or a tiny bit of flour. Use parchment paper squares that are slightly larger than your rolls—they act as a natural wrapper. For extra security, brush the outside with a light coat of olive oil before frying or baking.
Can I bake these instead of frying?
Yes! Preheat your oven to 425°F and bake the rolls for 8-10 minutes on a parchment-lined rack. Flip halfway for even browning. For extra crispiness, broil for 1-2 minutes at the end. Baking reduces oil but may make them slightly less crispy than fried versions.
How do I make these gluten-free?
Replace panko with crushed cornflakes or gluten-free breadcrumbs. Use a food processor for even texture. Swap all-purpose flour for a 1:1 gluten-free flour blend and add 1 tsp xanthan gum to bind the coating. The rolls will still be crispy but slightly denser.
What’s the secret to crispy coating?
Three keys: double-dipping (egg → flour → panko → egg again), using cornstarch in the flour mix, and keeping the calamari completely dry before coating. Rest the coated rolls on a wire rack for 5 minutes before frying to set the coating.