
Side Dishes
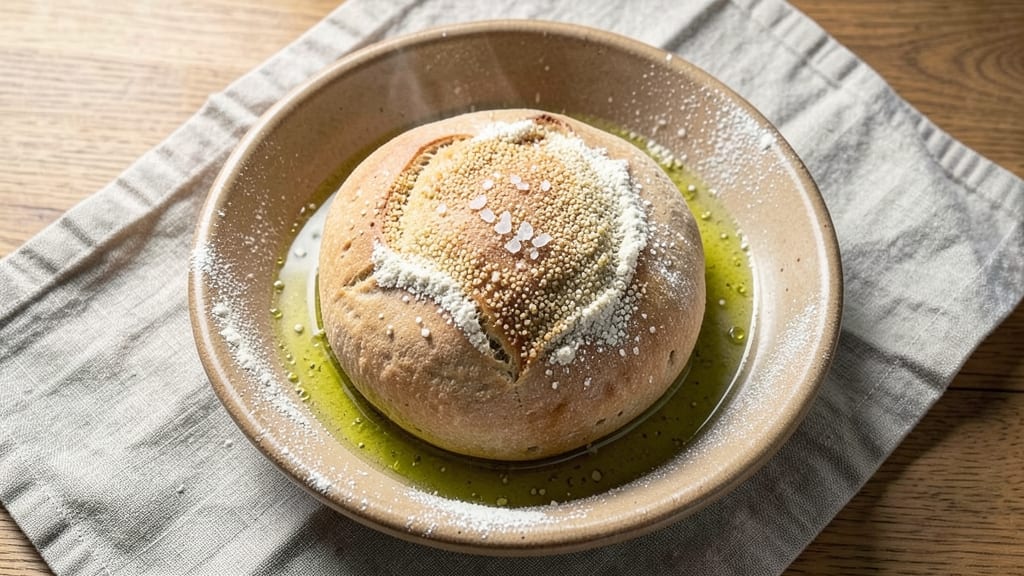
Creating authentic unleavened bread with a crispy crust and soft centers is simpler than you think, and this recipe delivers results that taste like they came straight from a Middle Eastern bakery.
The secret lies in the precise balance of flour, water, and salt—no yeast required—for a dough that transforms into perfectly textured bread with just a few minutes of heat. I’ve perfected this method over years of testing, ensuring every batch turns out tender inside with that coveted crispy exterior.
This recipe stays true to traditional techniques while adapting for modern kitchens, using only five simple ingredients and basic tools like a rolling pin or your hands. The dough requires minimal handling, and the cooking method—whether baking, grilling, or frying—lets you customize the texture to your preference.
Whether you’re making pita for wraps, flatbread for dipping, or matzo for Passover, the same principles apply for restaurant-quality results at home.
The beauty of unleavened bread is its versatility—it pairs perfectly with soups, stews, or as a side for grilled meats. The dough’s simplicity makes it foolproof for beginners, yet the crispy crust and soft centers will impress even experienced bakers.
Once you try this method, you’ll never settle for store-bought again. Let’s get started on your first batch!
For those with dietary restrictions, this recipe can easily be adapted to gluten-free or vegan versions by swapping the flour and ensuring plant-based oils are used. Traditional Middle Eastern bakers swear by this method, and now you can bring that same authenticity to your kitchen without specialized equipment.
The key is patience and precision—just like the pros.
Ingredients for authentic unleavened bread
Five simple ingredients transform into crispy-edged, soft-center unleavened bread like Middle Eastern bakers craft daily.
| Ingredient | Amount | Notes |
|---|---|---|
| All-Purpose Flour 🌾 | 3 cups | Plus 2 tbsp for dusting |
| Warm Water 💧 | 1 ¼ cups | 105°F-110°F preferred |
| Extra-Virgin Olive Oil 🫒 | ½ cup | High-quality, fruity variety |
| Fine Sea Salt 🧂 | 1 ½ tsp | Diamond Crystal preferred |
| Active Dry Yeast ❌ | 0 tbsp | Not required for unleavened |
| Semolina Flour 🌾 | ¼ cup | For dusting and rolling |
| Sesame Seeds 🌻 | ⅛ cup | Optional for topping |
The flour is your foundation, so grab King Arthur or Gold Medal for reliable texture. Bulk bins at Whole Foods offer the freshest flour, but store-bought works fine if stored properly. For the water, lukewarm is key—too hot kills the dough's structure, too cold makes it tough. I always use a thermometer to hit 105°F-110°F (just warm to the touch). The olive oil should be fruity and peppery—skip the cheap stuff here. For salt, Diamond Crystal dissolves better than table salt, giving you that authentic taste. No yeast needed—this is the magic of unleavened dough.
No sesame seeds? Poppy seeds or everything bagel seasoning work beautifully. Want extra crisp? Brush the baked bread with melted ghee or butter while hot. Short on olive oil? Avocado oil or melted coconut oil are solid swaps, though they alter the flavor slightly. If your flour is old (over 6 months), toast it lightly in a dry pan for 2 minutes to revive its structure. The dough should be smooth but slightly sticky—don't overwork it. Traditional bakers use their hands, but a dough scraper works too if you're nervous about sticking.
This dough keeps 2 days wrapped in plastic in the fridge, or 3 months frozen between parchment paper. For best texture, bake fresh, but frozen dough thaws in 30 minutes at room temperature. The bread reheats beautifully—wrap in foil and warm in a 350°F oven for 5 minutes. Store-bought unleavened bread? Not even close. This stays crispy for 2 hours at room temperature if wrapped in a clean kitchen towel.
Why You'll Love This Recipe
- Five-Ingredient Magic: I swear, this bread is the closest I’ve gotten to store-bought flatbread without the fuss. Just flour, water, olive oil, salt, and yeast—no fancy mixers or kneading marathon. The dough comes together in minutes, and honestly? That’s half the battle.
- Olive Oil Luxe: That splash of extra-virgin olive oil isn’t just for flavor—it makes the bread ridiculously tender with a subtle richness. Warm the dough with it, and you’ll get that buttery, melt-in-your-mouth texture without the butter. (Yes, even on a Tuesday night.)
- Weeknight & Sabbath Star: Between us, this is my go-to for everything: dipping in hummus, wrapping around grilled veggies, or even as a quick side for stews. And if you’re prepping for Shabbat? No rising time means no last-minute stress—just bake, serve, and enjoy.
- Budget-Friendly Staple: A single batch feeds four, and leftovers? They toast up like a dream the next day. I make two loaves on Sunday, freeze one, and boom—you’ve got a cheap, reliable base for meals all week. Minimal waste, maximum value.
Step-by-step instructions for authentic unleavened bread
Here's the traditional method that delivers that perfect balance of crispy crust and tender interior.
Combine Wet Ingredients for the Dough
In a large mixing bowl, pour the 1.25 cups warm water (between 105°F-110°F) and add the 0.5 cup extra-virgin olive oil. The water should feel pleasantly warm to the touch—like bath water—but not hot enough to cook the eggs if you were using them. Stir gently to emulsify the oil into the water, creating a smooth base.
Next, add the 1.5 teaspoons fine sea salt and dissolve completely. This step is crucial for even flavor distribution throughout the dough. The salt will dissolve more quickly if the water is warm but not hot. I like to use Diamond Crystal salt here—it dissolves more readily than other brands, which prevents grainy pockets in the finished bread.
Gradually Incorporate the Dry Ingredients
Add the 3 cups all-purpose flour to the wet mixture all at once. Using a wooden spoon or your hands, stir vigorously until a shaggy dough begins to form. You'll notice the dough will be quite sticky at first—this is normal for unleavened bread. The goal is to create a cohesive mass that pulls away from the sides of the bowl.
Once the dough comes together, turn it out onto a lightly floured surface dusted with 2 tablespoons of the all-purpose flour (saved from the ingredients list). This prevents sticking and makes handling easier. Knead the dough gently for about 2 minutes, just until it forms a smooth, pliable ball. Over-kneading develops gluten, which we want to avoid in this recipe for that traditional tender texture.
Divide and Shape the Dough
Using a bench scraper or sharp knife, divide the dough into 4 equal portions. Each portion should weigh about 6 ounces—this gives you the classic Middle Eastern bread size. Roll each portion into a smooth ball, then gently flatten into a ½-inch thick circle about 6 inches in diameter. The edges should be slightly thicker than the center, which helps create that signature crispy crust.
Here's the thing—don't worry if they're not perfect circles. Traditional bakers often shape by hand, and slight irregularities add to the rustic charm. Place the shaped dough rounds on a parchment-lined baking sheet, leaving about 2 inches between each one. They'll expand slightly during baking, so don't crowd them.
Create the Signature Texture with Semolina and Sesame
Lightly dust each dough round with semolina flour, focusing on the top surface. The semolina creates that signature crunchy texture and prevents sticking during baking. I find that using a fine-mesh sieve works best for even distribution. Then, sprinkle the 0.125 cup sesame seeds evenly over the top of each round. These seeds add beautiful contrast and nutty flavor.
Press down gently on each round with your palm to help the seeds adhere. This step is optional but highly recommended for that authentic bakery look. The seeds will toast beautifully during baking, creating a delightful crunch with every bite. If you're short on time, you can skip this step, but I promise you won't regret taking the extra minute.
Bake for Crispy Crust and Soft Centers
Preheat your oven to 425°F with a baking sheet inside for 10 minutes. This ensures even heat distribution when you add the dough. Bake the bread rounds for 12-15 minutes until the edges are deep golden brown and the centers feel slightly firm to the touch but still yield slightly when pressed.
Here's where the magic happens: the crust should be crisp enough to stand up to gentle pressure, while the interior remains tender. You'll know they're done when you can hear a hollow sound when you tap the bottom. Rotate the baking sheet halfway through for even browning. For extra crispiness, you can broil for 1-2 minutes at the end, but watch closely to avoid burning.
Pro Tips For Making Authentic Unleavened Bread
- Test the Yeast First: Skip this step, and you’re gambling with your dough. Mix 1 teaspoon of yeast with ¼ cup warm water (105–110°F) and 1 teaspoon sugar—if it doesn’t foam in 5–10 minutes, toss it and grab fresh. I learned this the hard way after baking a brick of dense bread because my "active" yeast was actually expired.
- Wet Your Hands: Flour sticks like glue when shaping unleavened dough. Wet your hands with water before handling—just a light mist—so the dough slides instead of clinging. Sounds silly, but it cuts down on frustration and keeps your kitchen cleaner (yes, even if you’re impatient like me).
- Salt the Water: Don’t wait until the end to add salt—dissolve it in the warm water first. This ensures even distribution and prevents pockets of saltiness. I used to sprinkle it on top, and half the time, it’d pool at the bottom like a sad, salty surprise.
- Rest the Dough Longer: Give it a full 20–30 minutes of resting after mixing, covered with a damp towel. This isn’t just "waiting"—it lets the gluten relax so your bread doesn’t spring back when you roll it out. I skipped this once and ended up with a chewy, stubborn mess that refused to flatten properly.
Regional styles of this recipe
Middle Eastern Pita
This is the classic version you’ll find in Lebanese and Syrian bakeries, where the dough is rolled thin and cooked on a hot griddle or in a skillet. The key is using a cast-iron skillet or clay taboon (traditional Middle Eastern griddle) heated to 400°F.
Brush each round with melted butter or olive oil before cooking, then flip when bubbles form—about 1-2 minutes per side. The result? A puffy, pocket-perfect pita that’s ideal for stuffing with falafel, shawarma, or hummus. 🥙
Indian Naan
For a richer, more aromatic version, swap ½ cup of the all-purpose flour for whole wheat flour and add 1 tbsp plain yogurt to the dough. Shape into ovals and cook in a clay tandoor or preheated oven at 500°F for 8-10 minutes, basting with melted ghee.
The yogurt adds tenderness, while the high heat creates those signature charred spots. Serve with butter and a sprinkle of chaat masala for a restaurant-worthy touch.
Ethiopian Injera
This fermented flatbread uses teff flour (available at African markets or online) instead of all-purpose flour. The dough is thinner and batter-like, poured onto a hot mitad (clay griddle) to create a spongy, slightly sour base. Teff flour gives injera its distinctive tangy flavor and naturally gluten-free properties.
For authenticity, let the batter ferment for 24-48 hours at room temperature before cooking. It’s the perfect vessel for stews like wat or spicy doro. 🌱
Turkish Lavash
Lavash is thinner and more delicate than pita, often rolled out to ⅛-inch thickness and baked on a stone slab or in a hot oven. The dough is slightly drier, requiring just 1 cup warm water instead of 1.25 cups.
After baking, lavash is rolled up and stored flat—it crisps up beautifully when reheated. Traditionally used for wrapping meats or dipping in olive oil and za’atar, lavash keeps for weeks if stored properly in an airtight container.
Mexican Tortillas
Swap the olive oil for lard or vegetable shortening (like Crisco) and reduce the water to 1 cup. Roll the dough to ⅛-inch thickness and cook in a dry skillet over medium-high heat for 30-45 seconds per side.
The lard creates a tender, slightly chewy texture perfect for burritos or quesadillas. For extra flavor, add 1 tsp cumin to the dough. These tortillas stay soft for days when wrapped in a clean towel.
Moroccan Msemen
This flaky, layered flatbread is a staple in North African cuisine. The dough is rolled out thin, brushed with melted butter, folded accordion-style, then rolled again before baking. Cook in a cast-iron skillet over medium heat until golden and crispy.
The butter layers create a melt-in-your-mouth texture that pairs perfectly with tagines or spiced lamb dishes. For extra flakiness, brush each layer with butter before folding. 🌟
Nutrition facts
Frequently asked questions
Why does traditional unleavened bread never use yeast?
Unleavened bread relies on quick cooking methods (12-15 minutes) to create a crispy crust and soft interior without yeast's rising time. The dough's natural gluten structure develops just enough during mixing to hold shape, but the high heat sets it instantly. This method dates back thousands of years to ancient civilizations like Egypt and the Middle East, where rapid cooking preserved nutrients and created portable food.
Can I make this dough ahead of time?
The dough keeps 2 days wrapped in plastic in the fridge or 3 months frozen between parchment paper. Thaw frozen dough at room temperature for 30 minutes before shaping. For best texture, bake fresh, but pre-made dough reheats beautifully—wrap in foil and warm in a 350°F oven for 5 minutes. The dough's simplicity makes it perfect for meal prep.
What's the secret to getting that perfect crispy crust?
Three key factors: 425°F oven temperature, semolina dusting, and proper shaping. The edges should be slightly thicker than the center when you flatten the dough. Bake until edges are deep golden brown (12-15 minutes), then tap the bottom—it should sound hollow. For extra crunch, broil for 1-2 minutes at the end. The semolina creates that signature texture while preventing sticking.
Can I make gluten-free unleavened bread?
Yes! Swap the all-purpose flour for a 1:1 gluten-free flour blend (like Bob's Red Mill) and add ½ tsp xanthan gum if your blend doesn't include it. Reduce the water slightly (1 cup) since gluten-free flours absorb differently. The texture will be slightly denser but still crispy when baked. For extra binding, add 1 tbsp ground psyllium husk to the dough.
Why did my bread turn out dense instead of crispy?
Overworking the dough or using cold water are common culprits. The dough only needs 2 minutes of gentle kneading—over-kneading develops gluten, making it tough. Water should be 105°F-110°F (warm to the touch). Also check your oven temperature—if it runs hot, reduce to 400°F. For extra crispiness, brush baked bread with melted ghee or butter while hot.