
Beverages
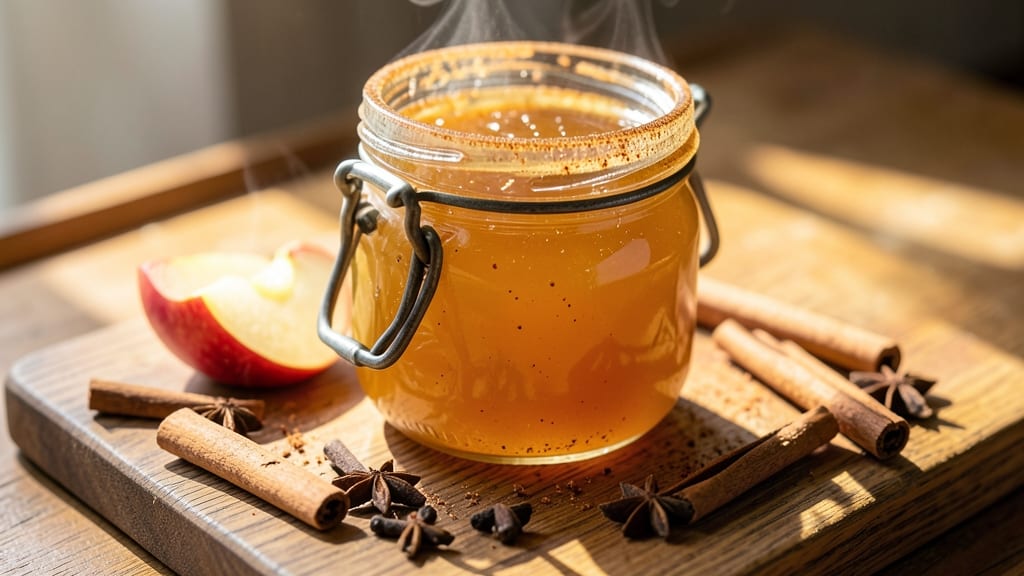
Transforming apple cider into velvety jelly captures autumn's warmth in every jar—this recipe delivers rich, spiced sweetness that elevates toast, cheese boards, and desserts alike.
The process is straightforward: simmering cider with sugar and pectin until it reaches that perfect gel stage, then letting it set for a spreadable texture with subtle cinnamon notes. I developed this method after realizing how versatile homemade jelly could be compared to store-bought versions, which often lack depth.
The beauty of this jelly lies in its simplicity—just five ingredients create a product that tastes like fall in a jar. Pectin ensures a firm yet spreadable consistency, while citric acid adds brightness that balances the cider's natural tartness.
The spice blend (cinnamon and cloves) infuses warmth without overpowering, making it perfect for both savory and sweet applications. Most batches yield about four half-pint jars, enough to gift or enjoy throughout the season.
What you'll end up with is a glossy, amber-colored jelly that glistens under light and carries the complex flavors of apple cider—hints of caramel, spice, and fruit all in one smooth, velvety spread.
The texture is just firm enough to hold its shape on toast but melts gently on the tongue. This isn't just a condiment; it's a statement piece that turns everyday meals into something special. Let's make it.
Use this jelly as a breakfast spread, a cheese board accent, or a dessert garnish—its versatility makes it a pantry staple. The recipe includes tips for adjusting sweetness and spice levels to suit your taste, ensuring you can customize it perfectly.
Once set, it keeps for months in the refrigerator, so you'll have homemade flavor ready whenever you need it.
Ingredients for apple cider jelly
Five ingredients, four jars of autumn magic—this jelly transforms humble cider into something extraordinary.
| Ingredient | Amount | Notes |
|---|---|---|
| Apple Cider 🍎 | 4 cups | Unfiltered, preferably spiced variety |
| Granulated Sugar 🍚 | 3 cups | White or light brown preferred |
| Powdered Pectin 🍬 | 2 tbsp | Ball RealFruit or Sure-Jell recommended |
| Citric Acid 🍋 | ¼ tsp | Bulk bins or small jars |
| Ground Cinnamon 🌿 | 1 tsp | Freshly ground for best flavor |
| Ground Cloves 🌶️ | ½ tsp | Whole cloves crushed for stronger flavor |
The cider is everything here. Unfiltered, spiced varieties from local orchards or brands like Mott's or Woodchuck add depth. If you're using filtered cider, look for brands like Angry Orchard—they've got that caramelized richness. Sugar isn't just for sweetness; it's what helps the pectin set properly. Domino or C&H are reliable brands, but any granulated will work. The pectin? Don't skimp—Ball RealFruit or Sure-Jell are the gold standards. Citric acid keeps the jelly bright and prevents mold; grab it from the canning section or bulk bins at Whole Foods.
No powdered pectin? Sure-Jell liquid pectin works too—just adjust the recipe slightly. Running out of cinnamon? Nutmeg or allspice add warmth, but cloves are non-negotiable for that classic cider flavor. Want extra spice? Double the cloves or add a pinch of star anise. The sugar can be swapped for turbinado or brown sugar for a deeper caramel note. Just remember: if you're using a different pectin brand, always check the manufacturer's instructions—some require extra sugar or acid for proper gelling.
This jelly sets beautifully in half-pint jars—perfect for gifting. Once cooled, store in the fridge for up to 3 months. For longer storage, freeze individual jars for up to 6 months. The flavor actually improves over time, getting richer as the spices mellow. I always make double batches—one for my kitchen, one to give away. The amber color and glossy finish make it a showstopper on any table, and it pairs perfectly with sharp cheddar or buttery croissants.
Why You'll Love This Recipe
- No Boil-Over Drama: I swear by this method—just heat, stir, and let the pectin work its magic. No sticky mess on the stove or constant stirring like my first failed batch of homemade jam. The citric acid keeps it bright, and the cinnamon adds warmth without overpowering.
- Fall in a Jar: That perfect balance of sweet, tangy, and spiced? It’s like autumn in every bite. The apple cider’s natural depth shines through, while the cinnamon gives it a cozy, bakery-like richness. Honestly, I’ve caught myself sneaking spoonfuls straight from the jar.
- Gift-Worthy in Minutes: Between us, this is my go-to for holiday hosts or teacher gifts. It’s cheap to make in bulk, pours neatly into jars, and looks so much fancier than store-bought. Plus, no one can resist a jar of homemade goodness—especially when it’s this easy.
- Pantry Staple, Zero Waste: A single batch stretches into weeks (if I’m honest, it lasts days). Use it on toast, drizzle it over yogurt, or toss it into oatmeal—it’s my secret weapon for cutting sweetness in savory dishes too. And with just five ingredients, it’s the kind of recipe that doesn’t break the bank.
Step-by-step instructions for apple cider jelly
Here's how to make rich, spiced apple cider jelly that captures autumn's warmth perfectly.
Combine Apple Cider and Sugar
Pour the 4 cups apple cider into a large, heavy-bottomed saucepan. Add the 3 cups granulated sugar and stir over medium-high heat until the sugar completely dissolves. You'll know it's ready when the mixture becomes clear and all sugar crystals disappear—this usually takes about 5-7 minutes.
I like to use a wooden spoon for stirring because it helps prevent scratching the pan. Watch the mixture carefully—once it starts to bubble gently, it's time to move to the next step. The reason we dissolve the sugar completely is to ensure a smooth, glossy jelly without any graininess.
Add Pectin and Spices
Remove the pan from heat and let it cool slightly for 1-2 minutes—this prevents a sudden temperature shock when adding the pectin. Sprinkle in the 2 tablespoons powdered pectin and stir vigorously for 30 seconds to fully incorporate. This step is crucial because the pectin needs to hydrate completely for maximum gelling power.
Return the pan to medium heat and bring the mixture to a full rolling boil. As soon as it reaches a boil, add the 1 teaspoon ground cinnamon and 0.5 teaspoon ground cloves, stirring constantly for 1 minute. The spices will infuse quickly at this temperature, creating that warm autumnal aroma. Here's the thing—don't let the mixture boil harder than necessary, or you'll risk burning the spices and creating bitterness.
Cook to Proper Gel Stage
Continue boiling vigorously for 5-7 minutes, stirring constantly with a wooden spoon to prevent sticking. You'll notice the mixture will thicken noticeably as it cooks. To test for doneness, place a small spoonful on a chilled plate and refrigerate for 2 minutes. When you push it gently with your finger, it should wrinkle slightly but not be completely firm—this is the perfect gel stage for jelly.
If it's not set enough, return it to the heat for another 1-2 minutes of boiling. I've found that using a candy thermometer helps here—aim for 220°F on the thermometer. This temperature ensures proper gel formation without overcooking. The reason we test on a chilled plate is that room temperature can give a false reading about the jelly's readiness.
Add Citric Acid and Pour
Remove the pan from heat and stir in the 0.25 teaspoon citric acid immediately. This acidity helps preserve the jelly and gives it that bright, fresh flavor. Let the mixture sit for 5 minutes to allow the acid to fully incorporate and the temperature to stabilize slightly—this prevents skin formation when you pour it.
Carefully ladle the hot jelly into 4 sterilized 8-ounce jelly jars, filling each to within ¼ inch of the top. Tap the jars gently on the counter to remove any air bubbles that may have formed. The reason we leave space at the top is to allow for proper sealing during processing.
Process and Store
Place the filled jars in a boiling water bath and process for 10 minutes from the time the water returns to a full rolling boil. This sterilization step ensures your jelly will keep safely for months. After processing, remove the jars and let them cool completely on a wire rack—don't tighten the lids until they're completely cool.
Once cooled, check that the lids have sealed properly by pressing down on the center of each lid. If it doesn't pop back up, your jelly is safely sealed. Store in a cool, dark place for up to 12 months. The jelly will continue to develop its rich, spiced apple cider flavor over time, making it even more delicious with each passing week.
Pro Tips For Making Apple Cider Jelly
- Boil to 220°F: Your jelly won’t set if the cider isn’t hot enough—220°F is non-negotiable. I used to eyeball it and end up with runny jelly every time. Grab a candy thermometer; it’s the only way to guarantee that perfect firm-but-smooth texture.
- Strain the Cider: Sediment in your cider will make your jelly cloudy, no matter how much pectin you add. After simmering, strain it through a fine-mesh sieve or cheesecloth into a clean pot. Yes, it’s extra work, but the clarity makes all the difference.
- Weigh the Sugar: Volume measurements with sugar are a disaster—packed cups, loose scoops, you name it. Use a kitchen scale for the sugar and pectin. For this recipe, aim for 650 grams sugar (about 3.25 cups) to avoid over- or under-sweetening.
- Whisk in Cinnamon Last: Adding cinnamon too early lets it burn before the sugar dissolves. Stir it in just as you remove the jelly from heat—it’ll bloom instantly and give that warm, spiced aroma without bitterness. A little goes a long way; start with ½ teaspoon.
Make-ahead tips for apple cider jelly
Prep Ahead for Efficiency
Sterilize your jars and lids the night before by running them through a boiling water bath for 10 minutes. Let them dry completely on a clean towel—I use a Kitchenaid drying rack to keep them organized.
This step is a game-changer because it prevents contamination and ensures your jelly lasts for months. I also like to measure all my ingredients the day before and store them in small containers on the counter.
This way, when I'm ready to cook, everything is prepped and ready to go. 📅
Double-Batch for Gifting
Make this jelly in double batches—it's perfect for holiday gifts and lasts for months. The extra time spent means you'll have beautifully packaged jars ready for friends and family.
I use amber glass jars from Ball or Mason because they protect the jelly from light, which can degrade flavor over time. The amber color also makes the jelly look even more inviting. Label each jar with the date and contents to keep track of freshness. 🎁
Freeze for Long-Term Storage
If you won't use all your jelly within a few months, freeze individual jars for up to 6 months. Place the sealed jars in a single layer in the freezer, leaving 1 inch of space between them. Once frozen solid, stack them vertically to save space.
When you're ready to use a jar, thaw it in the refrigerator overnight. The texture will be slightly softer after freezing, but it reheats beautifully in the microwave for 20-30 seconds to restore its glossy finish. ❄️
Spice Adjustments in Advance
Want to customize your jelly ahead of time? Mix your spices in a small container and store them in the pantry. For extra warmth, add ¼ teaspoon of ground nutmeg or a pinch of star anise to the spice blend.
If you prefer a sweeter jelly, increase the sugar by ½ cup and adjust the pectin accordingly—just check the package instructions. I like to make a "spice blend" jar with all my measurements marked so I can easily adjust flavors for future batches.
This way, you can experiment with different combinations without stressing during the actual cooking process. 🌶️
Jelly as a Gift Topper
Turn your jelly into a stunning gift by pairing it with complementary items. I like to bundle it with artisanal crackers or cheese slices in a small wooden crate. Add a handwritten note about how to use it—like spreading it on toast or pairing it with sharp cheddar.
The presentation makes it feel special, and people always appreciate the extra thought. I've even wrapped the jars in twine and tied them with a cinnamon stick for a rustic touch. This makes your homemade jelly feel like a luxury product. 💫
Test Jelly Consistency Early
If you're unsure about the jelly's consistency, test it early by placing a spoonful on a chilled plate after 3 minutes of boiling. This gives you time to adjust if needed—either by adding more pectin or cooking longer.
I've found that testing early helps prevent overcooking, which can make the jelly too firm or develop a bitter taste. The key is to aim for that perfect balance between spreadable and set. Once you've mastered the timing, you'll be able to make jelly with confidence every time. 💡
Nutrition facts
Frequently asked questions
Can I use store-bought apple cider instead of homemade?
Store-bought cider works perfectly—just look for unfiltered varieties like Mott's or Woodchuck for richer flavor. Avoid clear, filtered ciders—they lack the depth needed for good jelly. The spiced versions add natural warmth, but you can always boost flavor with extra cinnamon or cloves during cooking.
Why did my jelly turn out too runny?
Runny jelly usually means insufficient pectin or undercooking. Double-check your pectin-to-sugar ratio (this recipe uses 2 tbsp pectin per 3 cups sugar). For future batches, boil the mixture 1-2 minutes longer and test consistency more frequently using the chilled plate method. A candy thermometer helps—aim for 220°F.
How can I make this jelly without added sugar?
For a sugar-free version, replace granulated sugar with agave syrup or honey (1:1 ratio) and use low-sugar pectin like Ball No-Sugar-Needed. Reduce cider to 3 cups and add 1 extra tbsp lemon juice for acidity. Note: The texture will be softer and less stable. Test small batches first—flavor develops differently without sugar.
Can I add fresh apple pieces to the jelly?
Yes, but with adjustments! Simmer ½ cup diced apples in the cider for 5 minutes before adding sugar. Strain out solids after cooking, then proceed normally. For thicker texture, increase pectin to 2.5 tbsp. Fresh apples add brightness but may require longer processing time.
What's the best way to reheat set jelly?
Microwave 15-20 seconds on medium power, stirring halfway. For smoother texture, place the jar in a bowl of hot water (double boiler method) for 3-5 minutes. Avoid boiling—it can break down the gel. Stir gently and let sit 1 minute before serving to restore gloss.