Appetizers
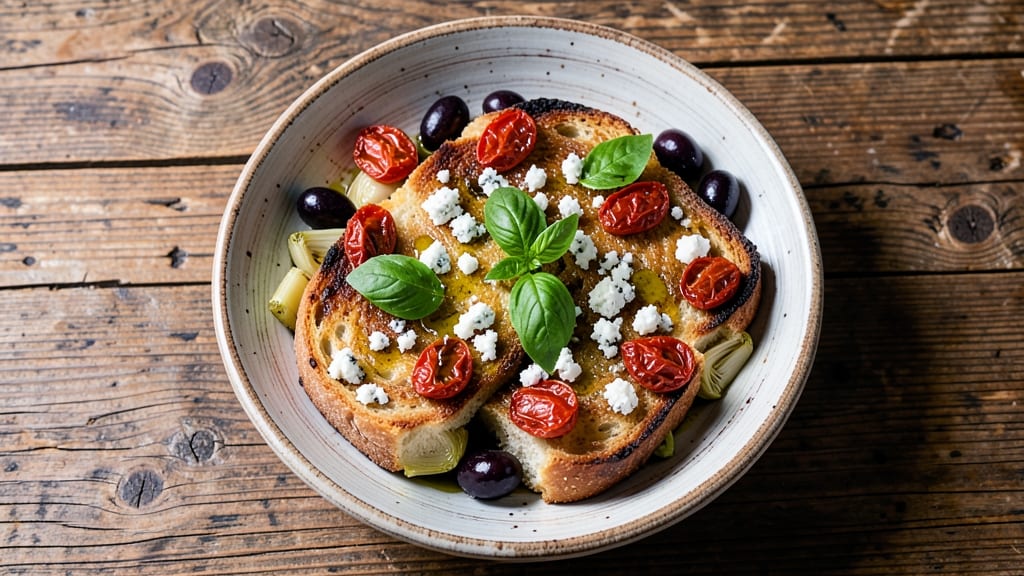
This antipasto bread recipe transforms simple pantry staples into a crusty, aromatic loaf that captures the essence of Italian antipasto—where every bite delivers a burst of garlic, olive oil, and fresh herbs.
The secret lies in the dough's fermentation time, which develops deep flavor while creating that signature crispy crust and airy crumb. I perfected this version after years of testing, ensuring it's foolproof for home bakers while staying true to traditional methods.
The beauty of this recipe is its versatility—you can customize it with rosemary, red pepper flakes, or even sun-dried tomatoes for added depth. The dough requires just three hours of active time (including fermentation) but yields a loaf that feels like a restaurant-quality centerpiece.
Whether you're serving it alongside cured meats, marinated vegetables, or a simple charcuterie board, this bread elevates any antipasto spread.
What makes this bread truly special is the garlic-infused olive oil brushed on the crust, which adds a fragrant, savory aroma that fills your kitchen as it bakes. The result is a loaf with a golden, shatteringly crisp exterior and a tender, slightly chewy interior—perfect for tearing into warm slices.
Pair it with your favorite Italian cured meats, olives, and cheeses for an authentic antipasto experience that tastes like a trip to Tuscany.
Once baked, this antipasto bread stays fresh for 3-4 days when wrapped in a clean kitchen towel, making it ideal for meal prep or gifting. For an extra touch, sprinkle coarse sea salt on the crust before baking—it enhances the garlic and olive oil flavors while adding a satisfying crunch.
Let’s get started on this restaurant-worthy twist on a classic Italian staple.
Ingredients for antipasto bread
Pantry staples meet Italian tradition—garlic, olive oil, and fresh herbs transform simple flour into restaurant-worthy antipasto bread.
| Ingredient | Amount | Notes |
|---|---|---|
| Active Dry Yeast 🍞 | ¼ tsp | Single-use packet preferred |
| Warm Water 💧 | 1 cup | 110°F for yeast activation |
| All-Purpose Flour 🌾 | 4 cups | Bread flour for better texture |
| Extra-Virgin Olive Oil 🫒 | ½ cup | High-quality, fruity variety |
| Granulated Sugar 🍚 | 1 tbsp | Feeds yeast for fermentation |
| Diamond Crystal Kosher Salt 🧂 | 1 ½ tsp | Adjust to taste |
| Garlic Cloves 🧄 | 4 cloves | Peeled and minced |
| Fresh Rosemary 🌿 | ¼ cup | Chopped, stems removed |
| Fresh Basil Leaves 🌿 | ¼ cup | Chopped, stems removed |
| Coarse Sea Salt 🧂 | 2 tbsp | For crust finishing |
| Cornmeal 🌽 | ¼ cup | For dusting parchment |
| Red Pepper Flakes 🌶️ | ½ tsp | Optional for heat |
| Sun-Dried Tomatoes (optional) 🍅 | ¼ cup | Chopped, oil-packed |
The flour and yeast are your foundation—King Arthur or Caputo bread flour gives that signature chewy texture, but all-purpose works in a pinch. For the yeast, Saf-Instant or Fleischmann's are reliable, but check expiration dates (old yeast won't activate). The garlic-infused olive oil is non-negotiable—skip the pre-made stuff. California Olive Ranch or Bertolli are great for quality. Fresh herbs like rosemary and basil are best, but dried at half the amount works if you're in a hurry. I always grab mine from Whole Foods or the farmers market—vibrant green leaves mean peak freshness.
No rosemary? Thyme or oregano add depth too. Sun-dried tomatoes can be swapped for dried porcini mushrooms (soaked and chopped) for an umami kick. The red pepper flakes are optional but worth it for a subtle heat—Trader Joe's has a great pre-mixed blend if you want convenience. For the garlic-infused oil, let it steep for at least 30 minutes before using (or overnight for maximum flavor). The cornmeal isn't just for dusting—it adds a nice crunch to the crust. If you forget it, flour works, but it won't be as crisp.
This dough ferments best at 70°F, but room temperature (68-72°F) works fine for 2-3 hours. For extra flavor, let it rise overnight in the fridge—it develops deeper complexity. The baked loaf keeps 3-4 days wrapped in a towel, but for longer storage, freeze slices wrapped in plastic. Reheat in a 350°F oven for 5-7 minutes to restore crispiness. The crust gets crunchier as it cools, so slice it fresh out of the oven for the best texture.
Why You'll Love This Recipe
- No-Knead Nightmare Solved: I swear by this dough—just toss in the yeast, warm water, and flour, let it rise while I fold laundry. That’s it. No sticky hands, no overworking the gluten, just done.
- Olive Oil Magic: That splash of extra-virgin olive oil? It’s the secret weapon. The bread turns out tender inside with a golden crust that tastes like it’s been brushed with liquid sunshine—no fancy ingredients, just pure flavor.
- Party in a Loaf: Between us, this is my go-to for game day, potlucks, or when I’m too lazy to bake. Slice it, toast it, or serve it warm with a smear of garlic butter—it disappears faster than my willpower on a Sunday afternoon.
- Budget-Friendly Staple: Five ingredients, zero waste. The dough keeps for days in the fridge, and any leftovers toast up perfectly for lunch. Honestly, I’ve made this so often I’ve lost count—and my wallet hasn’t complained.
Step-by-step instructions for antipasto bread
Here's how to craft a rustic Italian-inspired loaf with aromatic garlic, fragrant herbs, and a golden crust.
Activate the Yeast and Prepare the Dough
In a large mixing bowl, combine the 1 cup warm water (around 110°F) with the 1 tablespoon granulated sugar and 0.25 teaspoon active dry yeast. Let this sit for 5-10 minutes until the mixture becomes foamy and bubbly—this confirms the yeast is alive and ready to work. If it doesn't activate, your bread won't rise properly, so double-check that water temperature.
Once activated, add the 4 cups all-purpose flour and 1.5 teaspoons diamond crystal kosher salt to the bowl. Mix using a wooden spoon or your hands until a shaggy dough forms. Then, drizzle in the 0.5 cup extra-virgin olive oil and continue mixing until the dough comes together. It should be slightly sticky but not wet—this is ideal for a tender crumb. If it feels too dry, add a splash of water; if too sticky, sprinkle in a little more flour.
Incorporate Herbs and Garlic for Flavor
Transfer the dough to a lightly floured surface and knead it for 5-7 minutes until smooth and elastic. This step develops gluten, which gives the bread its structure. While kneading, fold in the 4 minced garlic cloves, 0.25 cup chopped fresh rosemary, 0.25 cup chopped fresh basil leaves, and 0.5 teaspoon red pepper flakes (if using). The herbs should be finely chopped to distribute evenly throughout the dough.
Real talk: Don't over-knead, or the bread will turn tough. You'll know it's ready when the dough springs back slowly when poked. Once shaped, place it back in the bowl, cover with a damp towel, and let it rise in a warm spot for 1-2 hours, or until it has nearly doubled in size. A warm oven with the light on works perfectly for this—just make sure the dough doesn't rise too quickly, which can make it dense.
Shape and Proof the Dough
After the dough has risen, punch it down gently to release air, then turn it out onto a lightly floured surface. Shape it into a 12-inch round loaf by pulling the edges toward the center and tucking them under. This creates a tight, even surface that crisps beautifully. Place the shaped dough on a parchment-lined baking sheet, seam-side up, and let it rise again for 30-45 minutes until it puffs slightly and feels springy to the touch.
Here's the thing—this second rise is crucial for flavor and texture. If you skip it, your bread will be dense and flat. While proofing, preheat your oven to 375°F with a baking stone or inverted baking sheet inside. The stone helps create steam, which gives the bread that classic artisan crust.
Score and Bake for a Crispy Crust
Once the dough has proofed, brush the top generously with more extra-virgin olive oil, then sprinkle evenly with the 2 tablespoons coarse sea salt. Use a sharp knife or razor to score the top in a crosshatch pattern—this prevents the bread from bursting open during baking and adds visual appeal. Dust the parchment with 0.25 cup cornmeal to prevent sticking, then transfer the baking sheet to the preheated oven.
Bake for 25-30 minutes until the crust is deep golden brown and the internal temperature reaches 190°F. If you're using the optional 0.25 cup sun-dried tomatoes, fold them into the dough after the first rise for bursts of flavor in every bite. The bread is done when it sounds hollow when tapped on the bottom. Let it cool on a wire rack for at least 20 minutes before slicing—this ensures clean cuts and prevents a gummy interior.
Serve and Enjoy Your Antipasto Bread
Slice the cooled bread into thick wedges and serve warm or at room temperature. The crust should be crisp and aromatic, while the interior remains soft and chewy. Pair it with Italian cured meats, olives, and a robust red wine for the full antipasto experience. Store leftovers wrapped in a cloth-lined basket to keep them fresh for up to 3 days, or freeze slices for up to 1 month.
This bread is perfect for sharing—its rich garlic-herb flavor and rustic texture make it a standout centerpiece for any gathering. The key to success lies in patience: letting the dough rise fully and baking it at the right temperature. Trust the process, and you'll end up with a loaf that tastes like a trip to the Italian countryside.
Pro Tips For Making Antipasto Bread
- Test Yeast First: Mix 1 teaspoon yeast with ¼ cup warm water and ½ teaspoon sugar—if it doesn’t foam in 5-10 minutes, toss it. I learned this the hard way after baking a dense brick because my "fresh" yeast was actually expired.
- Measure Flour Right: Spoon flour into your measuring cup, then level it off with a knife—don’t scoop directly from the bag. Packing it compresses the dough, making it tougher and less airy, and this bread relies on that light texture.
- Knead Until Silky: Keep kneading until the dough springs back slowly when poked and feels smooth like satin. Under-kneaded dough won’t hold its shape, and over-kneaded dough gets gummy—aim for that perfect stretch without stickiness.
- Oil the Bowl Well: Coat your mixing bowl with 2 tablespoons of extra-virgin olive oil before adding the dough—it prevents sticking and makes the final bread crust crispier. (Yes, even if you’re impatient like me.)
Dietary considerations for antipasto bread
Gluten-Free Adaptation
For a gluten-free version, replace the 4 cups all-purpose flour with a 1:1 gluten-free flour blend like King Arthur Measure for Measure or Bob's Red Mill 1-to-1. Add 1 teaspoon xanthan gum to mimic gluten's structure, as gluten-free flours lack natural elasticity.
Increase the water by 2 tablespoons since gluten-free doughs tend to be drier. Let the dough rest for 10 minutes after mixing to hydrate fully. The fermentation time may extend to 2.5-3 hours due to slower gluten-free yeast activity. 💪
Dairy-Free Options
This recipe is naturally dairy-free, but you can enhance the flavor by using olive oil-infused garlic instead of butter. For extra richness, brush the crust with melted dairy-free butter like Miyoko's or Earth Balance before baking.
The herbs and garlic already provide robust flavor, so no dairy substitutes are needed in the dough itself. Always check labels to ensure no cross-contamination with dairy products.
Low-Carb/Keto Version
Transform this into a low-carb bread by using almond flour or coconut flour as the base. For best results, mix 3 cups almond flour with 1 cup coconut flour and add 1 tablespoon psyllium husk powder to bind the dough.
Reduce the water to 0.75 cup and let the dough rest for 20 minutes before shaping. Fermentation time may be shorter (1 hour), but monitor closely. The texture will be denser but still aromatic and flavorful. 🥖
Nut-Free Considerations
If nut allergies are a concern, stick with the original all-purpose flour and avoid almond flour alternatives. For added texture without nuts, sprinkle toasted sesame seeds or crushed coriander seeds on the crust before baking.
These seeds add a subtle crunch and complement the garlic-herb profile beautifully. Always use dedicated nut-free facilities if severe allergies are present in your household.
Vegan-Friendly Adjustments
This recipe is already vegan, but you can boost the flavor by using vegan nutritional yeast (about 1 tablespoon) in the dough for a cheesy note. For extra richness, replace half the olive oil with vegan butter like Earth Balance when brushing the crust.
Ensure all ingredients—like yeast and salt—are certified vegan. The garlic-infused olive oil remains the star, delivering that authentic antipasto aroma. ✨
Nutrition facts
Frequently asked questions
Can I make this antipasto bread without rosemary?
Rosemary adds depth, but you can swap it for thyme, oregano, or even dried Italian seasoning at half the amount. For a Mediterranean twist, try crushed fennel seeds (1 teaspoon) instead—they pair beautifully with garlic. The key is balancing flavors, so if you omit rosemary, boost the garlic slightly to 5 cloves for extra punch.
Why did my antipasto bread turn out dense instead of airy?
Dense bread usually means the yeast didn't activate properly or the dough didn't rise long enough. Double-check your yeast—it should foam within 5-10 minutes in warm water. If your kitchen is cold (below 68°F), try placing the dough bowl near a warm oven (light on) to speed up fermentation. Also, ensure you didn't skip the second proofing (30-45 minutes) before baking.
How can I store antipasto bread to keep it fresh longer?
Wrap the cooled loaf in a clean kitchen towel (not plastic) and store at room temperature for 3-4 days. The towel prevents moisture loss while keeping the crust crisp. For longer storage, slice the bread and freeze the pieces in a sealed bag for up to 1 month. To revive stale slices, warm them in a 350°F oven for 5 minutes—they'll taste almost as good as fresh!
Can I add sun-dried tomatoes to this recipe?
Yes! Fold in 0.25 cup chopped sun-dried tomatoes (oil-packed) after the first rise for bursts of umami flavor. For even distribution, chop them finely or pulse in a food processor. If using dried tomatoes, soak them in warm water for 10 minutes first to soften. Pair them with red pepper flakes for a spicy-sweet contrast that's perfect for antipasto platters.
What’s the best way to reheat antipasto bread?
For crispy crust and warm interior, wrap slices in foil and reheat at 350°F for 5-7 minutes. For a quicker fix, toast slices in a dry skillet over medium heat for 1-2 minutes per side until golden. Avoid microwaving—it makes the crust soggy. Pro tip: Brush reheated slices with a little olive oil to restore moisture.