
Breakfast & Brunch
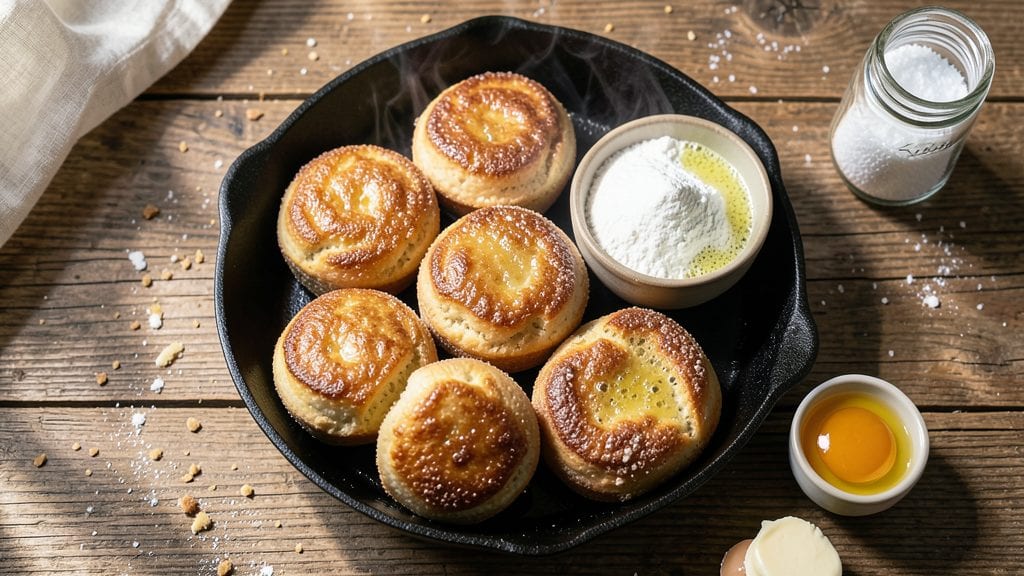
Mastering Amish English muffin bread means achieving that perfect crumb-top texture with soft, tender centers—just like the traditional recipes passed down through generations. This recipe captures the essence of Amish baking techniques, where patience and simple ingredients create something truly special.
The key lies in proper kneading, controlled proofing, and baking with steam to develop that signature rustic browning.
What sets this recipe apart is the focus on traditional methods without shortcuts. Hand-kneading develops gluten for a better texture, while proofing at room temperature allows the dough to rise naturally.
The steam during baking creates that signature crumb-top while keeping the inside soft and fluffy. These details make all the difference between store-bought and truly homemade bread.
By the time you pull this bread from the oven, you’ll have golden-brown muffins with a crisp, slightly chewy top and a soft, airy interior that’s perfect for toasting. The aroma alone will fill your kitchen with warmth, making every bite taste like a visit to an Amish bakery.
Whether you serve them with butter, jam, or savory toppings, this bread will become a staple in your morning routine.
This recipe yields enough for a family or small gathering, and the dough can be shaped into individual English muffins or larger loaves. The versatility makes it ideal for breakfast, brunch, or even as a side for savory dishes. Let’s get started on creating bread that tastes authentically homemade.
Ingredients for amish english muffin bread
Twelve simple ingredients transform into rustic, golden Amish-style muffins with crisp tops and tender centers.
| Ingredient | Amount | Notes |
|---|---|---|
| All-Purpose Flour 🌾 | 4 cups | Unbleached, spooned and leveled |
| Active Dry Yeast 🍞 | 2 ¼ tsp | Or 1 packet (0.25 oz) |
| Granulated Sugar 🍚 | 1 tbsp | For yeast activation |
| Unsalted Butter 🧈 | ½ cup | Cold, cubed (1 stick) |
| Warm Water 💧 | 1 ¼ cups | 110°F (43°C) for yeast |
| Large Eggs 🥚 | 1 whole | Room temperature |
| Diamond Crystal Kosher Salt 🧂 | 1 ½ tsp | Adjust to taste |
| Milk 🥛 | ¼ cup | Warmed, for tenderness |
| Cornmeal 🌽 | ½ cup | For dusting muffin tins |
| Ice Cubes ❄️ | 1 cup | For dough shaping |
The yeast is non-negotiable—Fresh Yeast or Red Star active dry works best. If your kitchen runs hot, proof the yeast in 105°F water (test with your finger—should feel warm but not hot). The butter should be cold when mixed in; European-style butter has higher fat content, giving a richer crumb. For flour, King Arthur or Bob’s Red Mill are reliable choices—avoid bread flour unless you want a denser texture. The milk adds tenderness, but buttermilk or sour cream would work too if you’re in a pinch.
No cornmeal? Semolina or all-purpose flour dusted on the tins works fine. Running short on ice? Chill the dough for 15 minutes before shaping. The sugar is just for yeast activation—skip it if you’re watching carbs, but the texture will be slightly less tender. For a richer flavor, swap the milk for heavy cream. And if you’re making a big batch, double the recipe—the dough keeps well for 24 hours in the fridge before baking.
The dough rises best at 70-75°F—if your kitchen is cooler, place the bowl near a warm spot (like the oven with the light on). Once baked, muffins stay fresh for 3 days in a bread bag at room temperature, or 1 week frozen (wrap tightly in foil). For extra crispiness, reheat slices in a 350°F oven for 5 minutes. The aroma alone will convince you to make a second batch.
Why You'll Love This Recipe
- No-Yeast Struggle: I’ve made bread that needed precise yeast handling—this recipe just dissolves the yeast in warm water with a pinch of sugar and lets it sit. Five minutes of hands-off waiting, and you’re ready to mix. No temperature checks, no guesswork.
- Buttery Soft Magic: That cube of butter baked right into the dough? It melts into every bite, giving you a tender crumb with just enough structure to hold up to toast or sandwiches. Honestly, my kids now ask for this over store-bought English muffins—no joke.
- Breakfast to Supper Star: I use the same batch for morning toast with jam, afternoon grilled cheese, and even dinner-time garlic butter sliders. Freeze half the loaf, and you’ve got quick breakfasts for weeks. (Yes, even on a Tuesday night.)
- Pantry Staple Power: Flour, yeast, sugar, butter—ingredients you already own. No specialty items, no last-minute grocery runs. One loaf costs me less than $2 to make, and it feeds four with leftovers that stay fresh for days. Budget-friendly doesn’t get much better than this.
Step-by-step instructions for Amish English muffin bread
Here's how to craft that iconic crumb-topped texture and tender interior—just like the Amish bakeries do.
Activate the Yeast and Mix the Dough
In a large bowl, dissolve the 1 tbsp granulated sugar in the 1.25 cups warm water (about 110°F) until fully combined. Sprinkle the 2.25 tsp active dry yeast over the surface and let sit for 5-10 minutes until it becomes foamy and bubbly—this confirms your yeast is alive and ready to work.
In a separate bowl, whisk together the 4 cups all-purpose flour and 1.5 tsp diamond crystal kosher salt. Cut in the 0.5 cup cold unsalted butter using a pastry cutter or your fingers until the mixture resembles coarse crumbs with pea-sized butter pieces. Pour the yeast mixture and 1 whole large egg into the flour mixture, then gradually add the 0.25 cup warm milk while stirring until a shaggy dough forms.
Knead Until Elastic and Smooth
Turn the dough onto a lightly floured surface and knead for 8-10 minutes by hand (or 5-6 minutes in a stand mixer with a dough hook) until it becomes smooth, elastic, and springs back when gently pressed. You'll know it's ready when the dough pulls away cleanly from the bowl and forms a windowpane when stretched thin.
If the dough feels too sticky, add 1-2 tablespoons of flour at a time; if it's too dry, add 1 teaspoon of warm water. Shape the dough into a ball, place it back in the bowl, cover with a damp towel, and let it rise in a warm place for 1-1.5 hours or until it doubles in size. This slow rise develops the signature crumbly texture.
Shape and Chill the Dough
Punch down the risen dough to release air, then divide it into 12 equal pieces (about 2.5 ounces each). Roll each piece into a ball, then flatten slightly into a disc. Here's the trick: place each disc between two sheets of plastic wrap and flatten into a 1.5-inch diameter circle using your palm or a rolling pin. This ensures even thickness for consistent baking.
Arrange the discs on a parchment-lined baking sheet, cover with a damp towel, and refrigerate for at least 24 hours (or up to 48 hours). This long chill is what creates the signature crumbly top—it allows the gluten to relax and the dough to develop its signature texture. When ready to bake, remove the discs from the fridge and let them sit at room temperature for 30 minutes before proceeding.
Bake for Crispy Tops and Soft Centers
Preheat your oven to 425°F and line two baking sheets with parchment paper. Lightly dust a work surface with 0.5 cup cornmeal (this prevents sticking and adds texture). Roll each chilled dough disc into a 3-inch circle, then press down firmly with your palm to create a thick center (about 0.75-inch) and a thin, crispy edge (about 0.25-inch). Place the muffins on the prepared baking sheets, spacing them 1 inch apart.
Bake for 12-15 minutes until the tops are deep golden brown and the edges are crispy. The centers should still feel slightly soft when pressed—this is key for that classic Amish texture. If they brown too quickly, tent the baking sheets with foil to prevent over-browning. Remove from the oven and let cool on a wire rack for 5 minutes before serving warm.
Serve with Butter and Jam
While still warm, split the muffins open with a serrated knife and brush the cut sides with melted unsalted butter for extra richness. Serve immediately with your favorite jam or honey—this is when the muffins are at their peak, with a crispy, crumbly top and a soft, pillowy center. Store any leftovers in an airtight container at room temperature for up to 3 days, or freeze for up to 1 month for freshness.
Pro Tips For Making Amish English Muffin Bread
- Measure Butter Cold: I learned this the hard way—using softened butter messes with the dough’s texture, making it gummy instead of light. Scoop the butter straight from the fridge in tablespoons, no need to soften. The cold fat creates pockets that give those muffins their signature tender crumb.
- Proof Yeast in Warm Water: Skip the fridge and use water that’s warm to the touch—about 105°F (40°C)—not hot enough to kill the yeast but not tepid either. If it’s too cold, the dough will take forever; too hot, and you’ll end up with flat, sad muffins. Test with your finger: it should feel like bathwater, not a sauna.
- Don’t Overmix the Dough: After adding the flour, mix just until combined—maybe 10-12 strokes with a spoon. Overworking it develops the gluten, turning your muffins into dense, chewy bricks. The Amish version relies on the butter and sugar for richness, not structure.
- Bake in a Metal Pan: Glass or ceramic pans hold heat too long, giving you a bottom-heavy, uneven bake. Use a metal pan (like a cast-iron skillet) to get even browning and a crisp crust. Preheat it for 10 minutes—this guarantees a golden top and bottom without burning.
Troubleshooting great amish english muffin bread
Dough Too Sticky
If your dough feels overly sticky during kneading, resist the urge to add too much flour at once. Instead, work in 1 tablespoon increments while kneading—this helps distribute moisture evenly.
I’ve found that King Arthur flour absorbs moisture better than some brands, so if you’re using a different flour, you may need slightly more. For extra help, wet your hands lightly with water before handling the dough—this creates a smoother surface and reduces sticking. 💫
Yeast Not Activating
If your yeast doesn’t bubble after 10 minutes, it’s likely dead or your water isn’t warm enough. Test the water temperature with your finger—it should feel like a warm bath (105-110°F). If it’s too hot, let it cool slightly.
For a quick fix, try Fresh Yeast (like Red Star Platinum) or check the expiration date on your active dry yeast. If all else fails, dissolve 1 tsp sugar in ¼ cup warm water and sprinkle it over the yeast to encourage activation.
Uneven Rising
Uneven rising often happens when the dough isn’t in a warm enough environment. Place your covered dough bowl near a turned-on oven light or in a proofing box set to 80°F. If your kitchen is drafty, drafts can cause uneven expansion.
For extra insurance, divide the dough into two bowls and place them in different spots—this helps balance the rise. I’ve also had success using a Dutch oven with hot water beneath it to create a consistent, warm environment.
Flat or Dense Muffins
Flat or dense muffins usually mean the dough wasn’t proofed long enough or the oven wasn’t hot enough. First, ensure your oven is fully preheated to 425°F—use an oven thermometer to confirm accuracy.
If your muffins still turn out flat, try proofing the dough for an additional 30 minutes after the initial rise. For extra lift, add ½ tsp baking powder to the dough mixture—just don’t overdo it, or you’ll lose that signature Amish texture. 🌟
Burnt Tops, Raw Centers
This classic issue happens when the oven runs too hot or the muffins aren’t shaped evenly. First, reduce your oven temperature to 400°F and bake for 1-2 extra minutes.
For even baking, use a baking stone or place a tray of water in the oven to create steam—this helps distribute heat more evenly. If your muffins still brown too quickly, tent them loosely with aluminum foil after 8 minutes to shield the tops while the centers finish cooking.
Dough Shrinks After Chilling
If your dough shrinks significantly after the 24-hour chill, it likely needs more kneading or a longer proofing time. Knead the dough for an extra 2-3 minutes to strengthen the gluten structure.
For future batches, try proofing the dough for 1.5 hours before chilling—this helps relax the gluten and prevents excessive shrinkage. If the issue persists, reduce the amount of milk in the dough slightly (2 tbsp less) to tighten the structure.
Nutrition facts
Frequently asked questions
Why does Amish English muffin bread need a 24-hour chill?
The long chill is essential for developing that signature crispy, crumbly top while keeping the center soft. It allows gluten to relax and the dough to hydrate evenly, creating the perfect texture. This traditional method mimics the slow fermentation Amish bakers used in cooler kitchens.
Can I make this recipe without a stand mixer?
Hand-kneading works perfectly for this dough. Work it on a lightly floured surface for 8-10 minutes until smooth and elastic. The extra effort develops the gluten structure needed for that classic Amish texture. Just be patient—it takes a little more time than a mixer.
What's the best way to reheat stale Amish English muffins?
For maximum crispiness, wrap muffins in foil and reheat at 350°F for 5-7 minutes. Alternatively, toast slices in a dry skillet over medium heat for 2-3 minutes per side. Avoid the microwave—it makes them gummy. The heat revives that perfect crumb-top texture.
Can I substitute milk with something else?
Yes! For extra richness, use heavy cream (same amount). For tanginess, try buttermilk or sour cream (reduce by 2 tablespoons to maintain moisture balance). The milk adds tenderness, but these alternatives work beautifully in traditional recipes.
How do I know when the muffins are fully baked?
Look for deep golden brown tops with crisp edges. The center should still feel slightly soft when pressed gently—this is key for that classic Amish texture. A toothpick inserted should come out clean or with just a few moist crumbs. Overbaking makes them dry, so pull them out just before they look perfect.